

PROCER Learn · User manual
Learn, step by step.
From creating your account and linking your PROCER to reading, asking questions, practising and sharing. Choose the topic you need or follow the manual in order.
Chapter 01 · Getting started
Before you begin
This manual covers PROCER Learn for a personal account using the new interface. The example uses a fictional account named Alex and a study note about water. You can repeat these same steps with your own materials.
-
Prepare your access
Go to learn.procertecnologias.com using an updated browser and an internet connection. Have your email handy. If you are going to link a PROCER device, have the username and password from the box ready. Microphone and camera permissions are requested when you use those functions.
View the screen for this step
-
Choose how to proceed
You can read the manual in order or open the chapter you need. The video follows the same chapters and steps. To practice, start with a short and legible file: it will be easier to review what was read and understand the answers.
View the screen for this step
-
Use keyboard, text, or voice
You can navigate the controls with Tab and go back with Shift plus Tab. Enter or the spacebar activates the control depending on its type. When entering a screen, the 'Skip to main content' link avoids repeating the menu. Instructions are also written: audio is optional.
View the screen for this step
-
Understand the scope
Functions that depend on Google, email, the microphone, or a device require completing that access on your device. The tutor's continuous conversation feature is enabled for pilot accounts. APRENDER tests and institutional administration are not part of the standard B2C access.
View the screen for this step
Chapter 02 · Getting started
Create your account or sign in
Your personal Learn account is identified by your email. Device credentials serve a different purpose: proving that the PROCER belongs to you when linking it.
-
Register with email
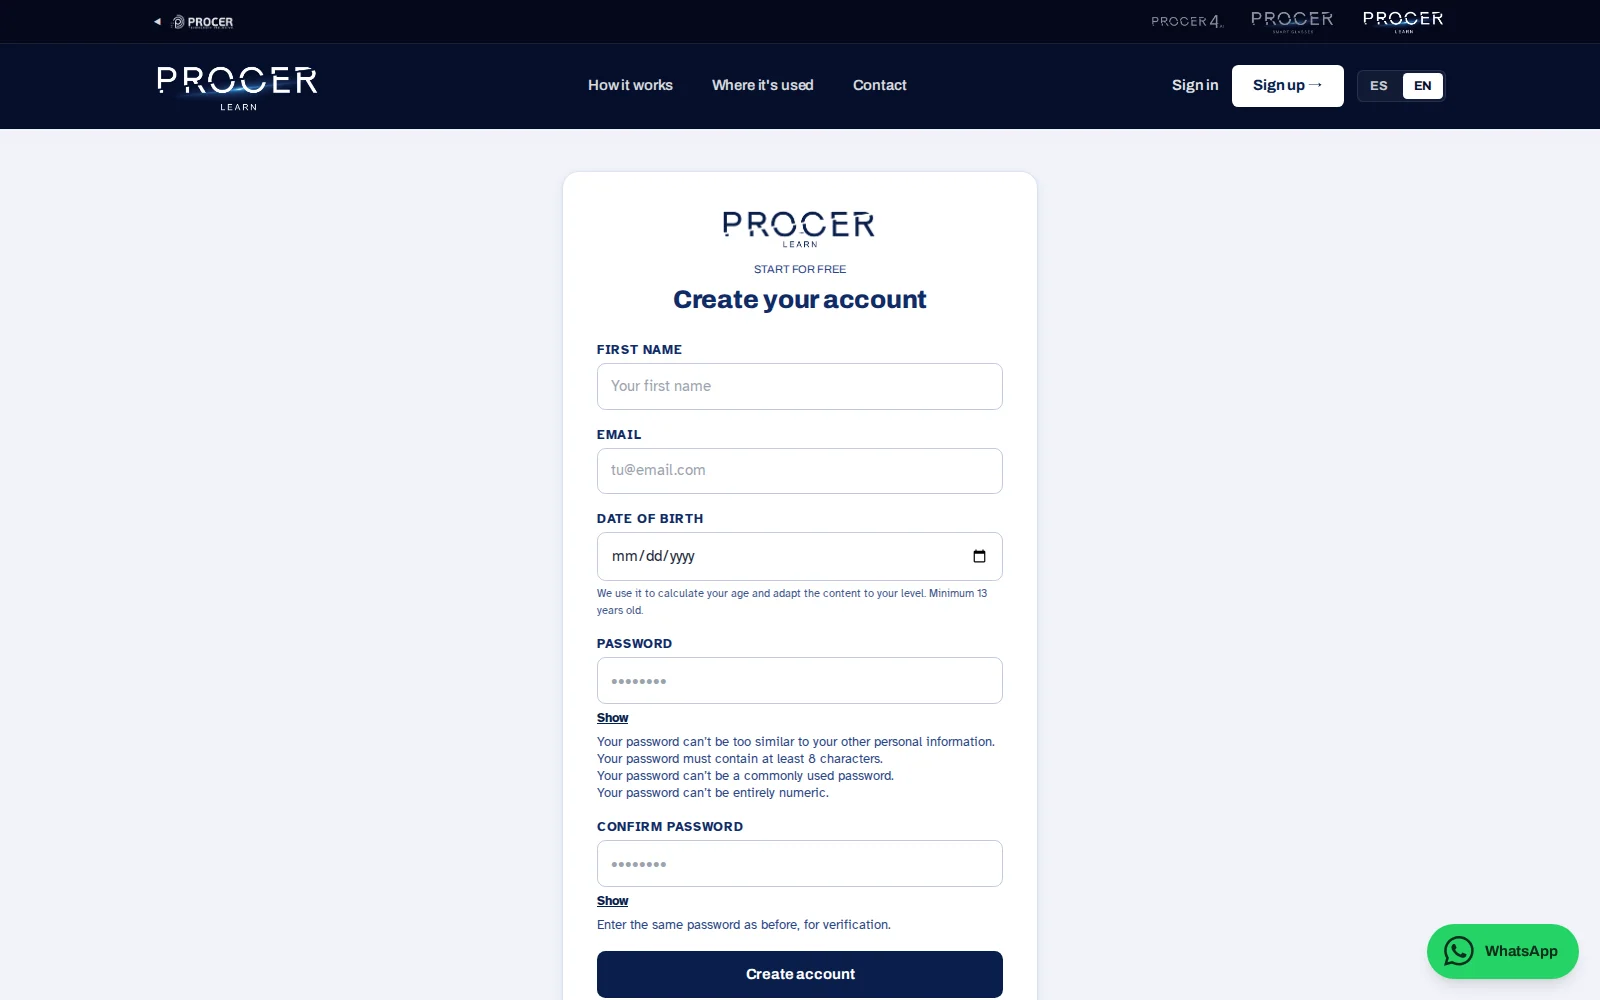
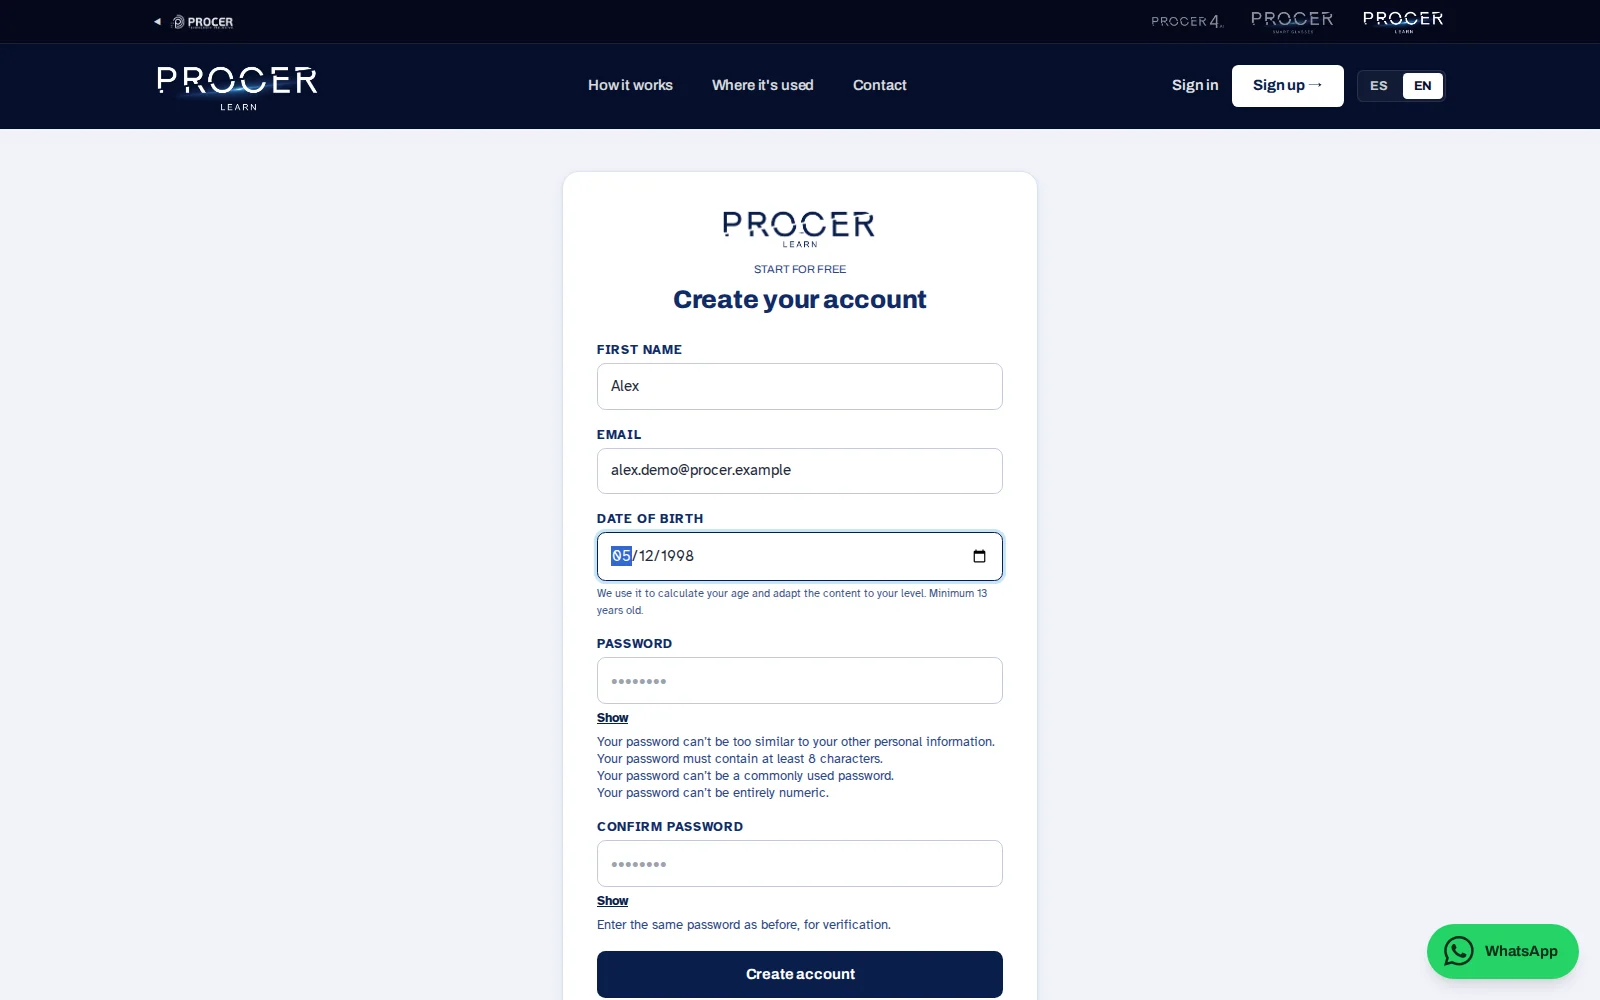
Select Sign up. Enter your name, email, and date of birth. Create a password and repeat it. Double-check the email before selecting Send: you will need it to verify the account and recover access. Individual registration requires being at least thirteen years old.
View the screen for this step
-
Verify your email
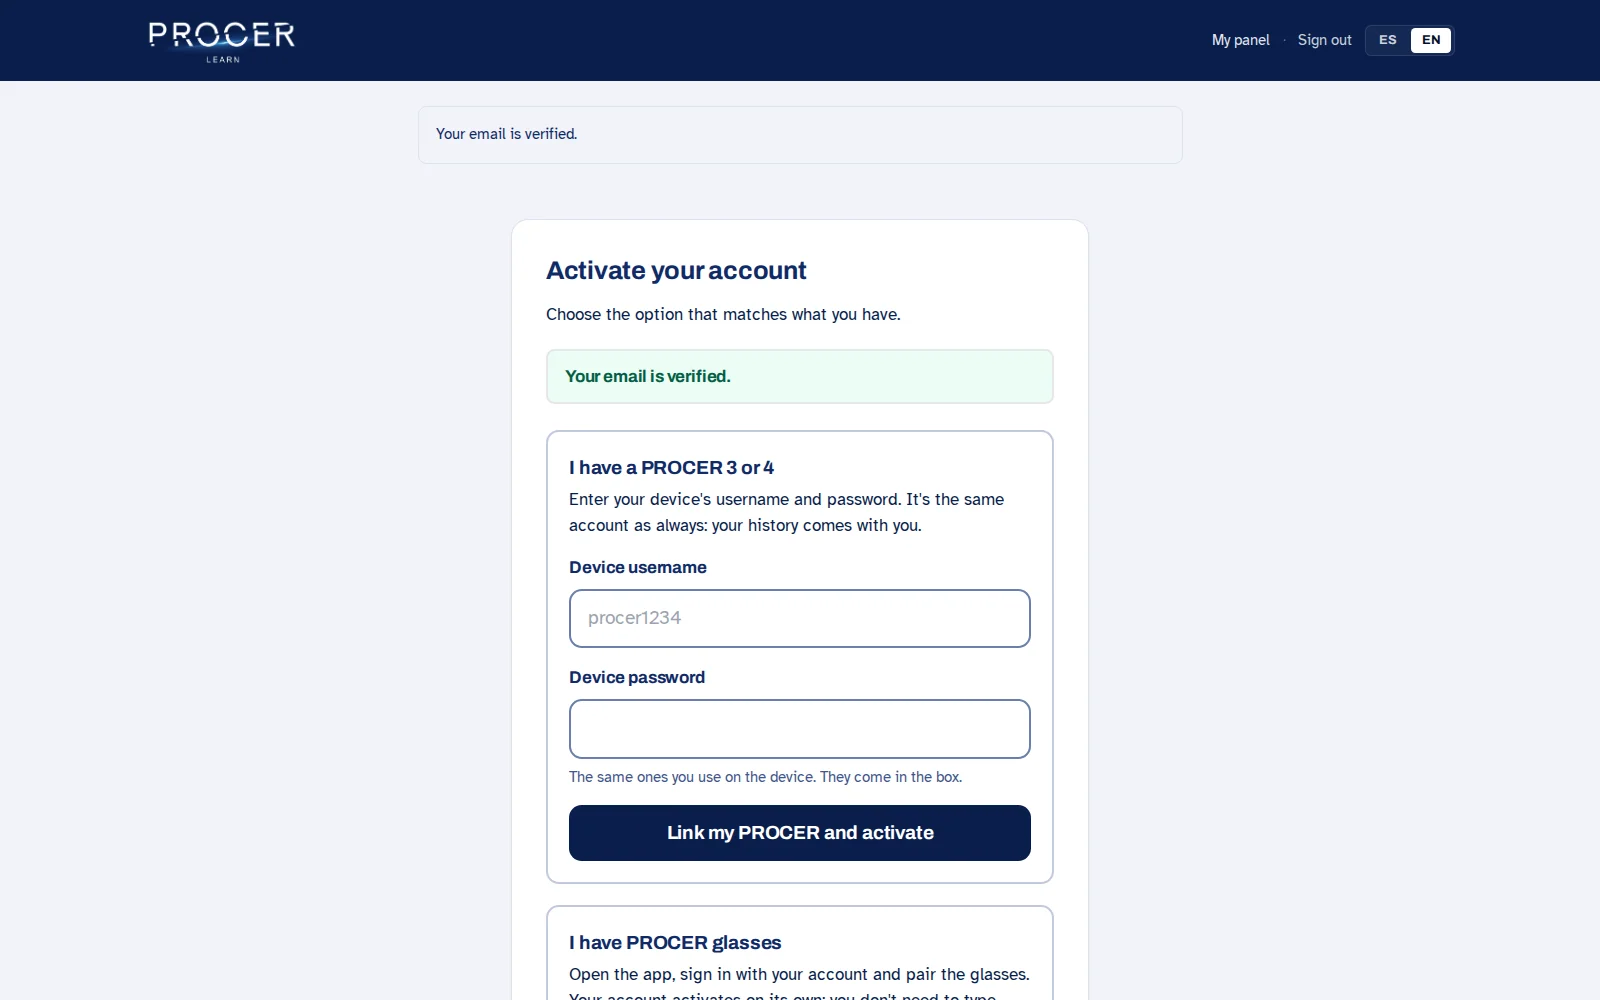
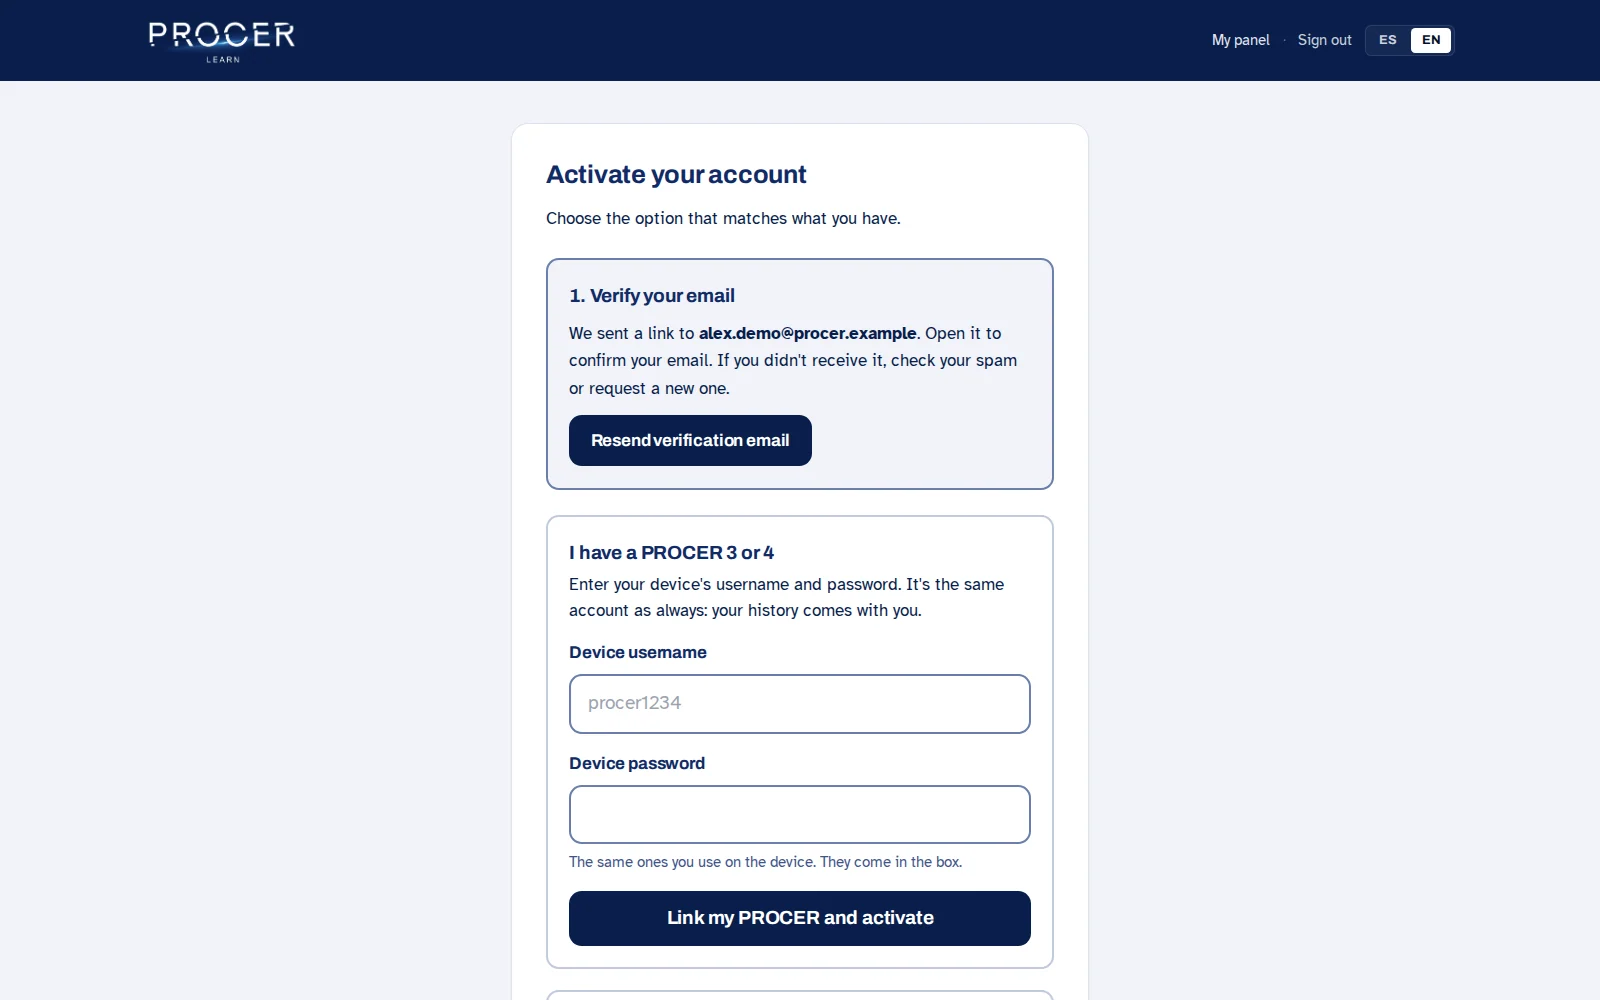
Open the verification message and follow the link. The screen will confirm if it was verified correctly. If it doesn't appear, check your spam folder and ensure you typed your email correctly. An expired or used link requires a new verification; do not create another account to resolve this.
View the screen for this step
-
Sign in with your existing account
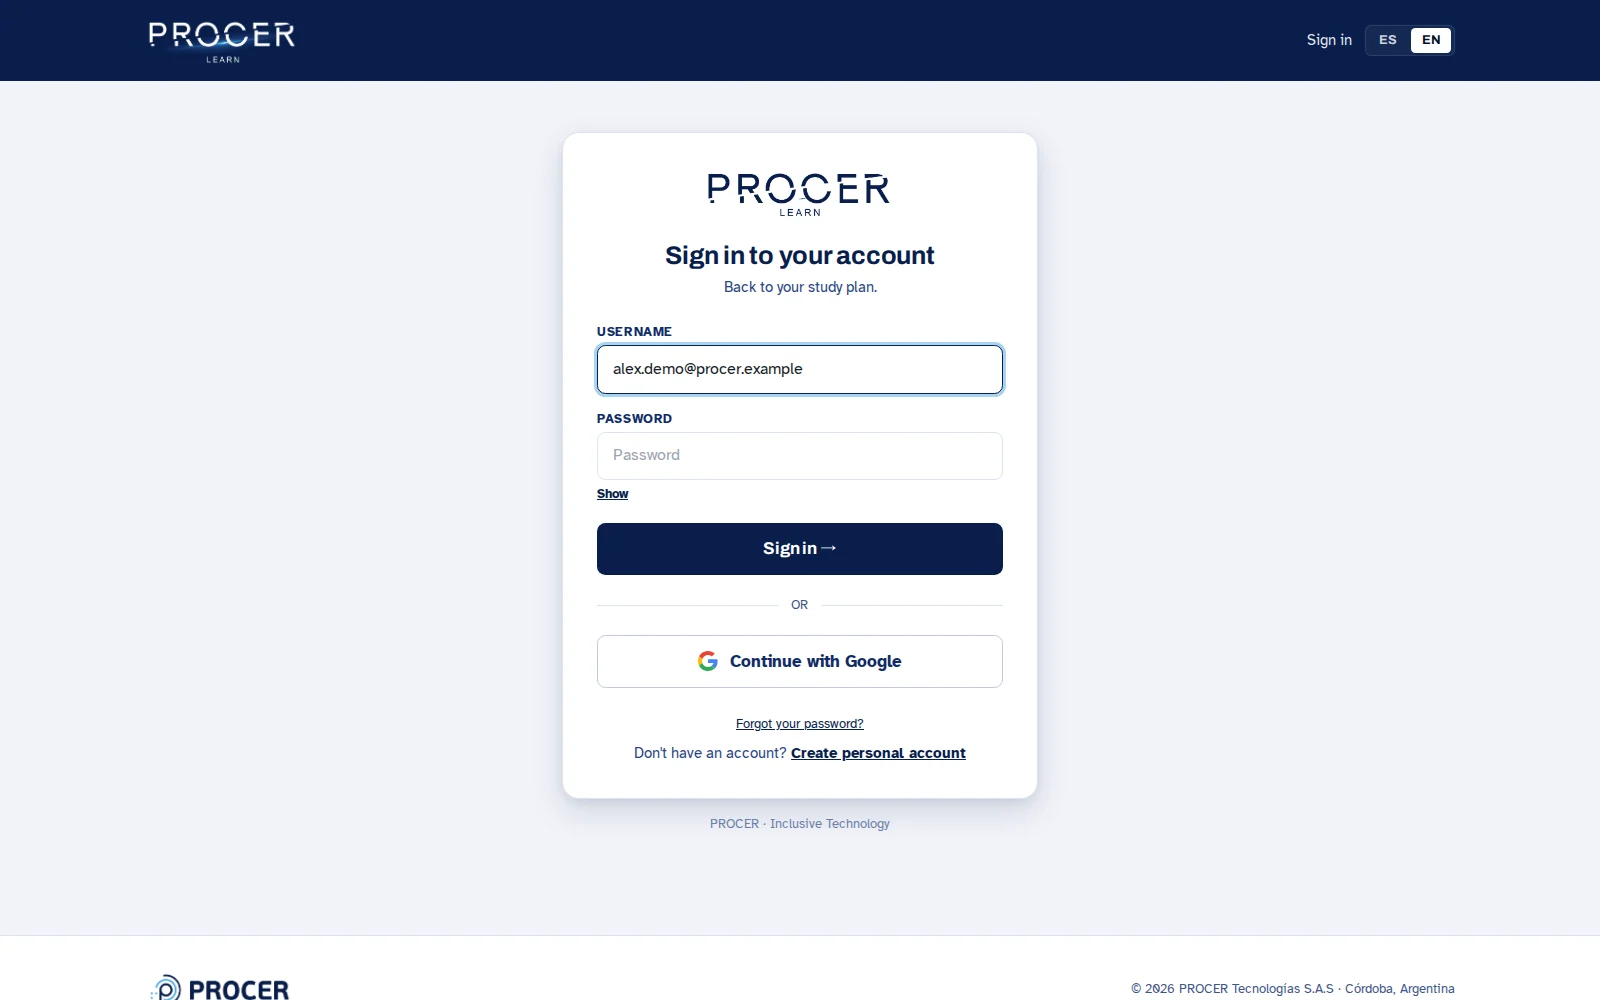
In Sign in, enter your email and your Learn password. If you use Google sign-in, choose the same Google account you registered with and complete the authorization. Do not type 'procer' followed by the device number as if it were your personal email.
View the screen for this step
-
If the email already exists
Use Sign in or password recovery. The registration process may send you a recovery link if it recognizes an existing account. Avoid registering another email to bypass the issue: this can split your materials and history between two accounts.
View the screen for this step
Chapter 03 · Getting started
Recover access and verify your identity
Recovery is done via email. Changing your personal password should not change the printed credentials of your PROCER.
-
Request a new password
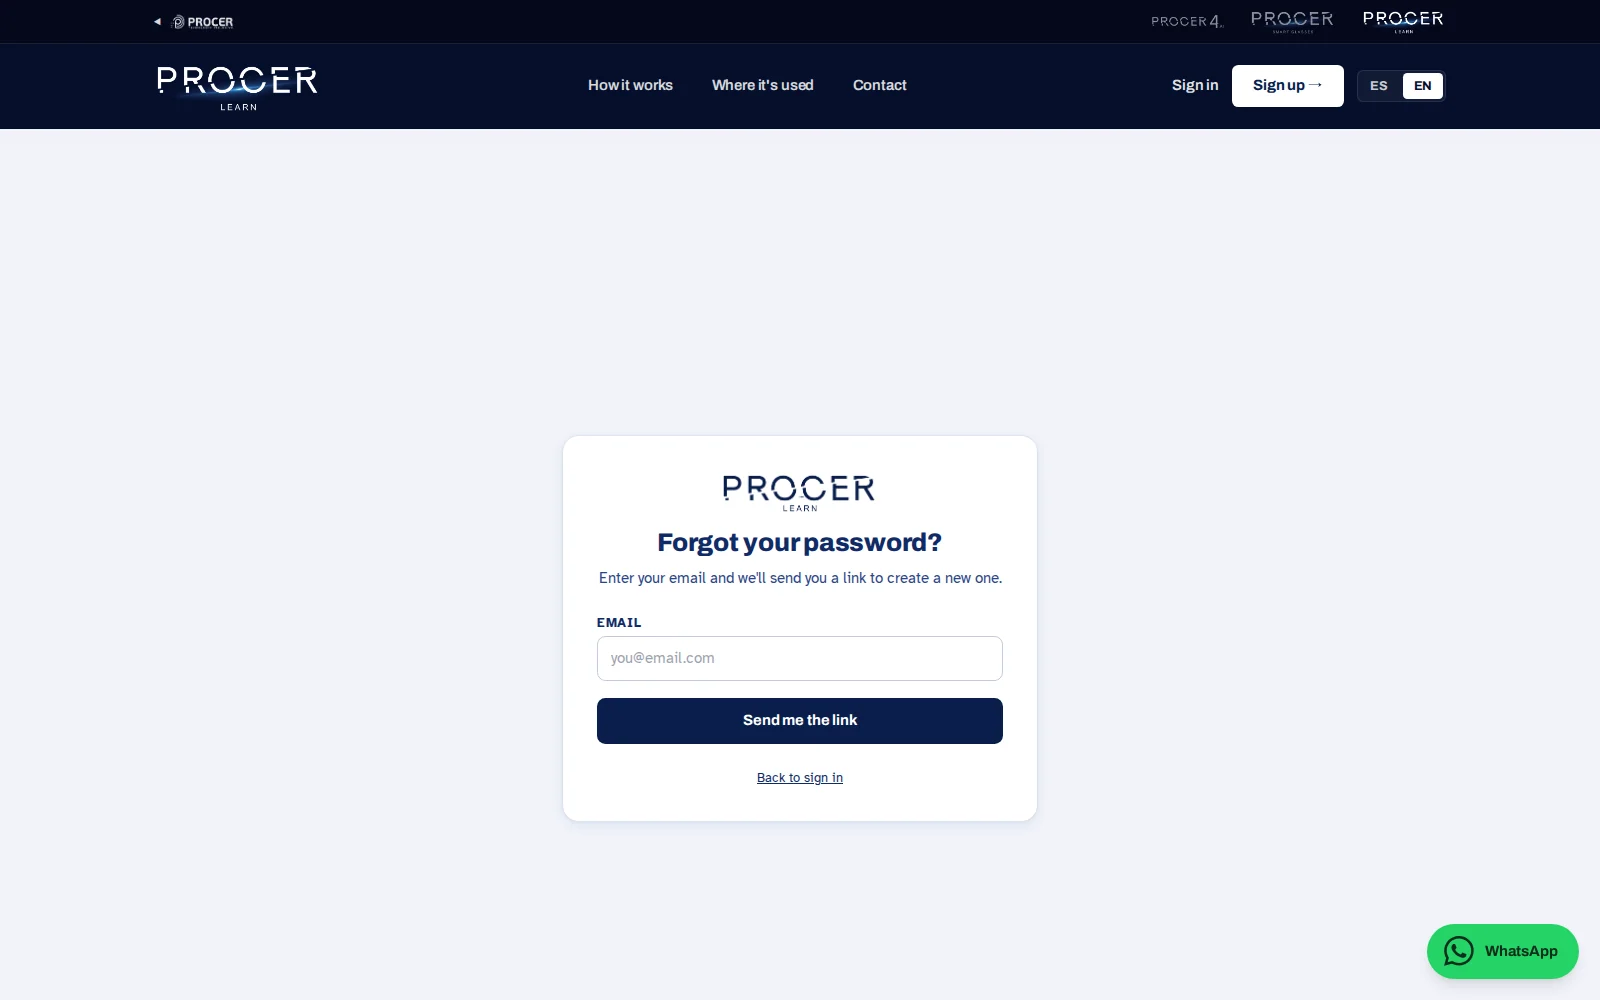
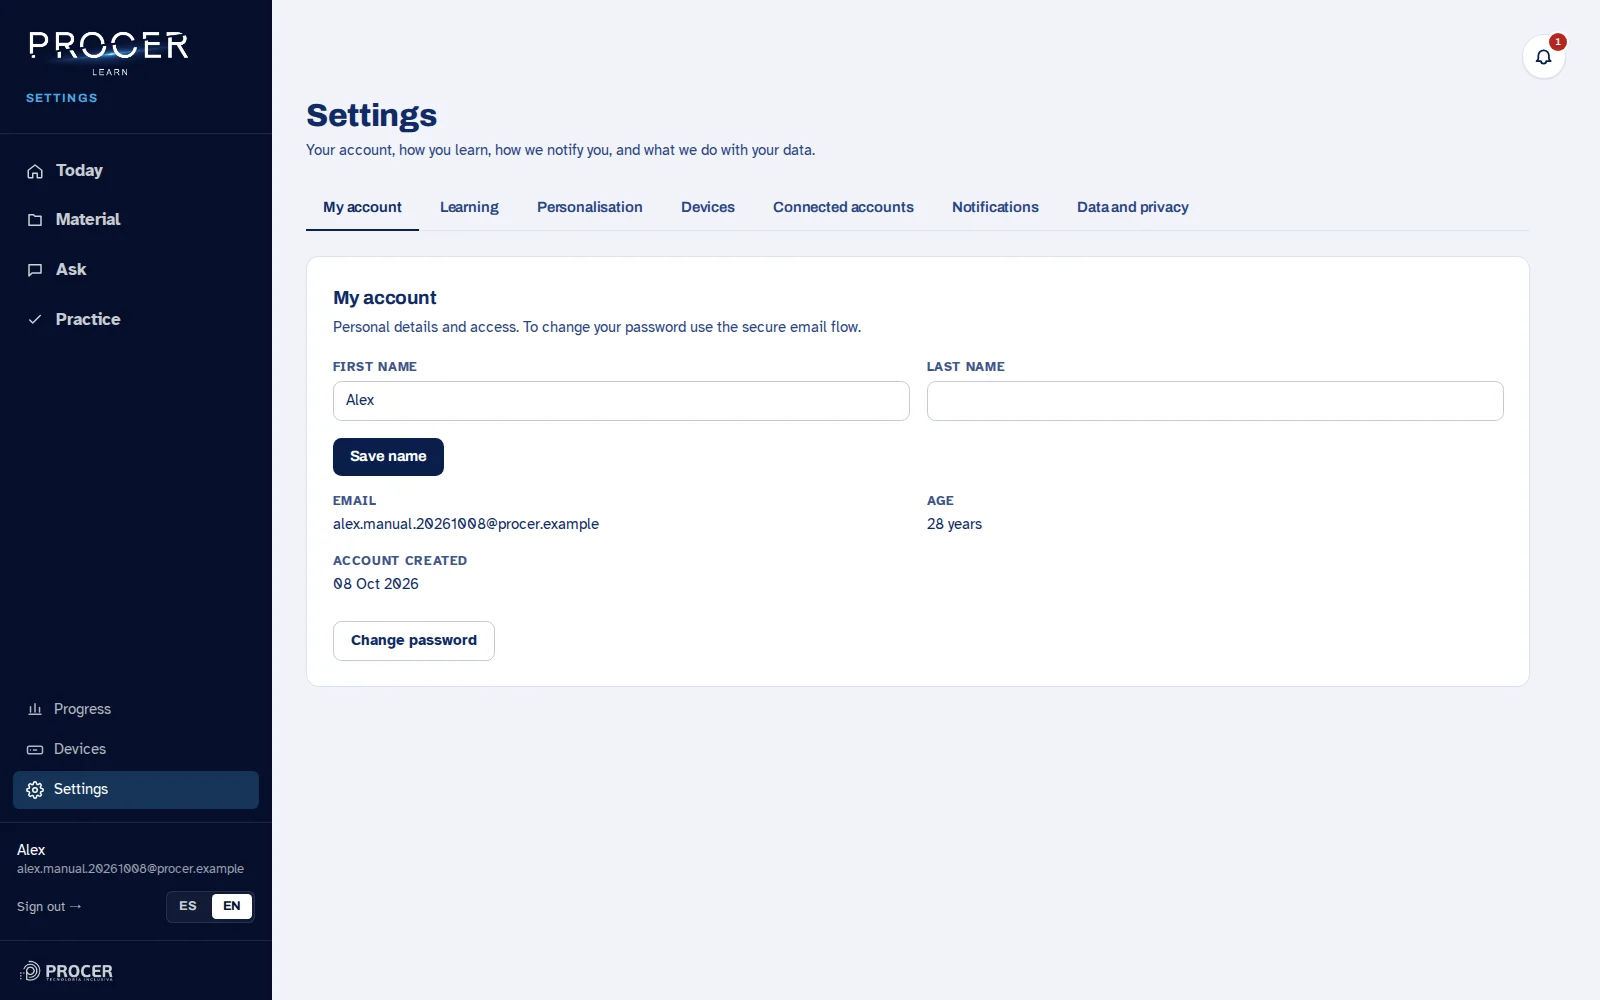
Open 'Forgot my password' or 'Change password' in Settings, My account. Enter your Learn email and send the request. Use the link from the most recent message to create the new password and then sign in.
View the screen for this step
-
Also if you used Google to sign in
An account created with Google can use email recovery to set a personal password. Keep the same email: this way you continue to access the same account and not a new profile.
View the screen for this step
-
Resolve a duplicate account
If the system detects another account associated with your same email when linking a device, it may suggest merging them via a confirmation link. Read the screen before confirming. If the device is listed under someone else's name, you need to resolve that linking, not change your password.
View the screen for this step
-
Ask for help with useful information
If you cannot recover access, write to support indicating your account email, the step that is failing, and the message that appears. Do not send passwords or linking codes in a public screenshot.
View the screen for this step
Chapter 04 · Getting started
Activate Learn and link your PROCER
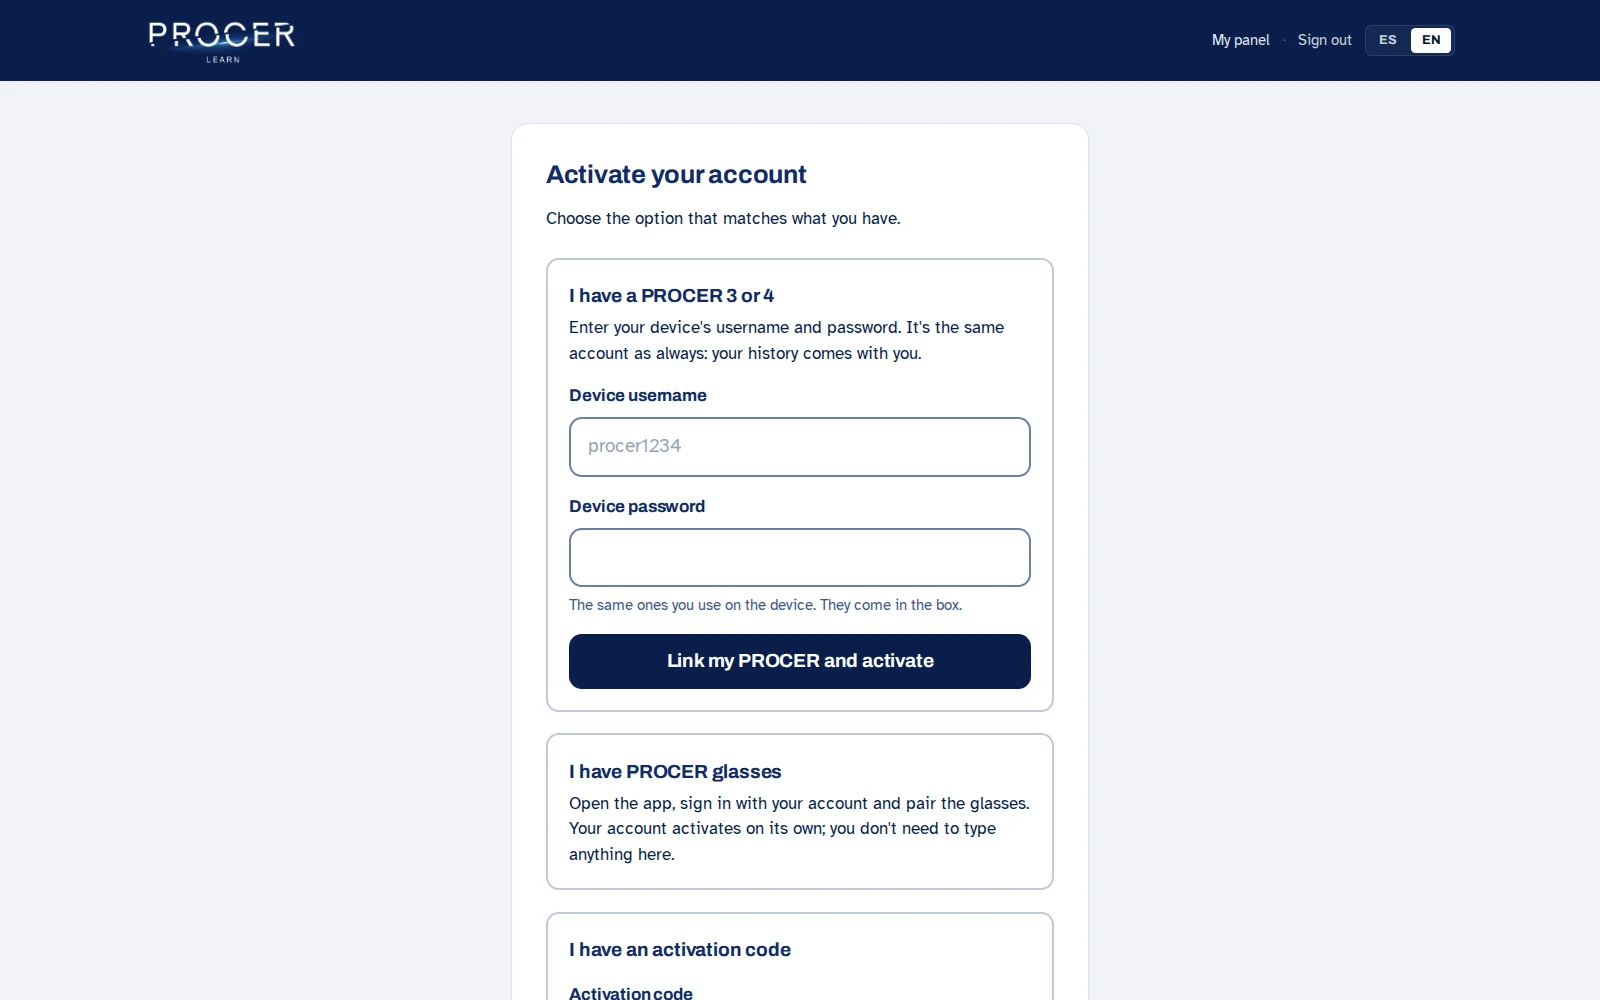
Creating an account and enabling access to Learn are separate steps. The activation screen shows you the available paths.
-
If you have a PROCER
Under 'I have a PROCER', enter the device username and password found in its box. Choose 'Link my PROCER and Activate'. These are the device credentials, even if your Learn account password is different.
View the screen for this step
-
If you received a code
Open the 'Activation code' option, enter your code, and choose 'Activate with code'. Each code corresponds to one activation. If it is expired, revoked, or used by another account, the system should indicate so; ask for help using that message.
View the screen for this step
-
If you have Smart Glasses
The glasses association is completed in the mobile app using your Learn account. When the app successfully links the device, it can enable access. Afterwards, check Devices in Learn. The web version does not replace the app's Bluetooth pairing.
View the screen for this step
-
Check what was linked
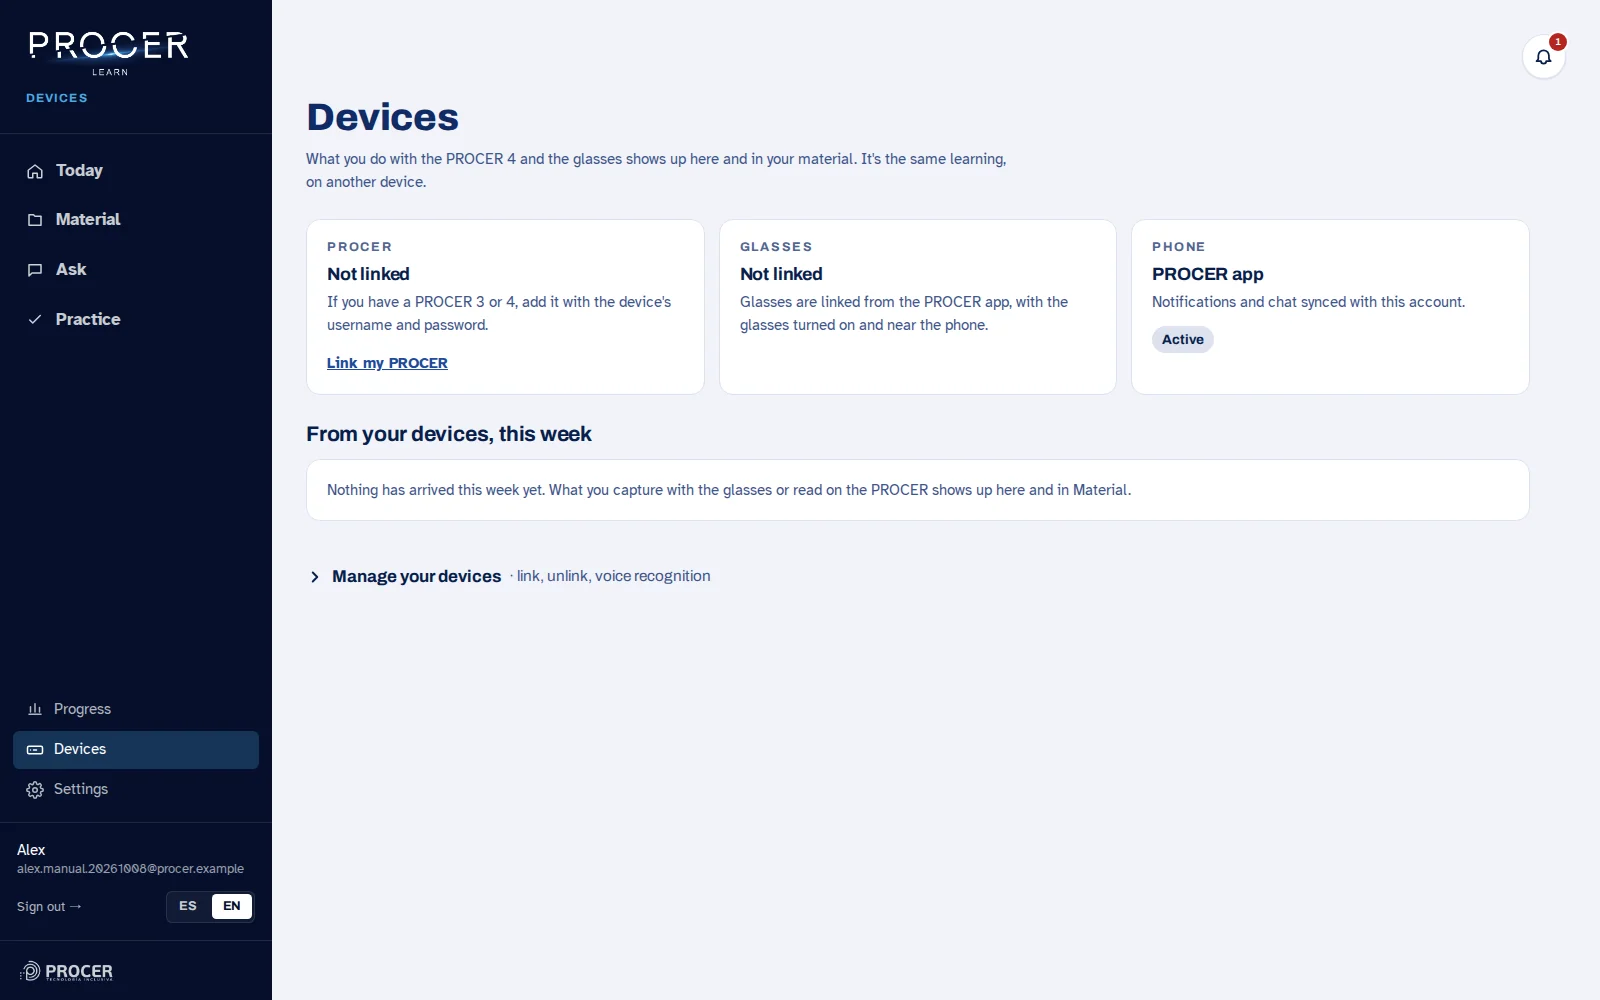
When finished, open Devices. Verify that the expected device appears. If there was previous PROCER history, check Material and Ask in that same account. If material is missing, do not repeatedly unlink and relink: keep the current state so support can review it.
View the screen for this step
Chapter 05 · Getting started
The new interface: where everything is
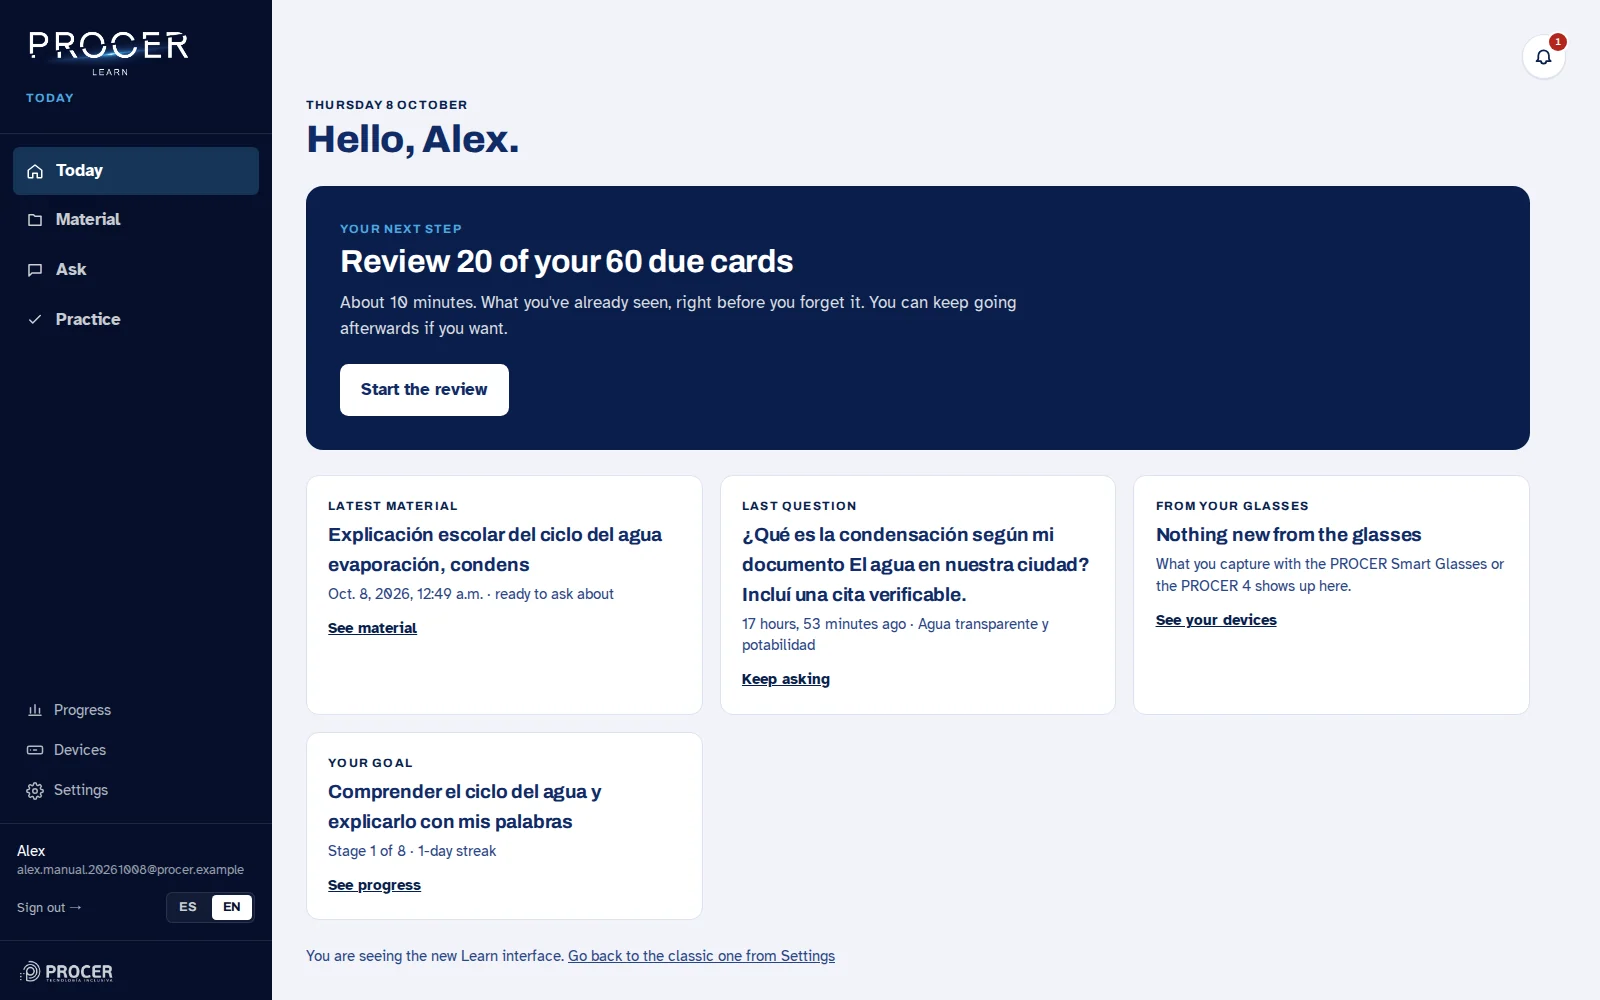
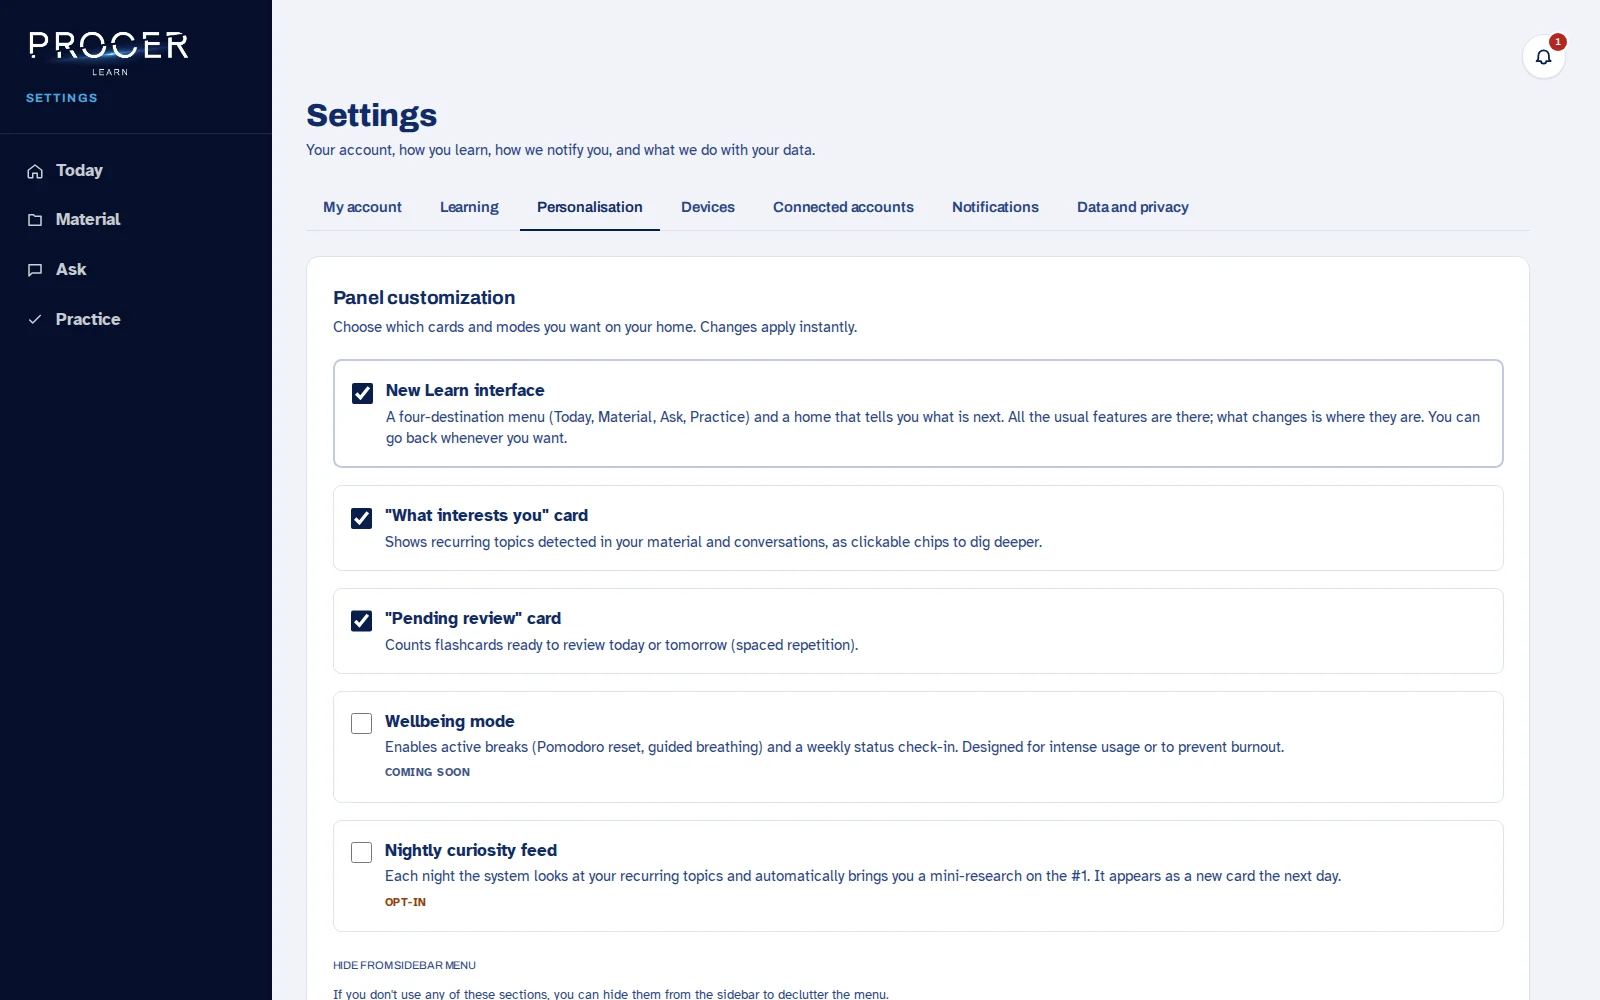
The main menu is organized around what you want to do: Today, Material, Ask, and Practice. Further down are Progress, Devices, and Settings.
-
Activate this interface if needed
Open Settings, Personalization. Check New Learn Interface and save. When you return to the home screen, you will see the four destinations. This preference can be changed back; there is no need to create another account or move your documents.
View the screen for this step
-
Start with Today
Today suggests a next step: upload material, review, or follow a goal. It also allows you to resume the last material, a recent conversation, and an open English practice. An empty card means there is no activity of that type in the account yet.
View the screen for this step
-
Locate the tools
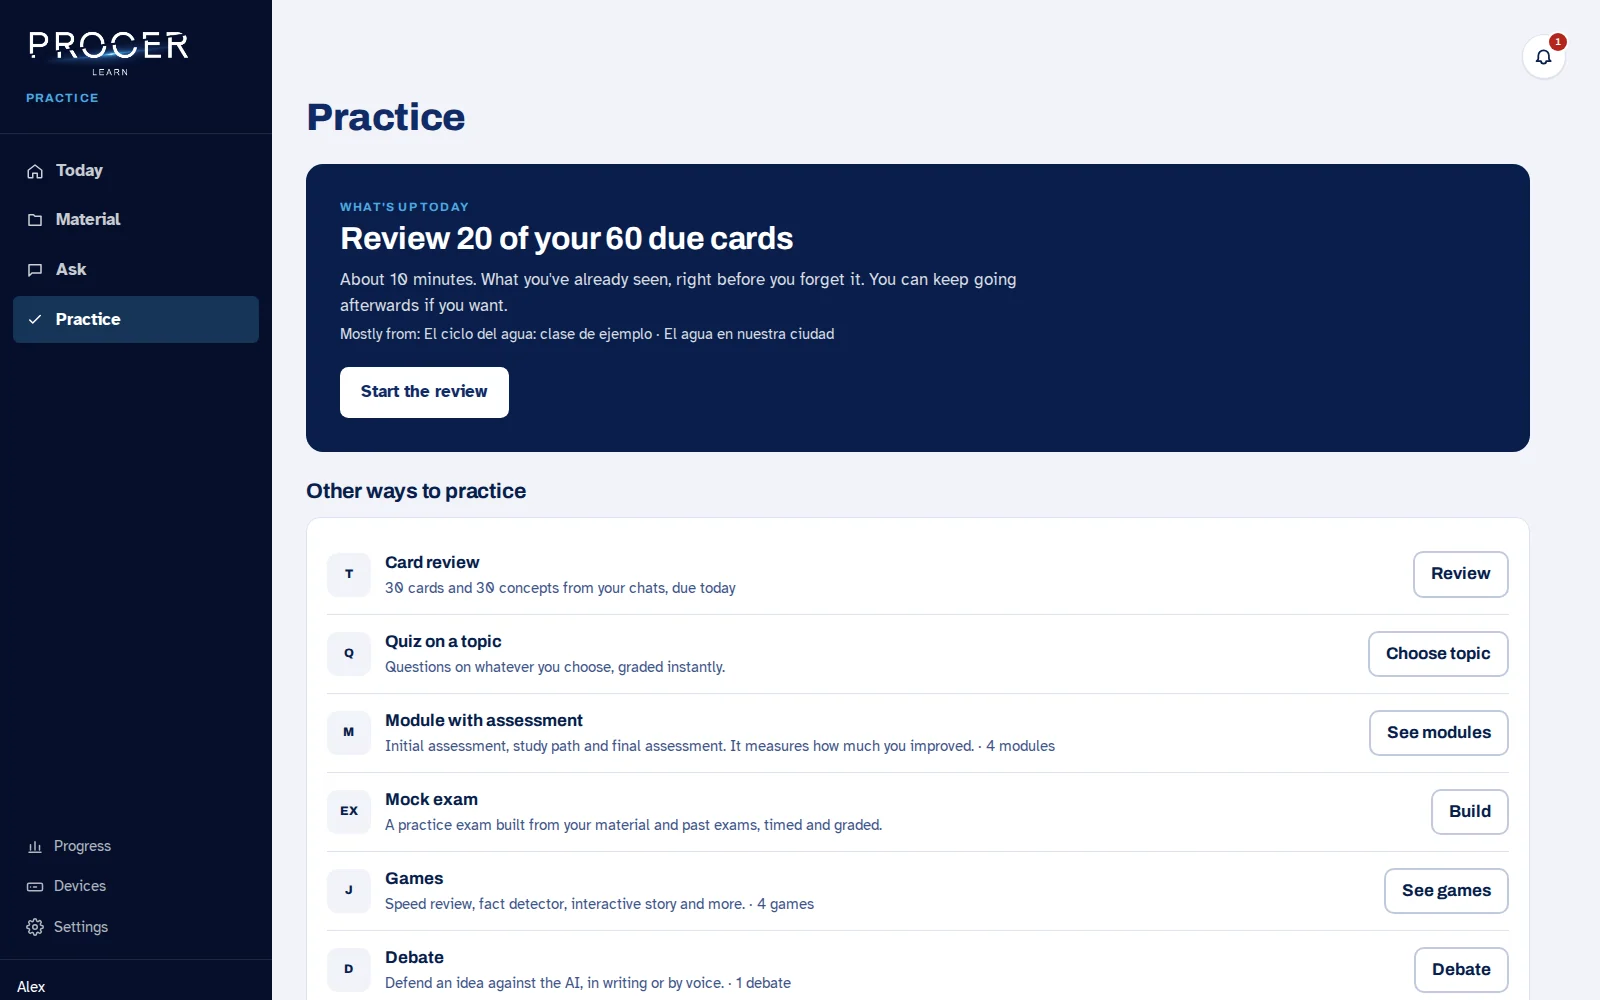
Material brings together documents, classes, research items, photos, and courses. Ask opens the chat. Practice brings together review, quizzes, modules, mock exams, games, debates, and English. Progress allows you to review progress, goals, and topic maps.
View the screen for this step
-
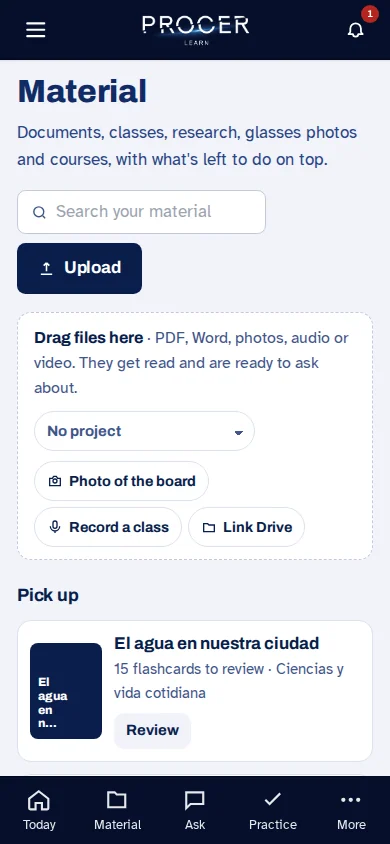
On a small screen
Open the navigation menu when it is collapsed. Forms adjust vertically; scroll to see the final actions. You can enlarge the text using the browser tools. A dropdown or tab keeps its name even if its position changes.
View the screen for this step
Chapter 06 · Getting started
Define a goal and a plan
A goal expresses what you want to achieve and how much time you can dedicate to it. You can define it when you start or later from Progress.
-
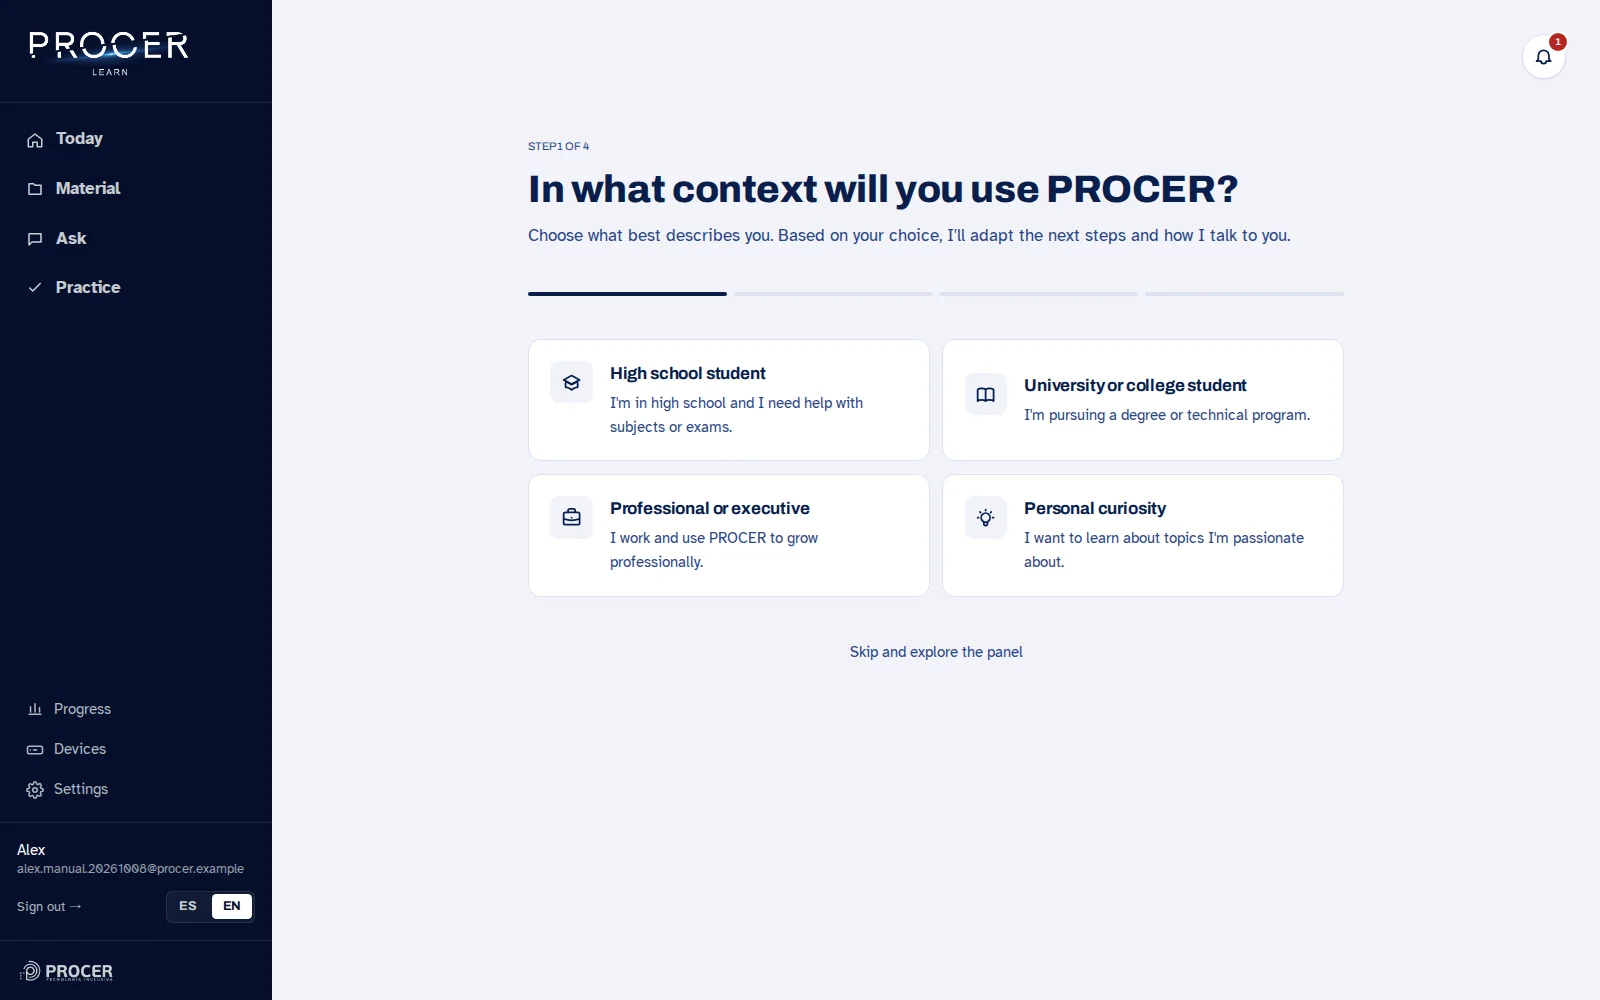
Choose your context
Indicate if you are studying in high school, in a degree program, if you use it professionally, or for personal curiosity. If you still want to explore, choose Skip and explore the panel. This does not remove the possibility of creating a goal later.
View the screen for this step
-
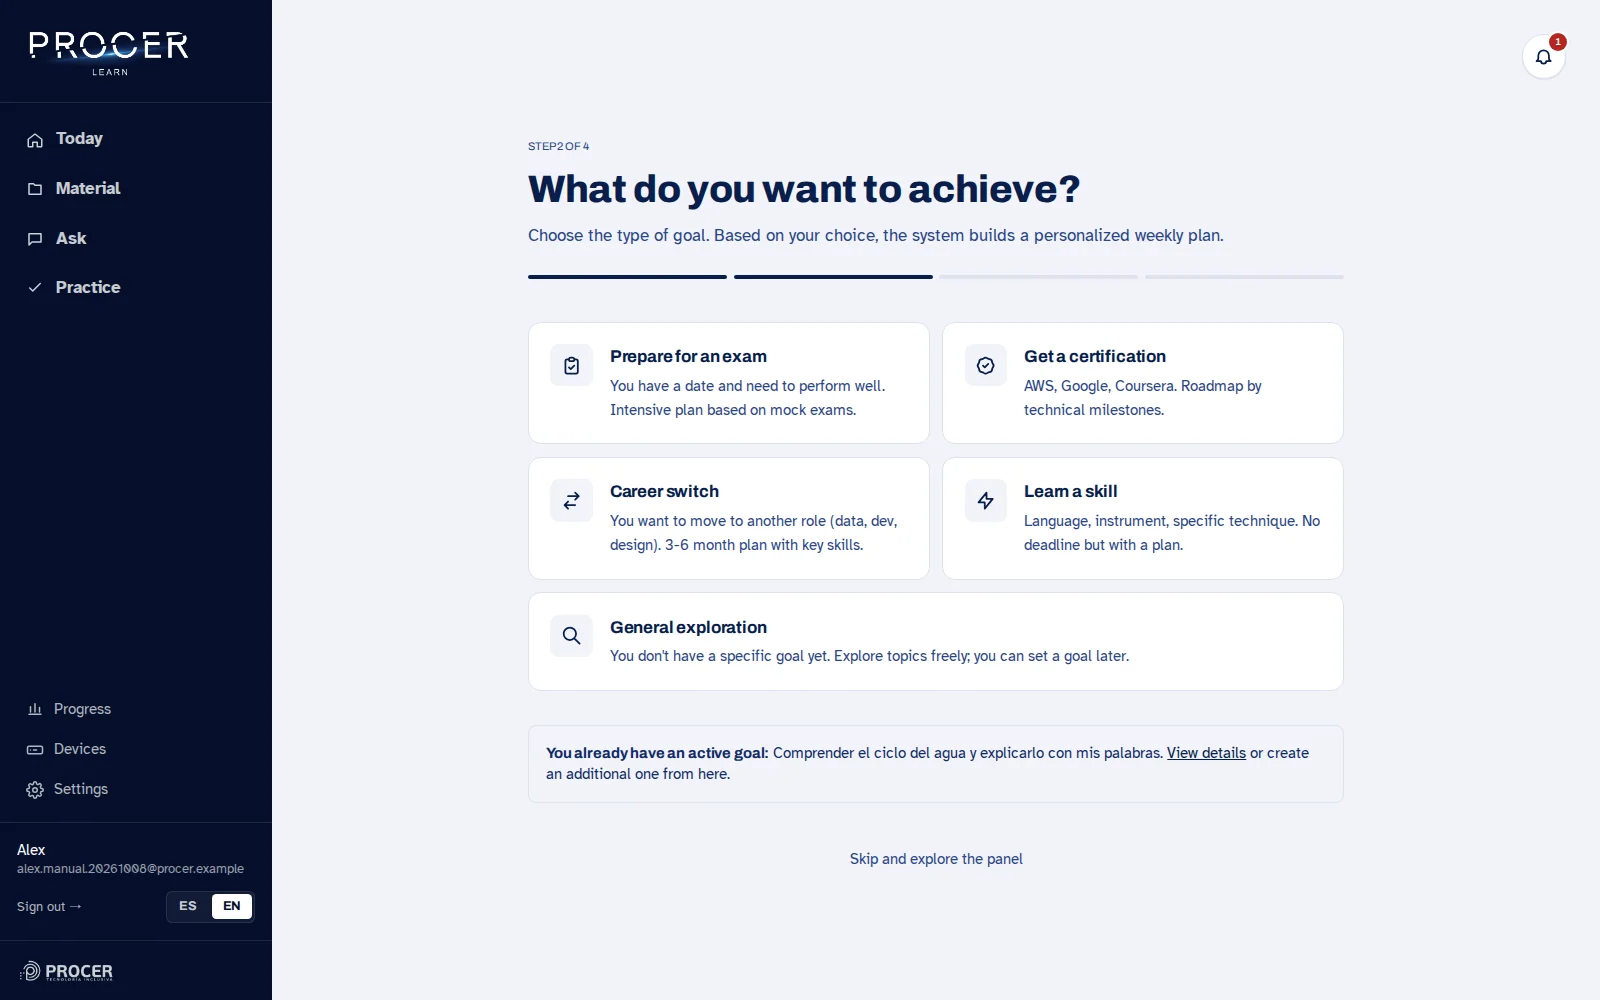
Choose the type of goal
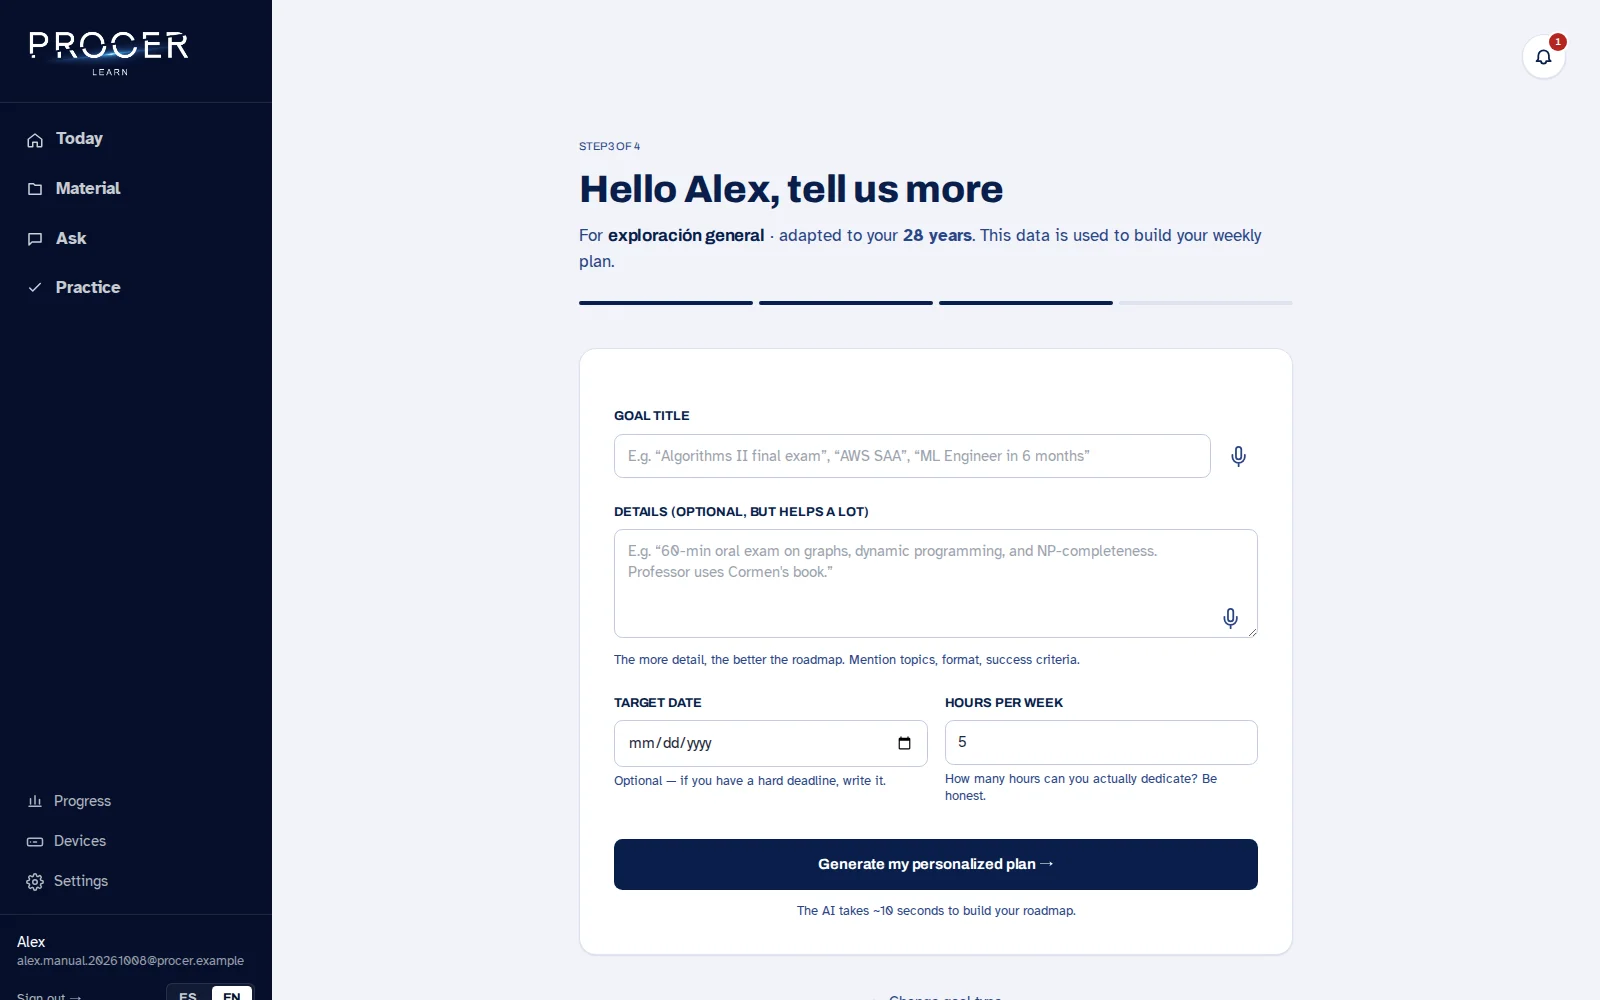
Select the corresponding type: prepare for an evaluation, obtain a certification, learn a skill, change careers, or explore a topic. Complete a specific title; for example, 'comprender el ciclo del agua y explicarlo con mis palabras' (understand the water cycle and explain it in my own words).
View the screen for this step
-
Add time and context
Describe what you need to learn, indicate a date if applicable, and the available hours per week. Send the form only once and wait. Review the proposed stages before starting to follow them.
View the screen for this step
-
If stages do not appear
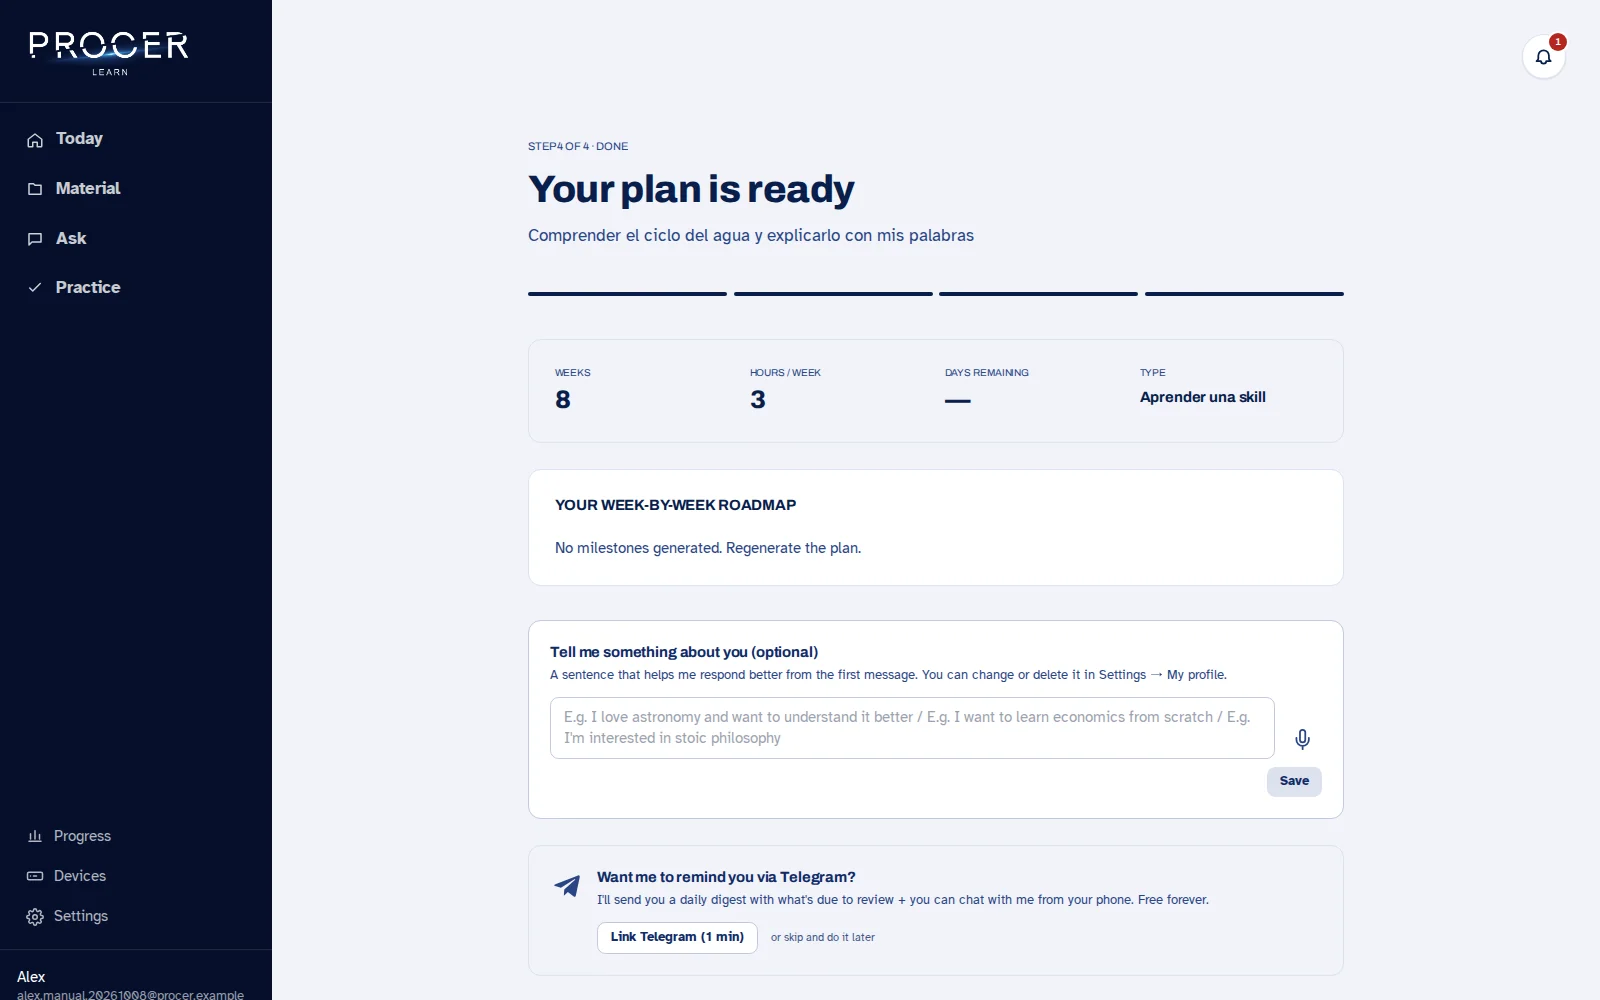
Testing found a case where 'Your plan is ready' appears, but below it says that no stages have been generated. In that case, the plan is not yet complete. Use Regenerate plan; if it remains empty, continue with Material or Practice and notify support.
View the screen for this step
-
Resume or change a goal
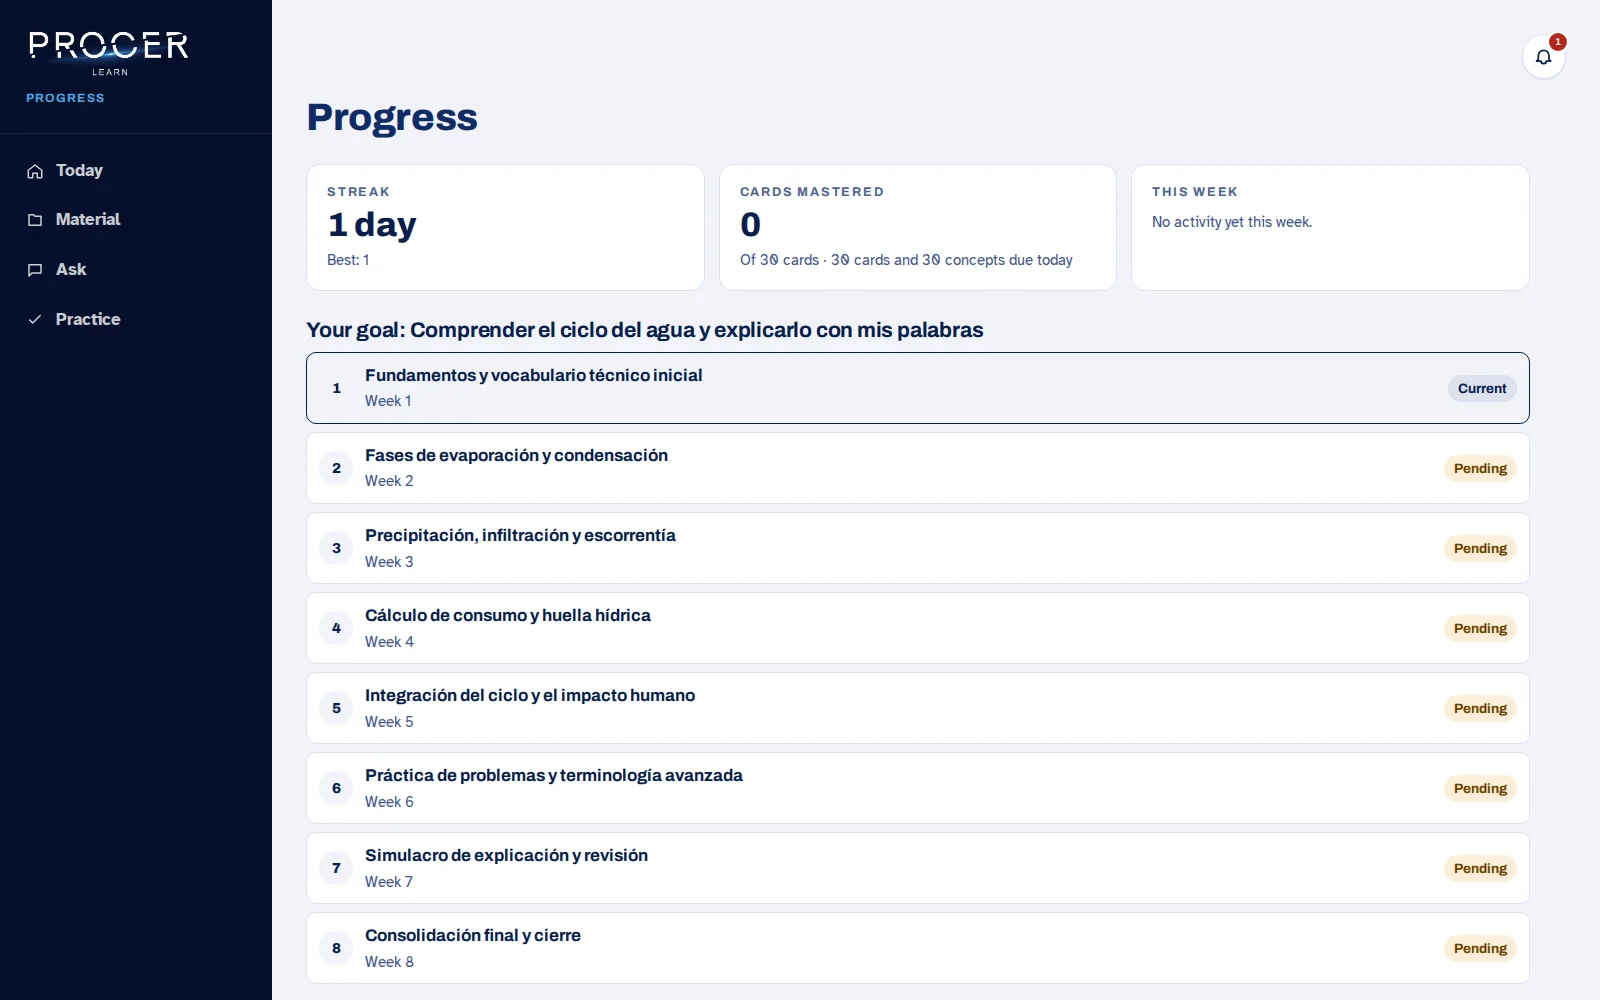
In Progress, open Your goal to consult the plan. Goals also have their own list and details. Regenerate modifies the proposed stages; deleting a goal is not equivalent to deleting the material from your library.
View the screen for this step
Chapter 07 · Your material
Uploading your documents
Learn prepares files so you can read them and ask questions. A received file may still be in processing.
-
Choose the file
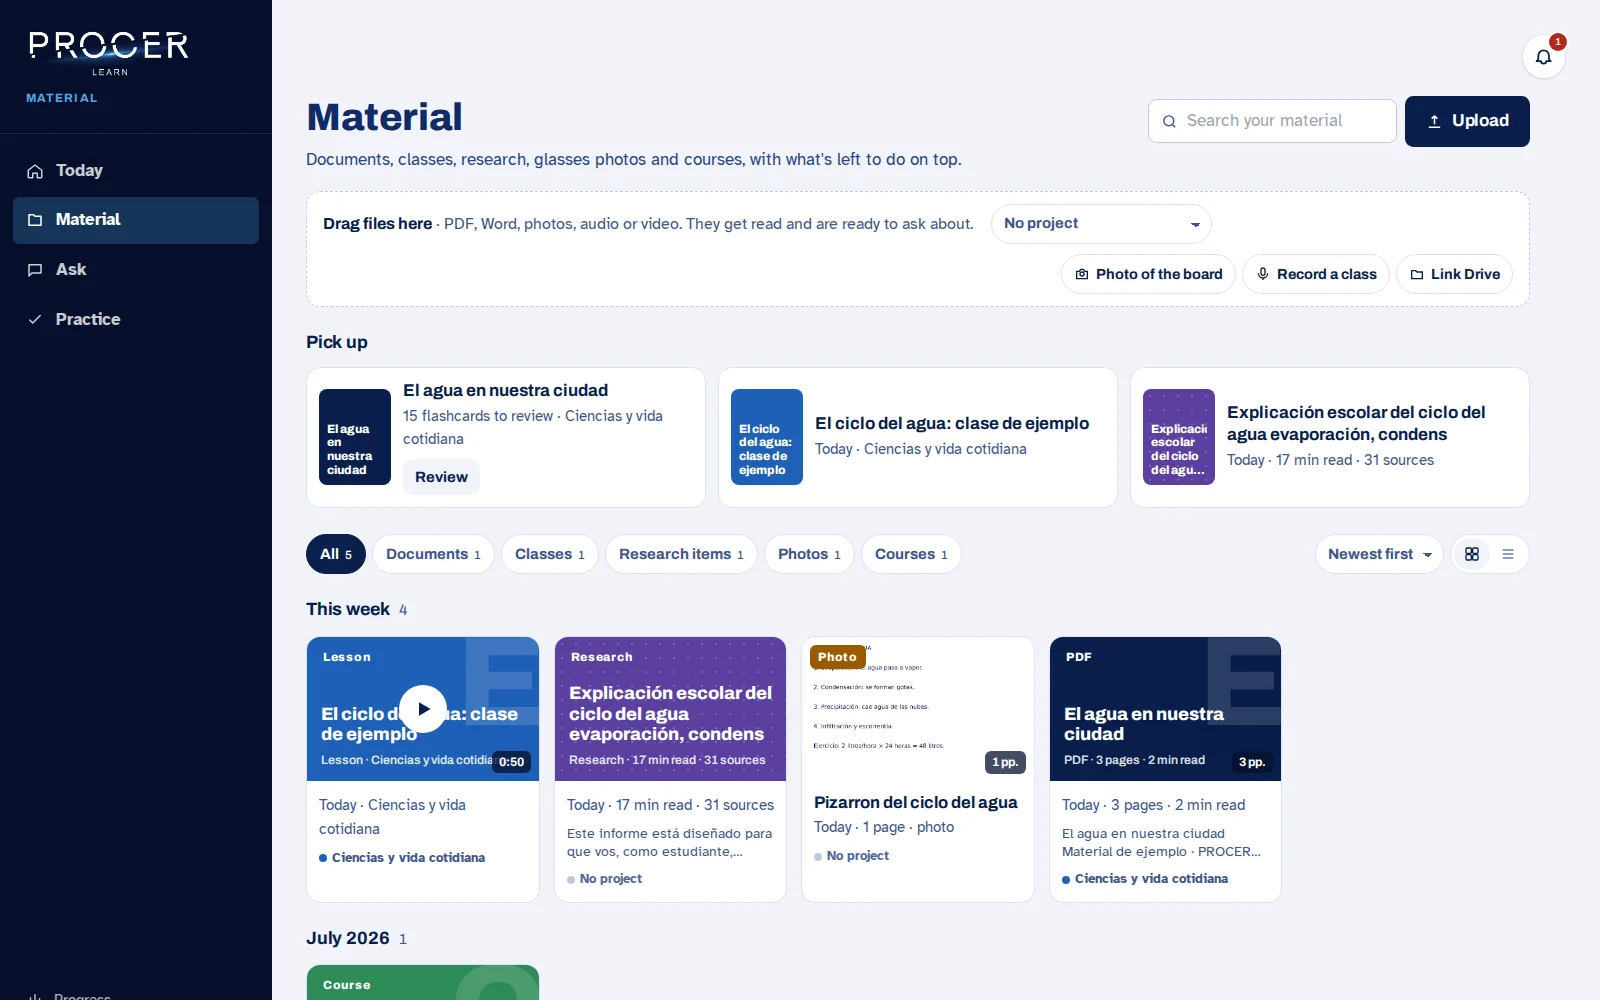
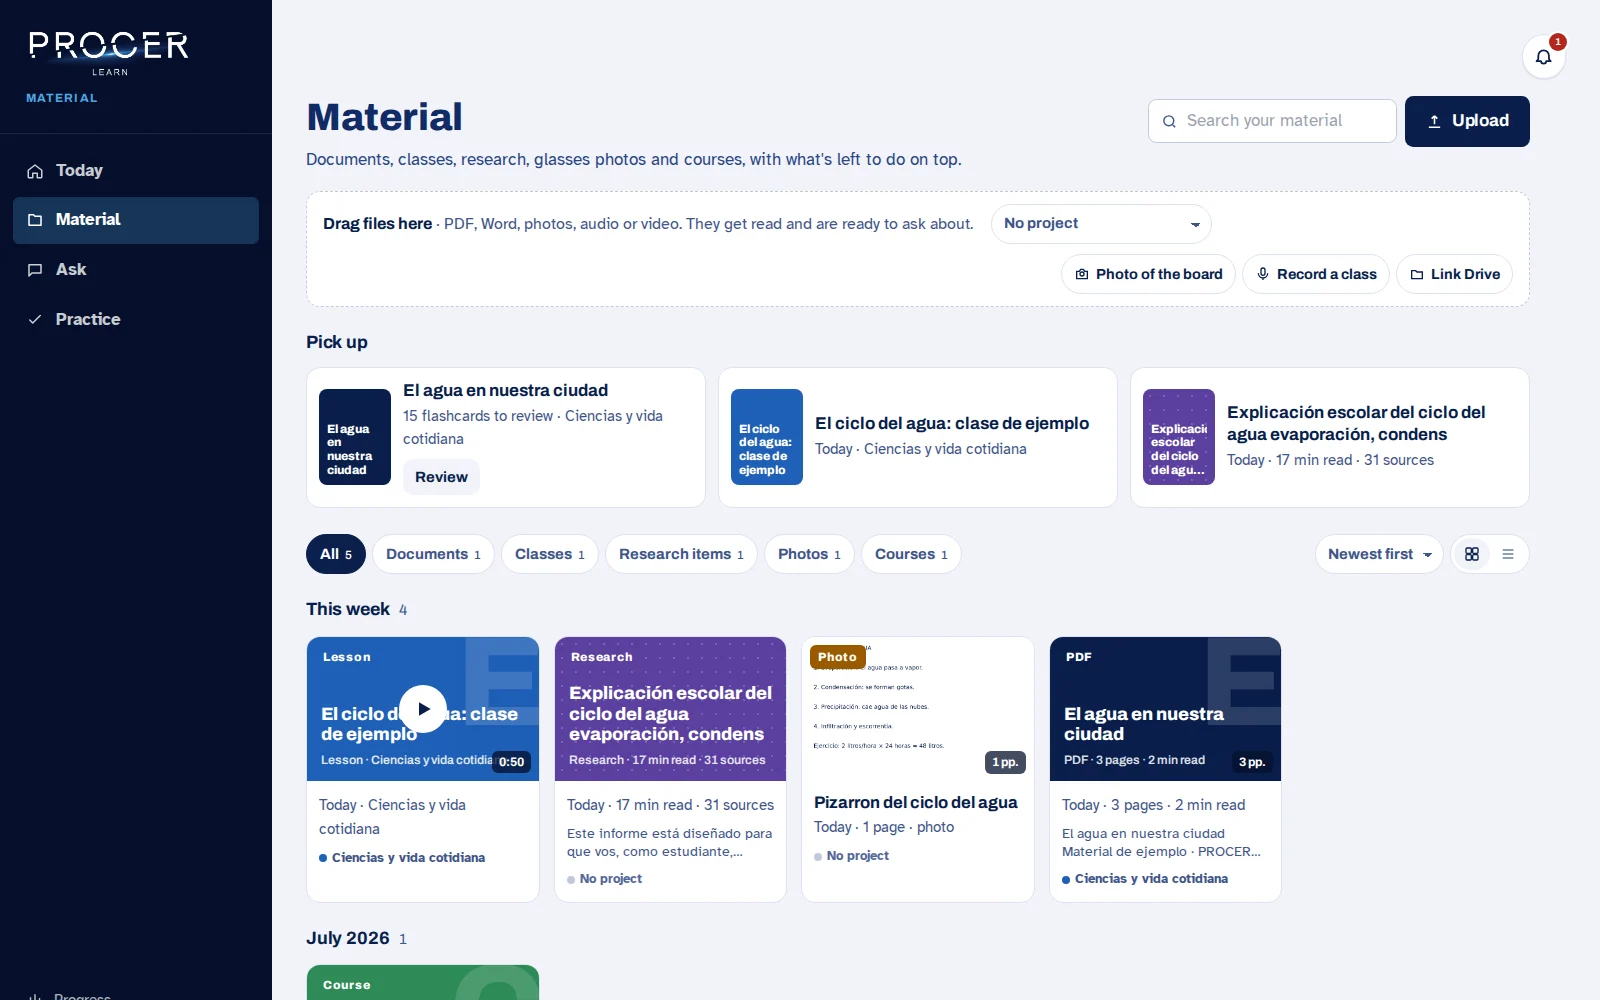
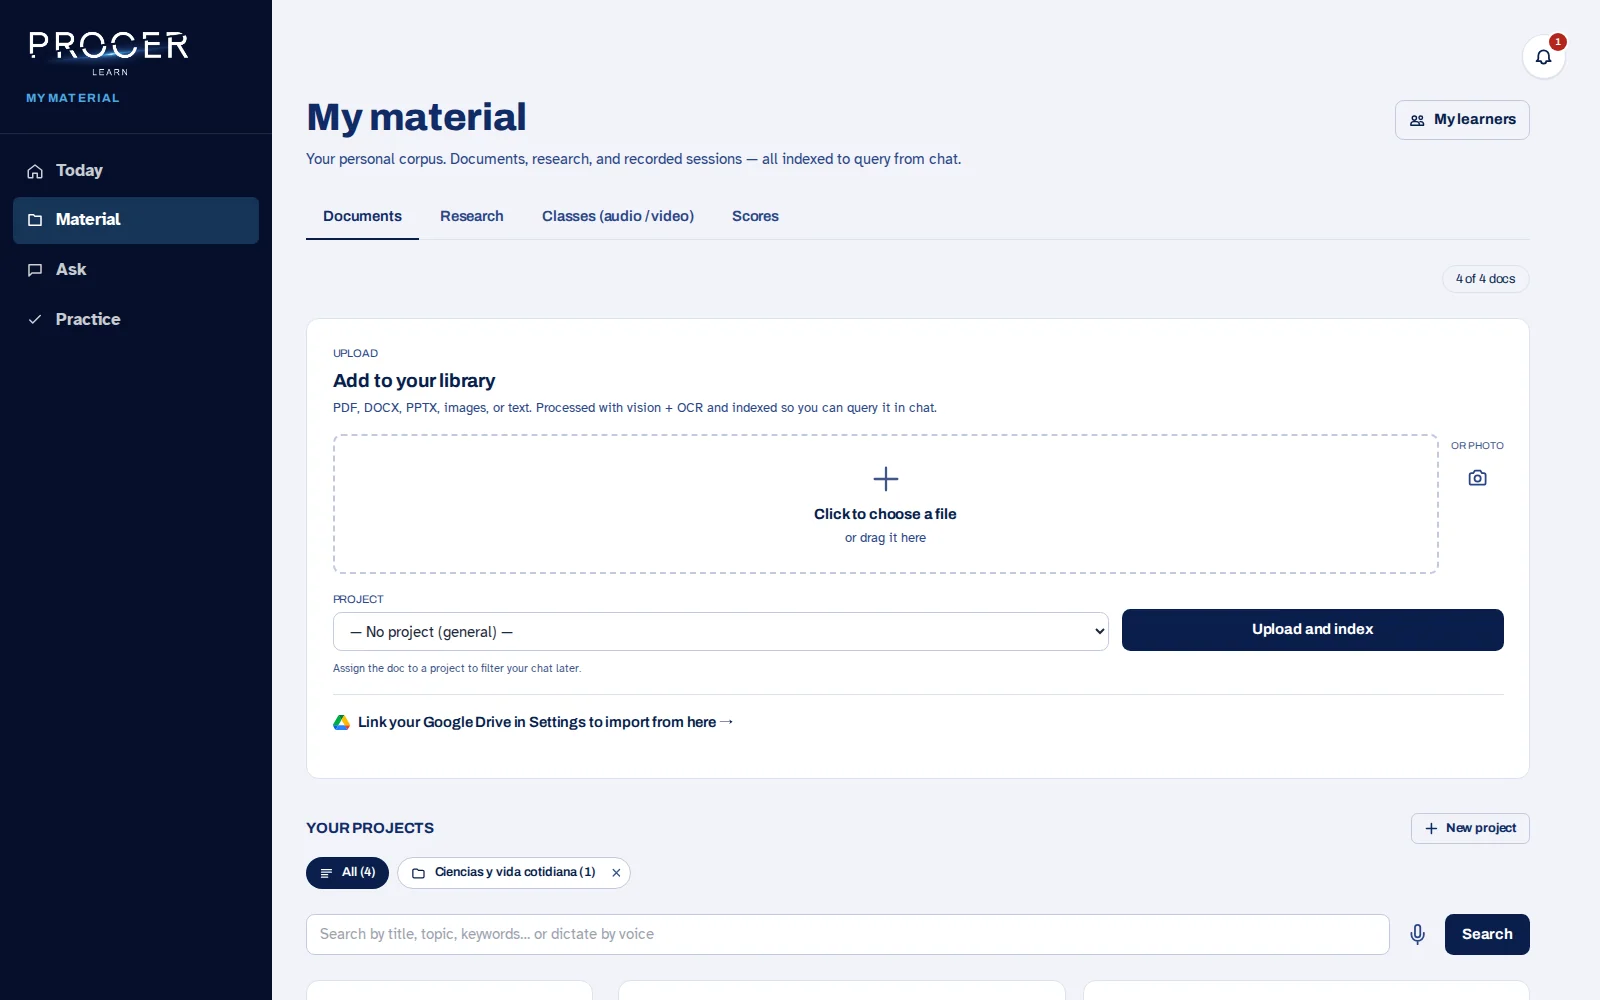
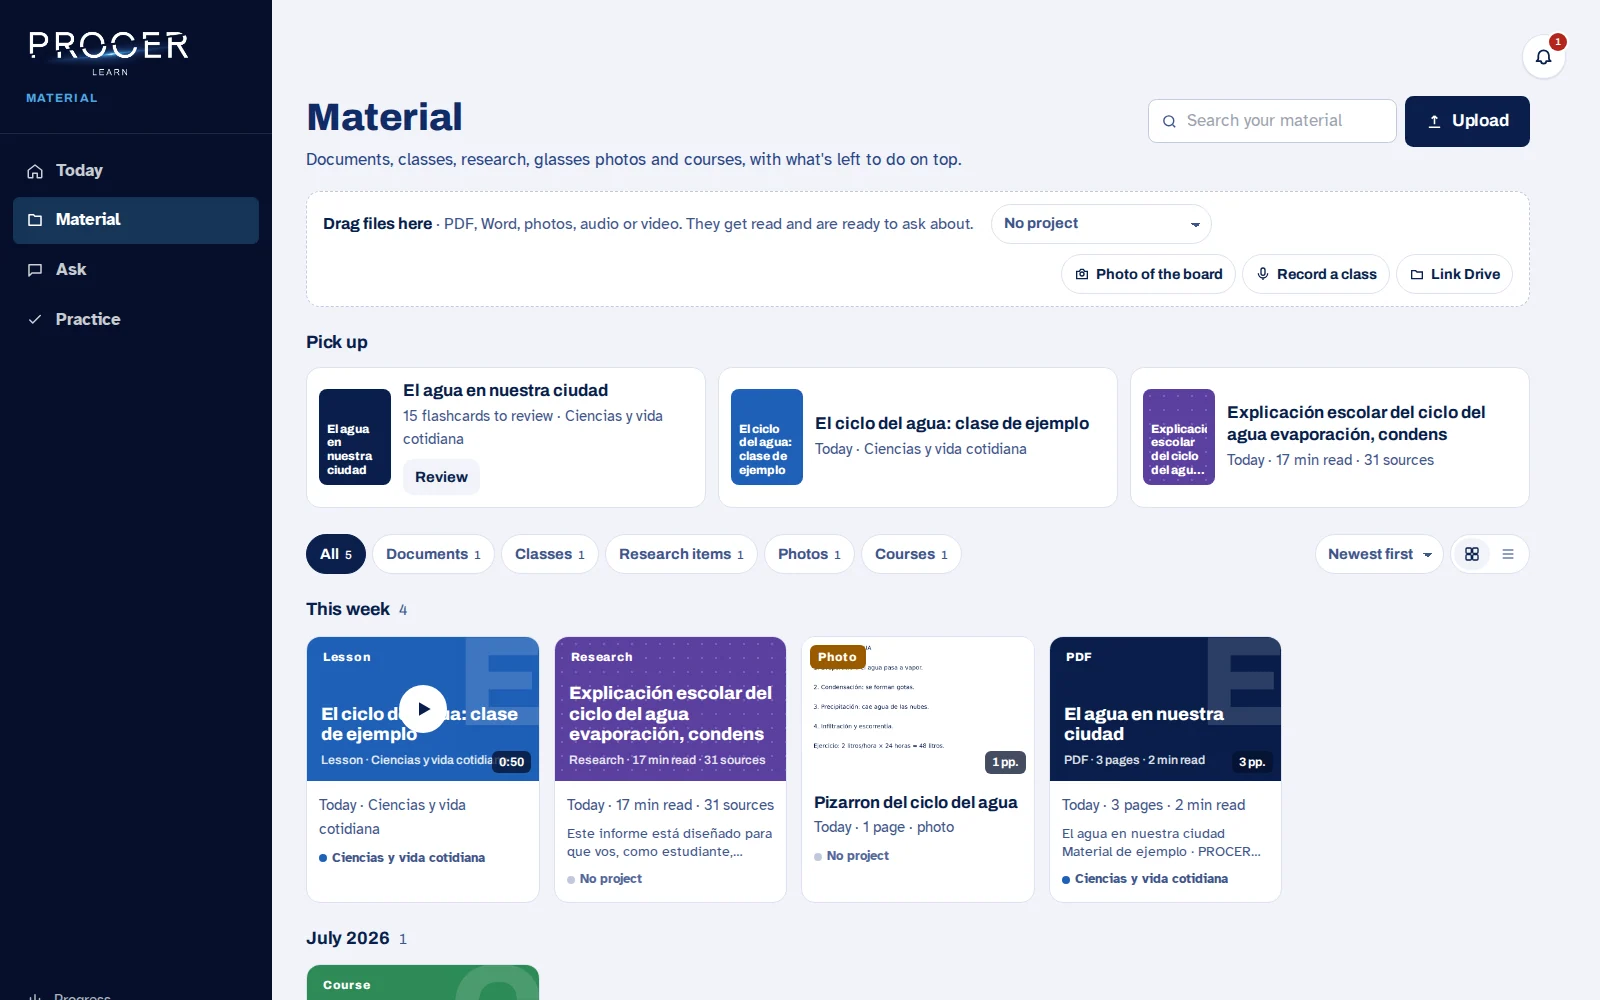
In Material, click Upload or drag a file to the upload area. You can provide PDFs, Word documents, presentations, images, or text, and use specific workflows for audio and video. To start, try a short document.
View the screen for this step
-
Assign a project
Before uploading, choose a project if you want to group that content with a subject or activity. You can also leave it as 'No project' and organize it later. The file title should help you recognize it in the chat and during practice sessions.
View the screen for this step
-
Wait for processing
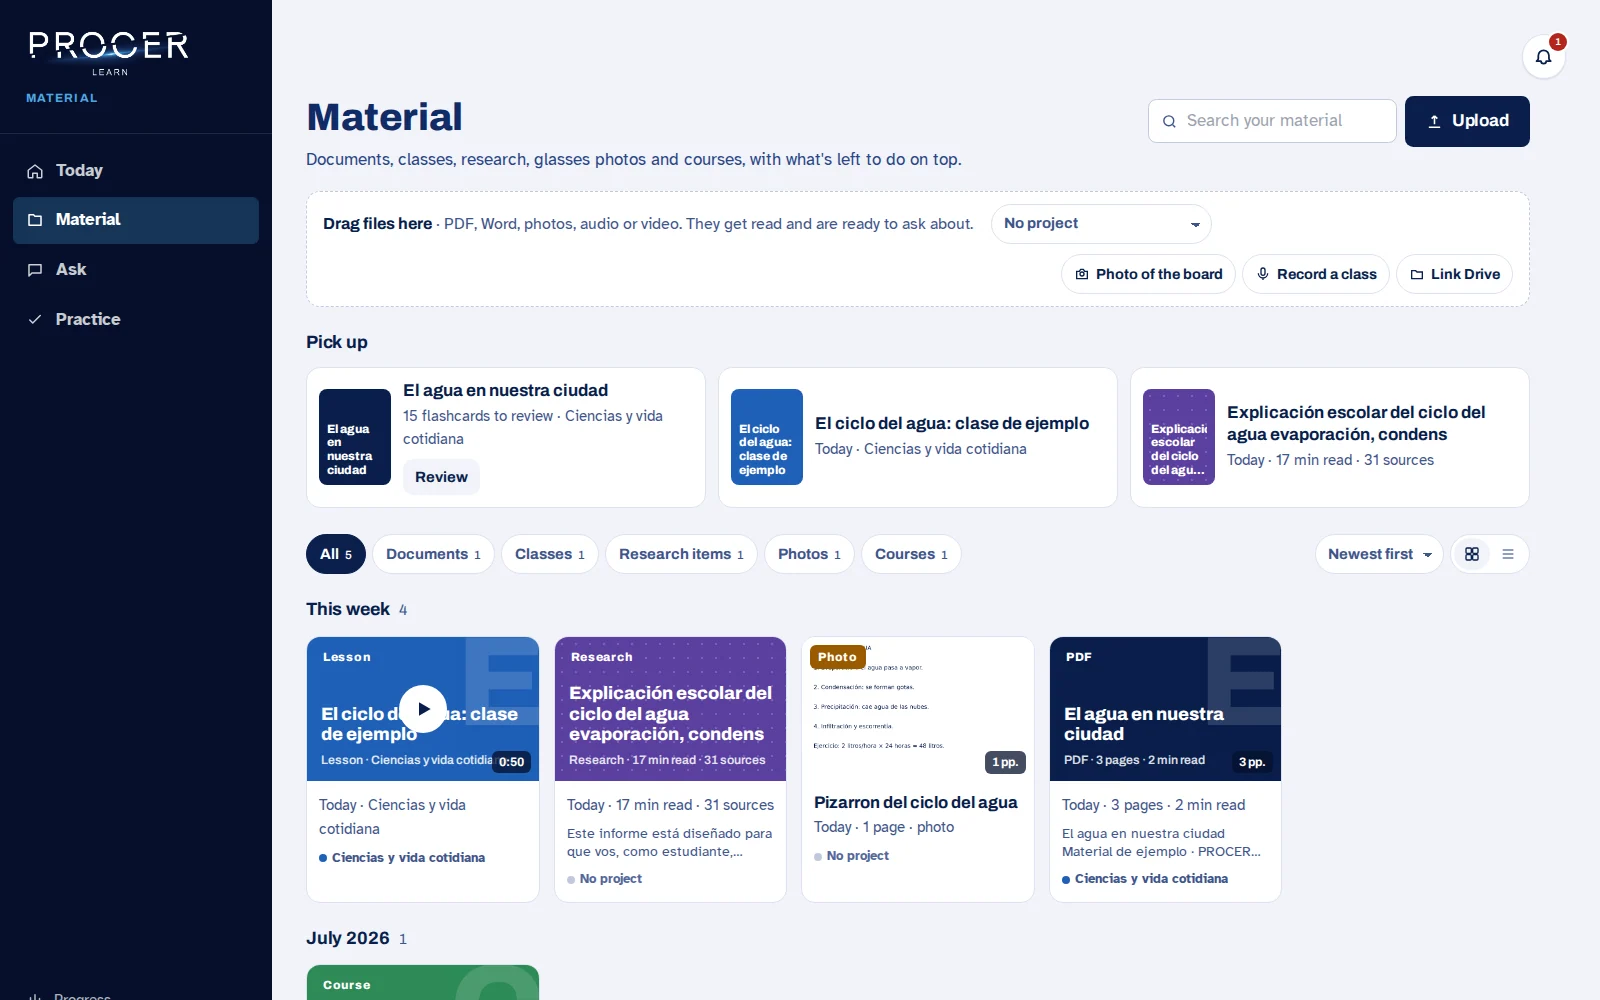
Follow the status in Material. The upload may go through reading, analysis, and indexing. You can browse Learn while it finishes. Do not upload the same file again just because it does not yet appear in the list of ready documents.
View the screen for this step
-
Review the result
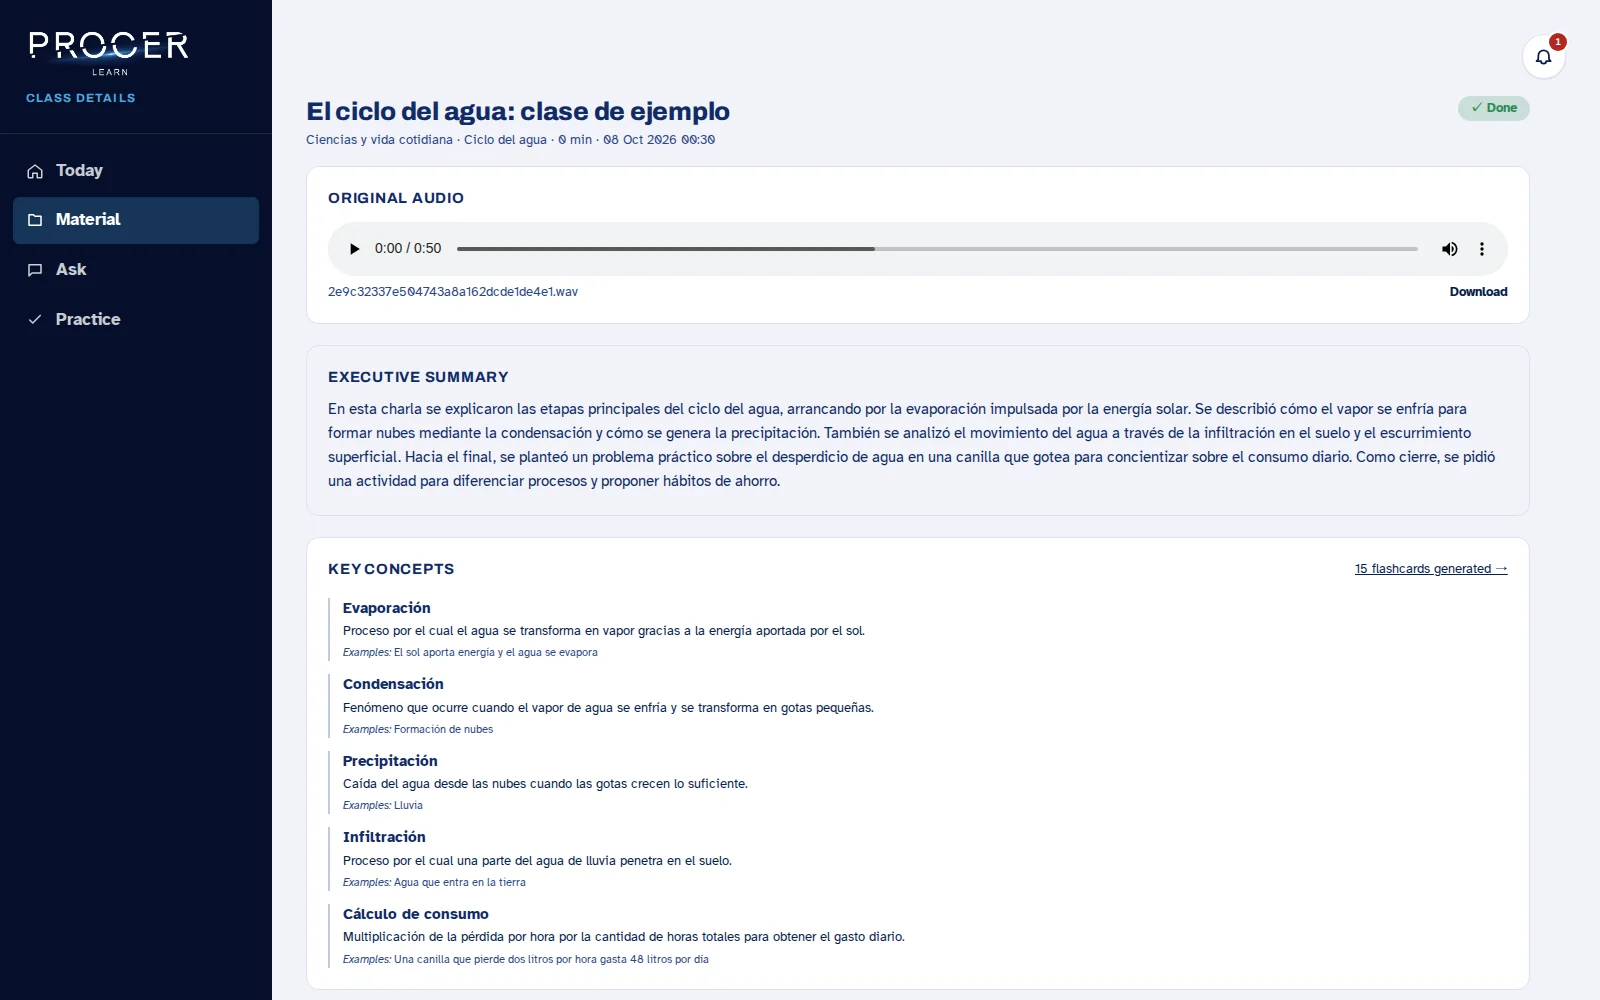
When the document card appears, open it and check that the correct text was read. In the example, the file contains 'el ciclo del agua' (the water cycle) and a problem about 'litros por día' (liters per day). Ask a question whose answer you already know to review the reading.
View the screen for this step
-
If an upload fails
Use the retry option when the interface offers it. For large scanned files, pay attention to the confirmation and processing options that appear. If it persists, try a legible fragment and keep the file name and the error for support.
View the screen for this step
Chapter 08 · Your material
Organize, search and manage Material
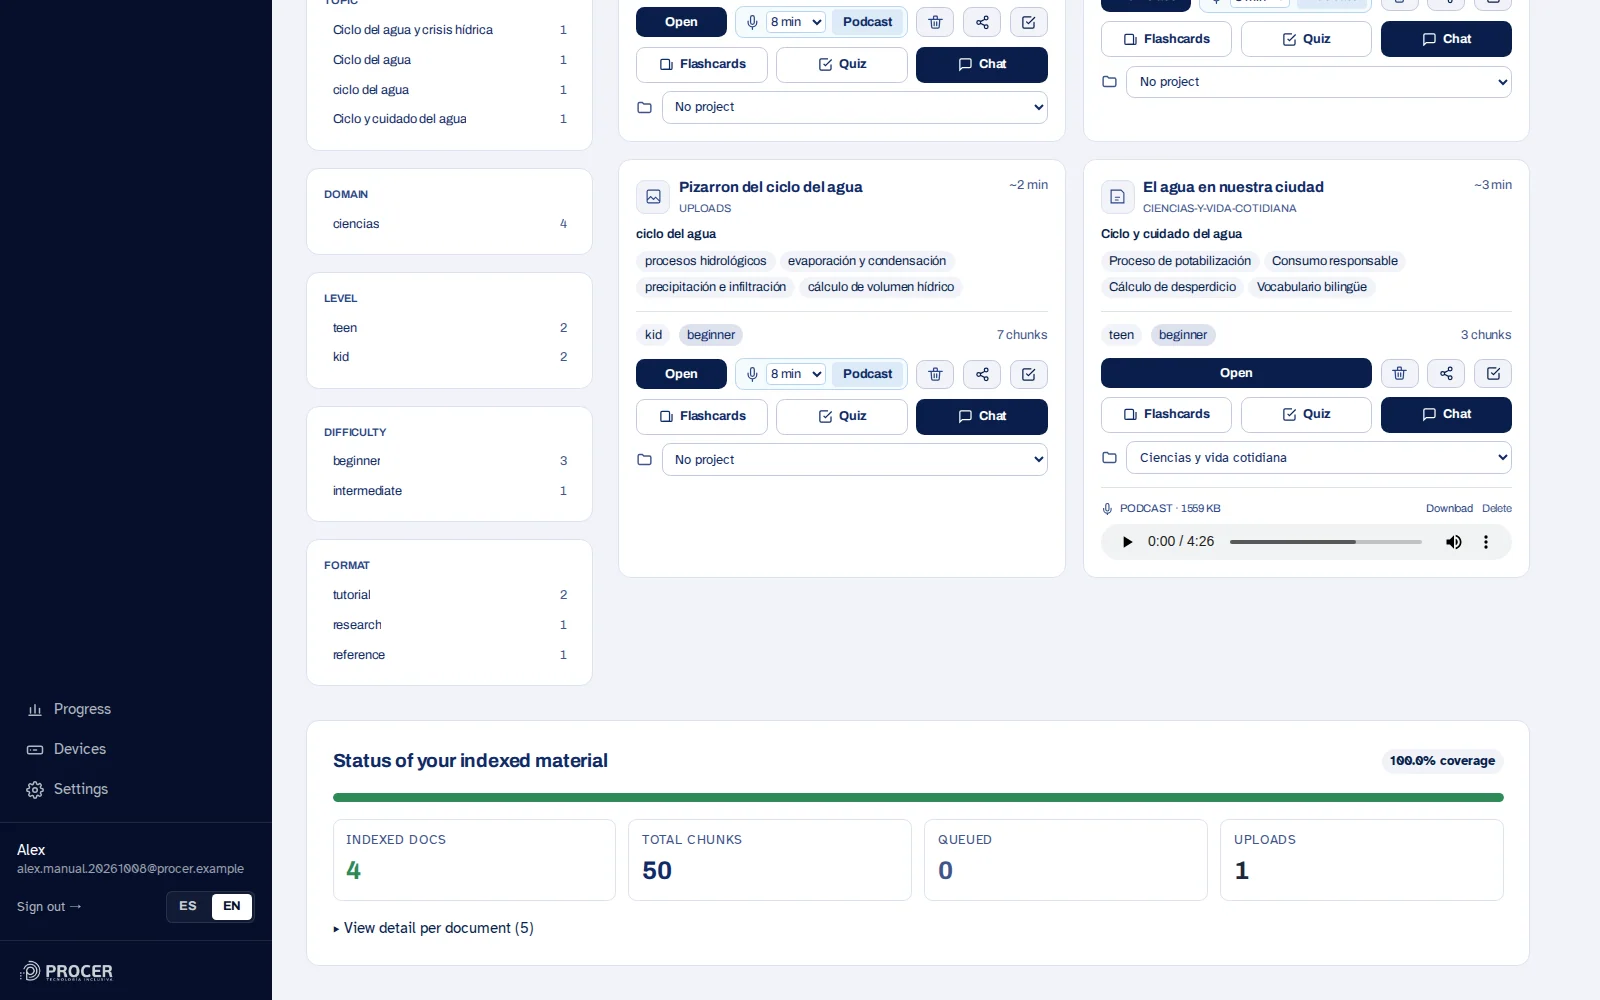
Material offers a quick view; the full Library retains more detailed options for projects, searching, podcasts, and administration.
-
Filter and sort
Use the Documents, Classes, Research, Photos, or Courses filters. Search by the material's text, switch between card and list views, and choose to sort by date or name. Remove filters if a file seems to have disappeared.
View the screen for this step
-
Create projects
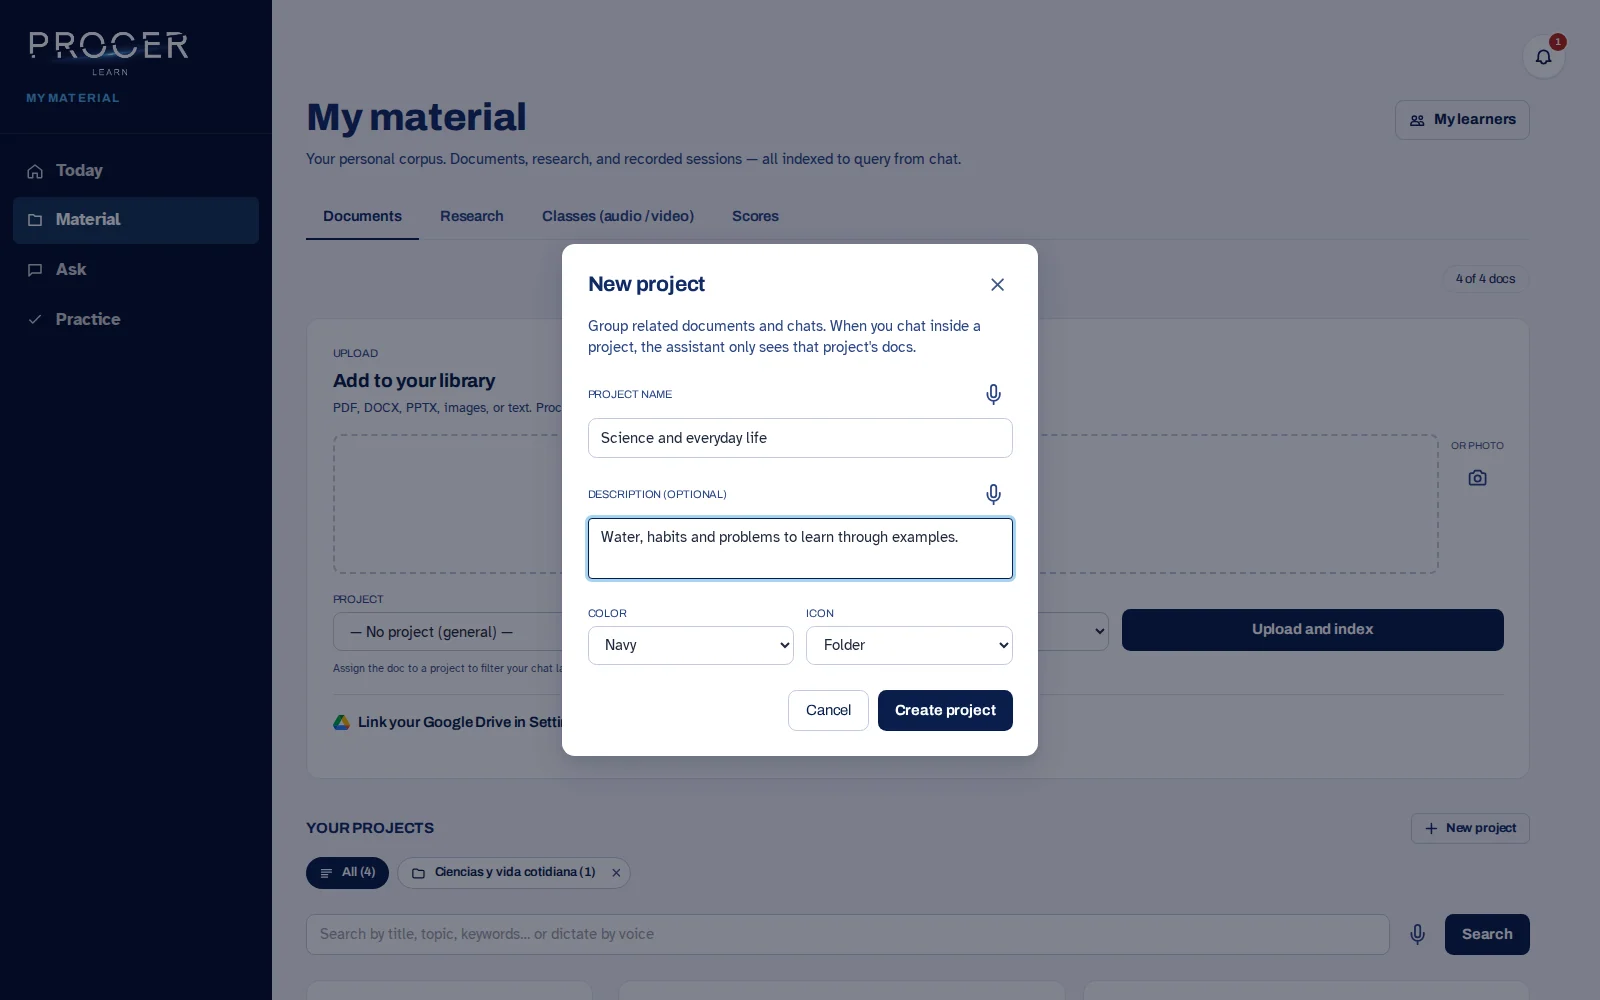
Open the full Library and choose New project. Type a name and description; you can choose a color and an icon. Group by subject, work, or purpose, avoiding names that are too general when you have a lot of material.
View the screen for this step
-
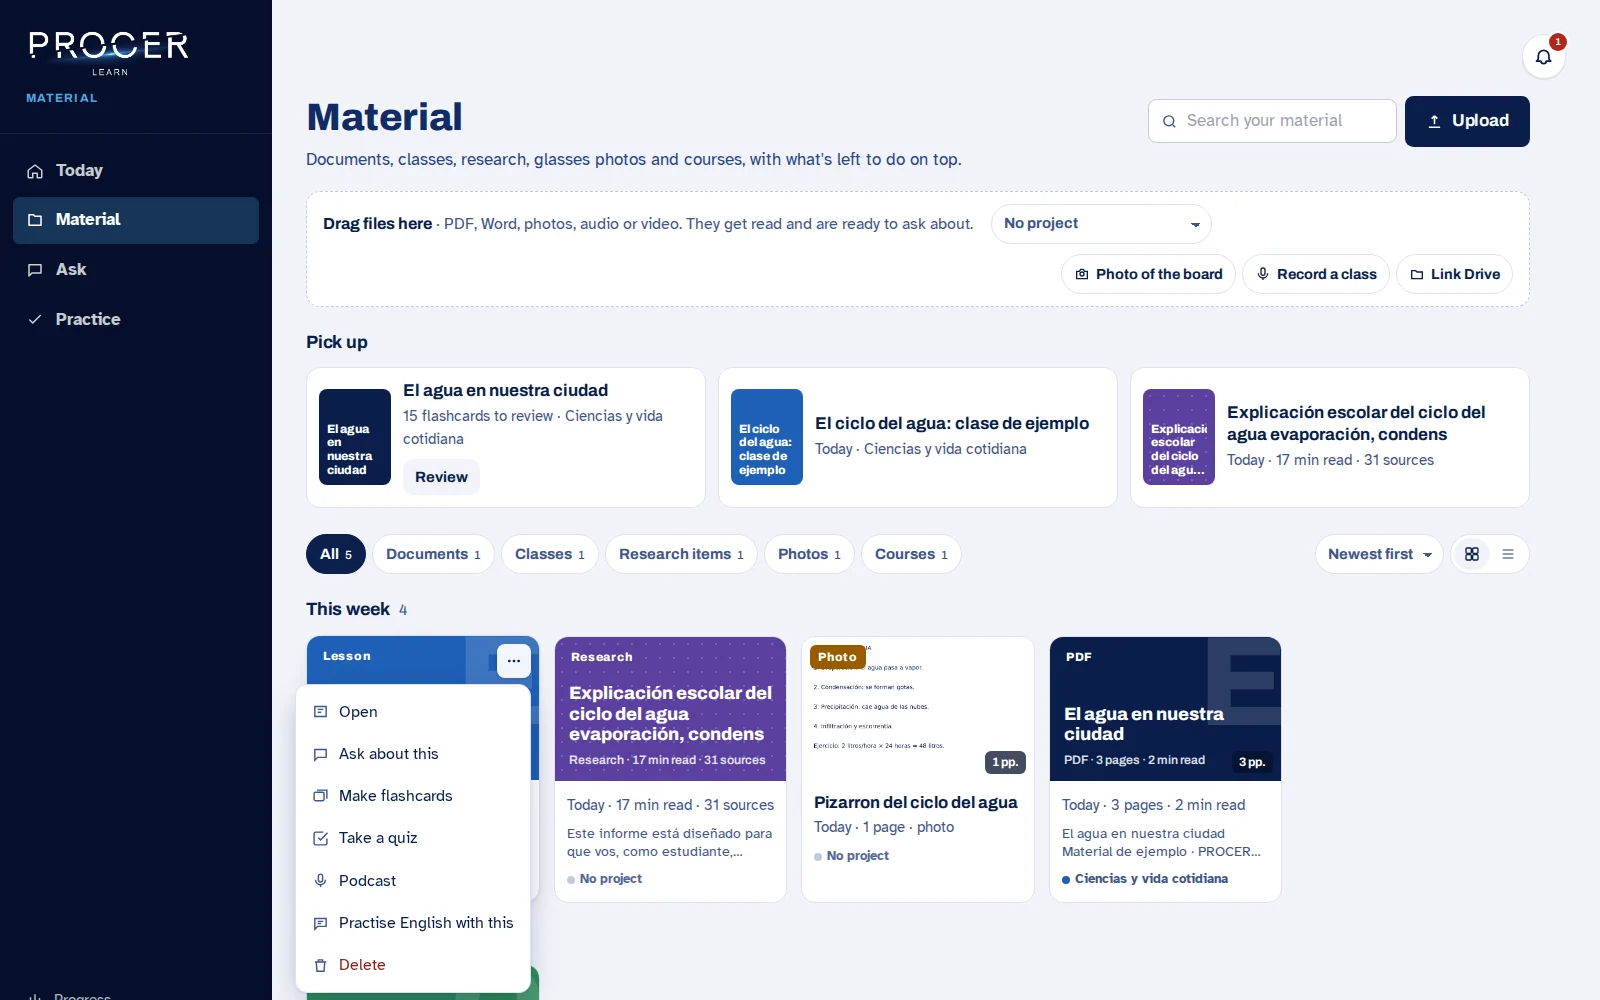
Use the document menu
Open the card's actions menu. From there you can open the file, Ask about it, create Flashcards, take a quiz, access the podcast, or practice English with that document. Options depend on the type of material.
View the screen for this step
-
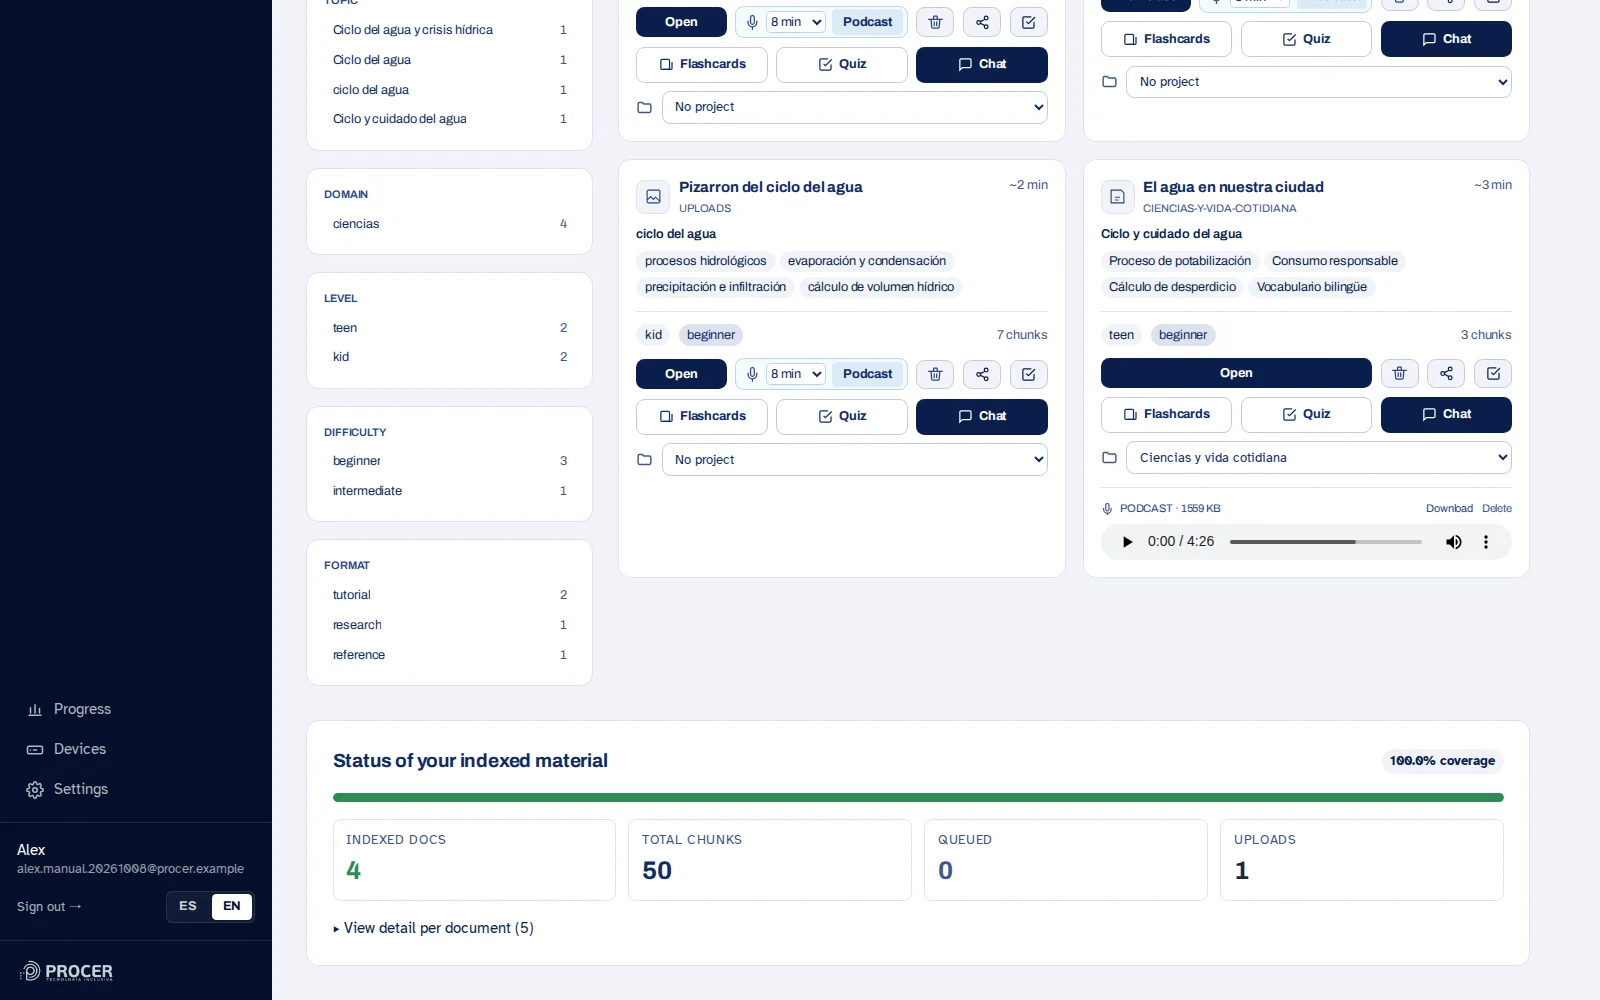
Move or delete with intention
Assign the document to another project when its organization changes. Deleting a document removes that material from the library and from future consultation. Archiving a project preserves its documents; it is not the same as deleting each file. Confirm that you have chosen the correct item.
View the screen for this step
Chapter 09 · Your material
Reading a document and returning to the original
Reading allows you to consult the file before relying on a response from the artificial intelligence.
-
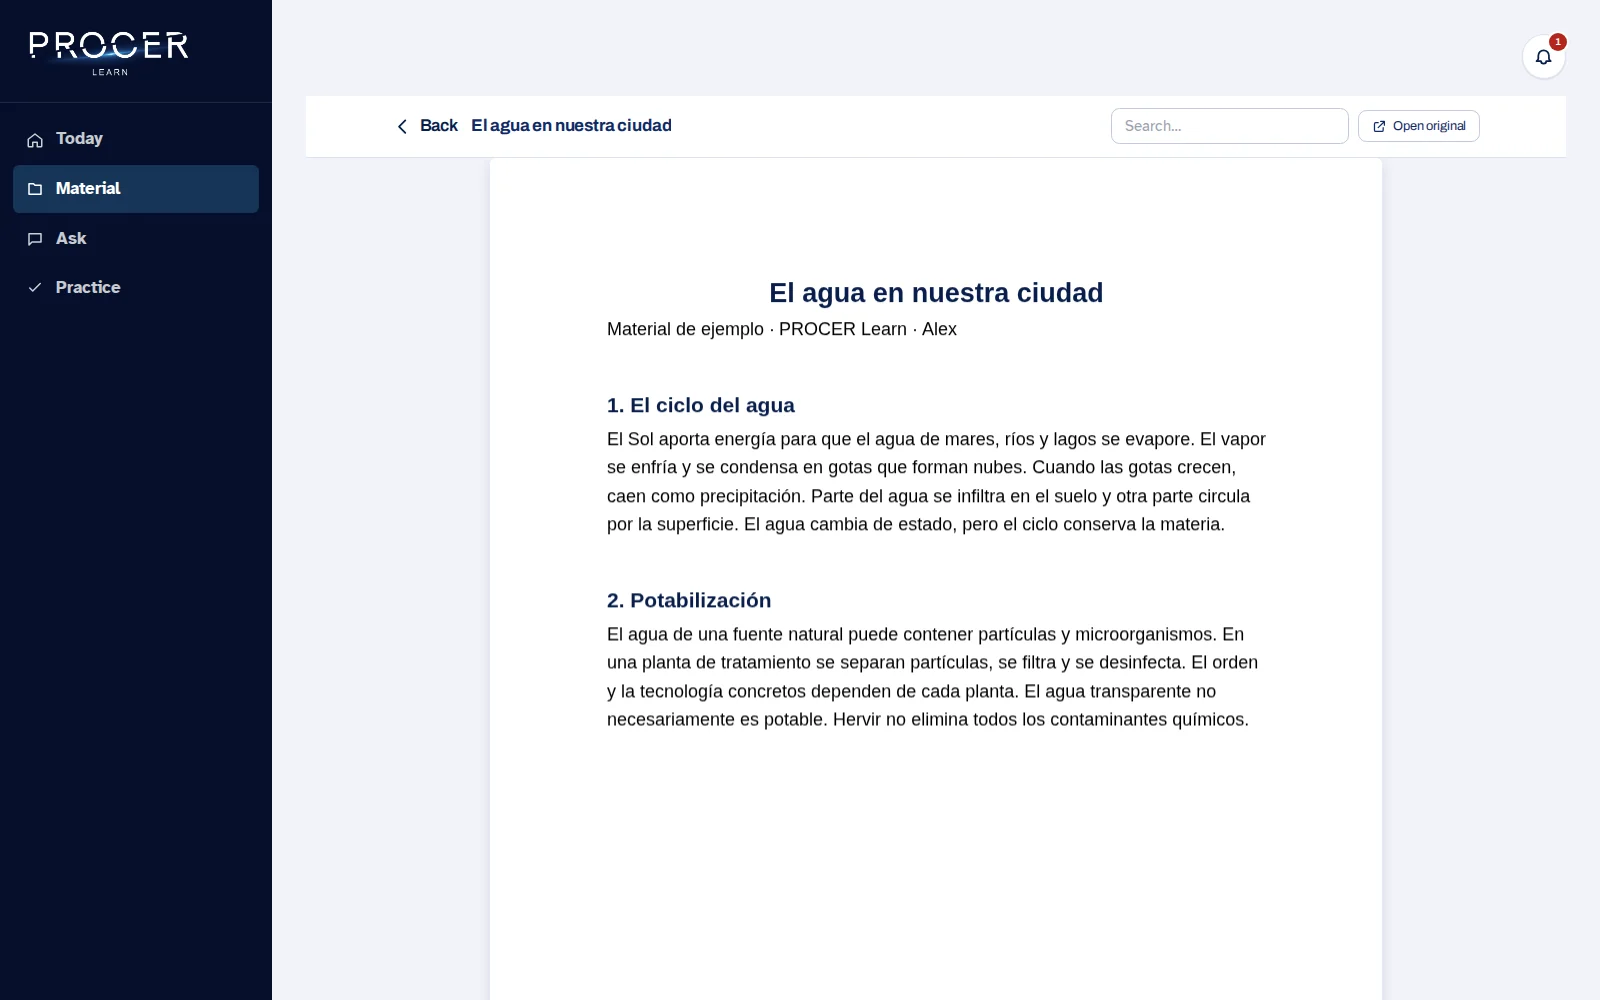
Open the document
Choose Open on its card or the link in the Biblioteca. Wait for the viewer to finish loading. In a PDF, you can browse the pages and their text. If an image or scan is not read correctly, compare it with the original.
View the screen for this step
-
Use the original when you need it
Open original shows the source file. It is useful for reviewing the layout, a table, a graph, or an instruction that needs more context. The view of the original and the representation prepared for Learn do not always look the same.
View the screen for this step
-
Resume reading
The viewer records the reading page so you can resume. Go back to Material or Today and open the same document. If you use browser zoom or a screen reader, check the page header to maintain your location.
View the screen for this step
-
Switch from reading to asking
Go back to the material menu and choose Ask about this. Name the passage or the problem you want to understand. If the response includes a citation, open it to compare the fragment and its context.
View the screen for this step
Chapter 10 · Your material
Photos, camera, and captures from your devices
A photo can be turned into study material. The result depends on the content being visible and the capture reaching the correct account.
-
Take a photo from the web
In Material, choose 'Photo of the board' and authorize the camera. Focus on the content, avoid cutting off the edges, and review the shot. You can retake it before choosing 'Use this photo'. Then, wait for processing as you would with any image.
View the screen for this step
-
You can also upload an image
If the camera is unavailable or you prefer an existing photo, use Upload file. Review the detected text in the viewer before requesting exercises. A blurry photo cannot be fixed by changing the question to the assistant.
View the screen for this step
-
Find captures from your glasses
Use the filter 'Photos' and the card 'From your glasses' in Today. For a capture to appear, the app and Learn must use the account associated with the device and have completed the transmission. Linking alone does not produce a new photo.
View the screen for this step
-
Separate responsibilities
Physical capture, Bluetooth, navigation, and glasses management are handled in the app. Learn allows you to consult and study the received material. If a photo does not arrive, first check the app, the connection, and the account before repeating an import in Learn.
View the screen for this step
Chapter 11 · Your material
Recorded classes: audio, video, and YouTube
Classes have their own workflow: upload or record, transcribe, and review. The resulting texts can then be used for studying.
-
Upload a class
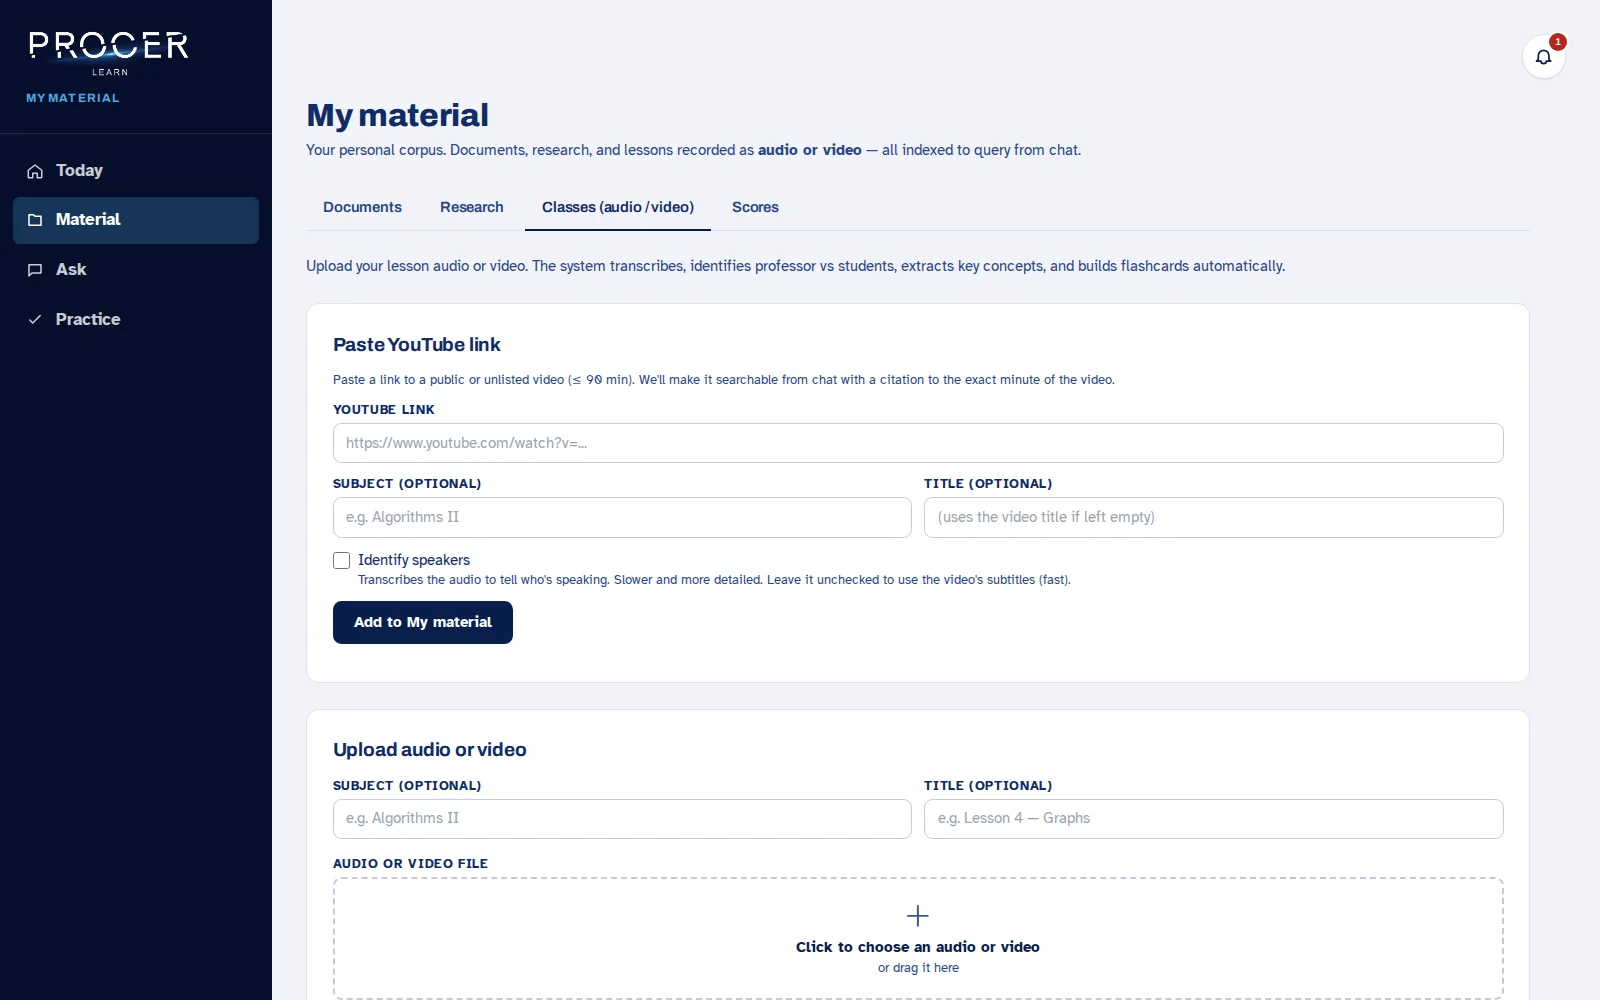
Go to Your recorded classes from Material. In Upload audio or video, specify the subject and title, choose the file, and press Upload and process. Use a name that includes the topic so you can recognize it among other classes.
View the screen for this step
-
Or record in the browser
Choose Record here or Record class, authorize the microphone, and verify that the app is capturing audio. Stop the recording when finished and complete the submission. For real classes, agree on the recording with those participating.
View the screen for this step
-
If you start from YouTube
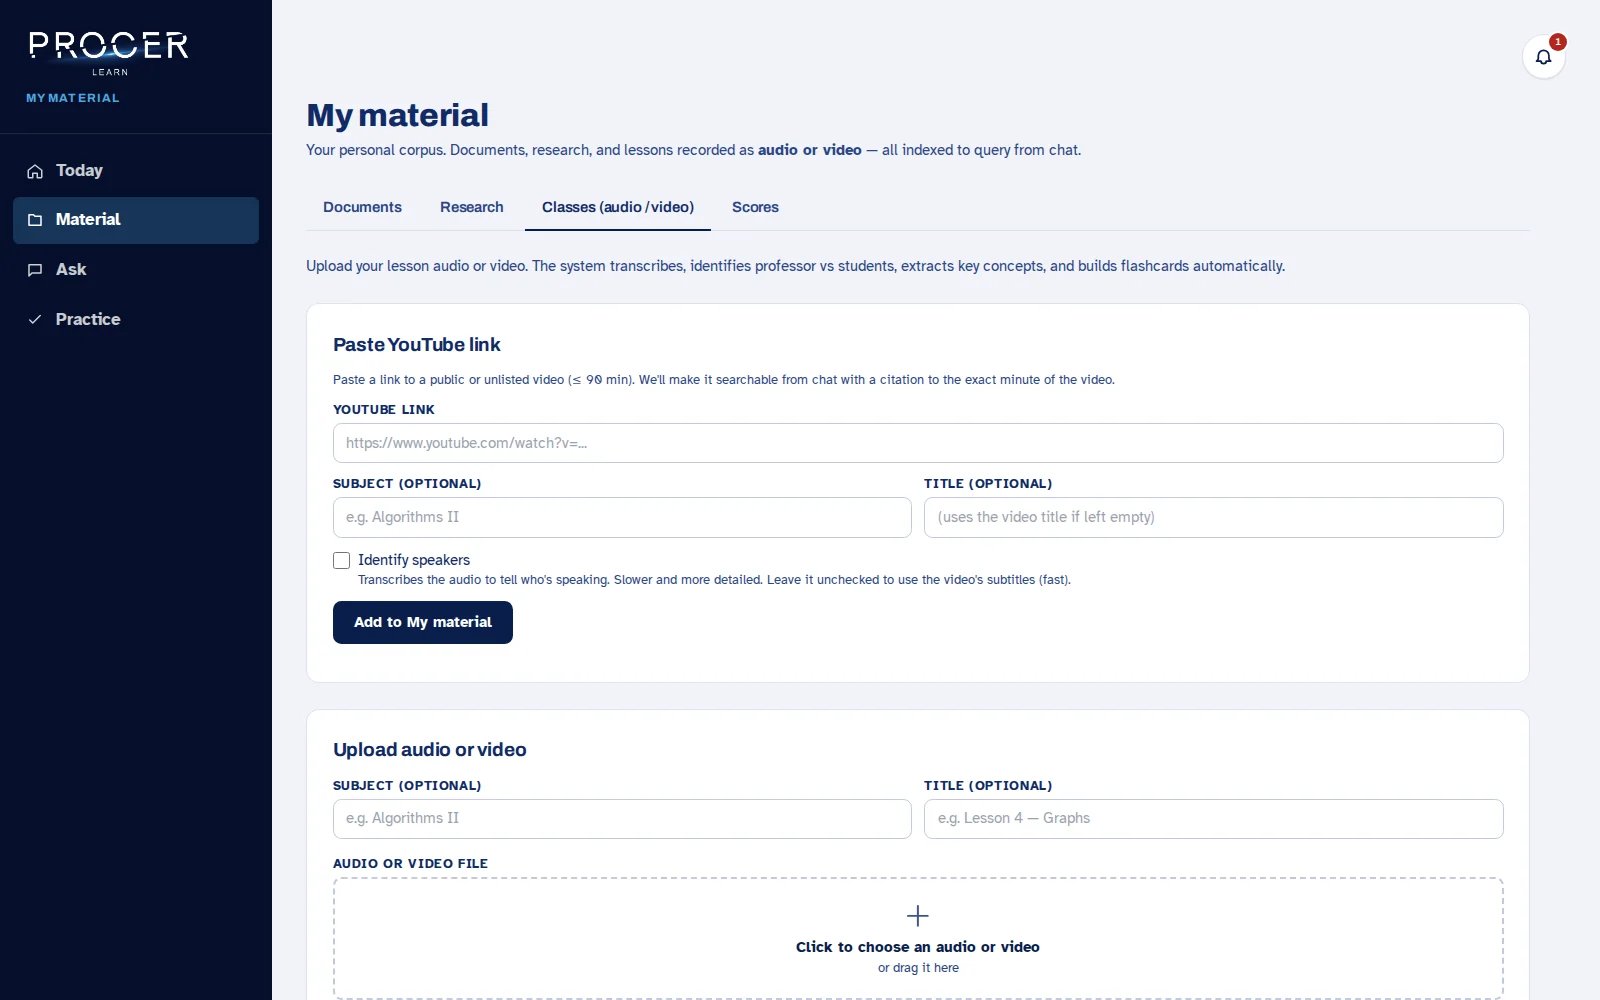
Paste the link into the YouTube form, complete the title and subject if necessary, and add it to Material. Importing depends on the service being able to access the video. The fact that a video plays in your browser does not guarantee it can be imported.
View the screen for this step
-
Wait for the transcription
The list shows statuses such as Transcribing. A class of several minutes may take some time. Open the details when it finishes; do not mistake a processing screen for a final empty transcription. The status and retry options help track a failed job.
View the screen for this step
-
Review and study
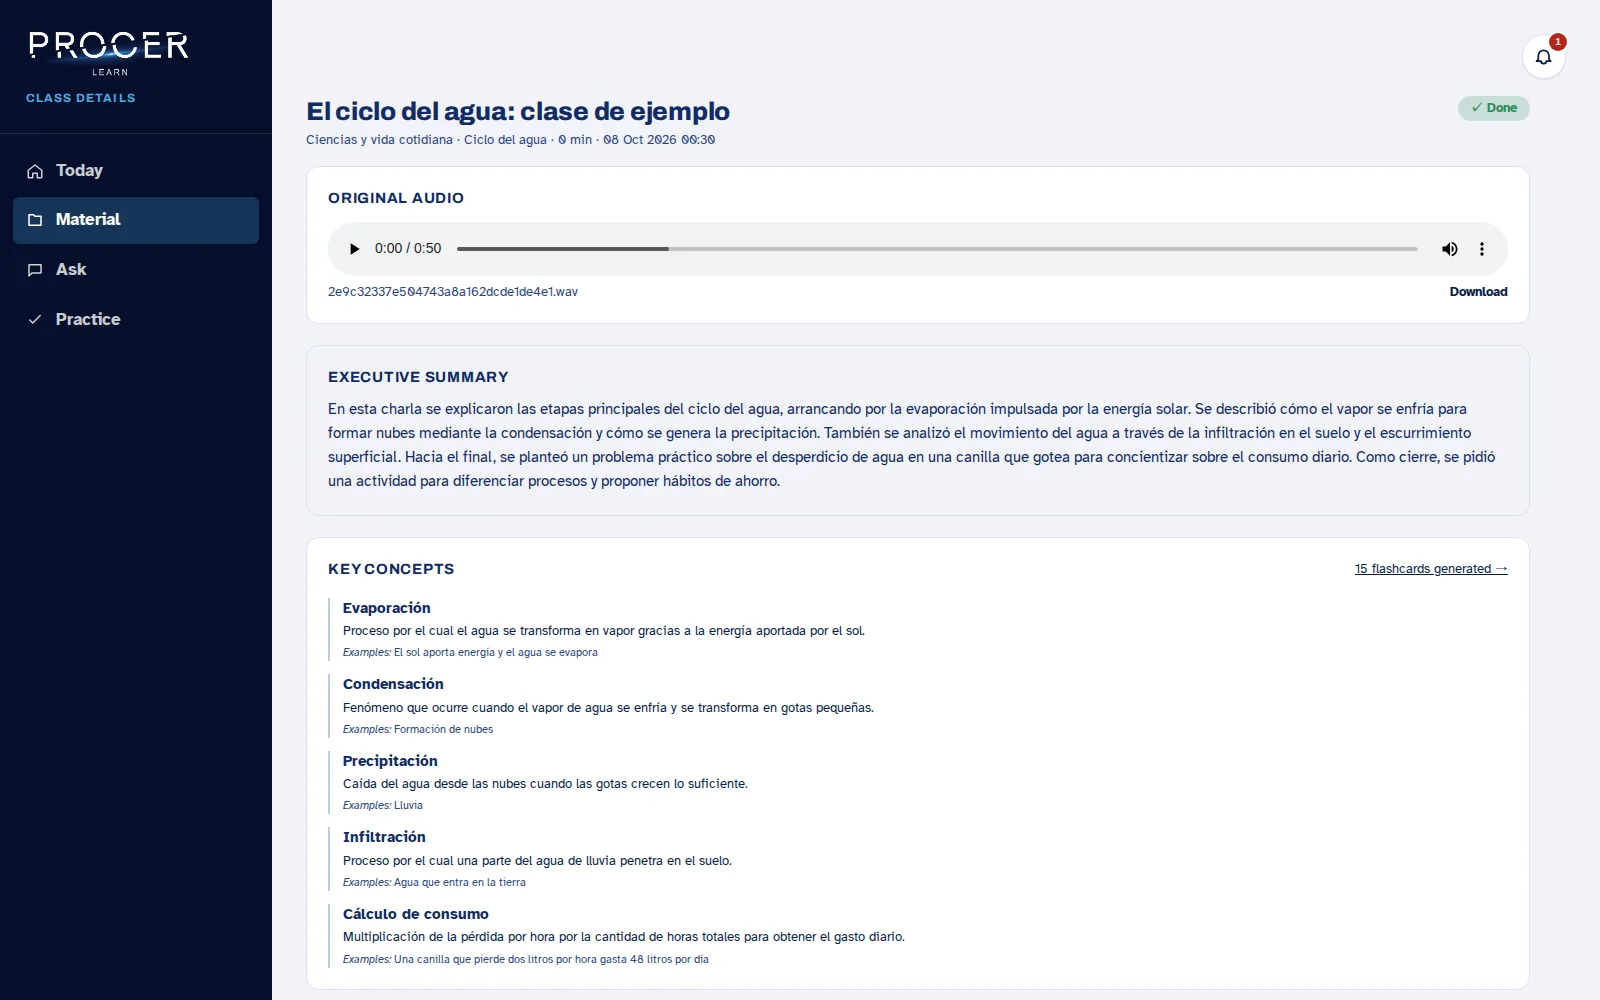
In the details, go through the transcription, its timestamps, and the available derived sections, such as the summary, concepts, or activities. Use the player to compare the audio and download the transcription if you need to correct it or use it outside of Learn. Speaker names require review.
View the screen for this step
Chapter 12 · Studying and practising
Ask: conversations and sources
The chat is used to work with your materials or ask general questions. Choosing the context correctly avoids responses that mix up topics.
-
Create or resume a conversation
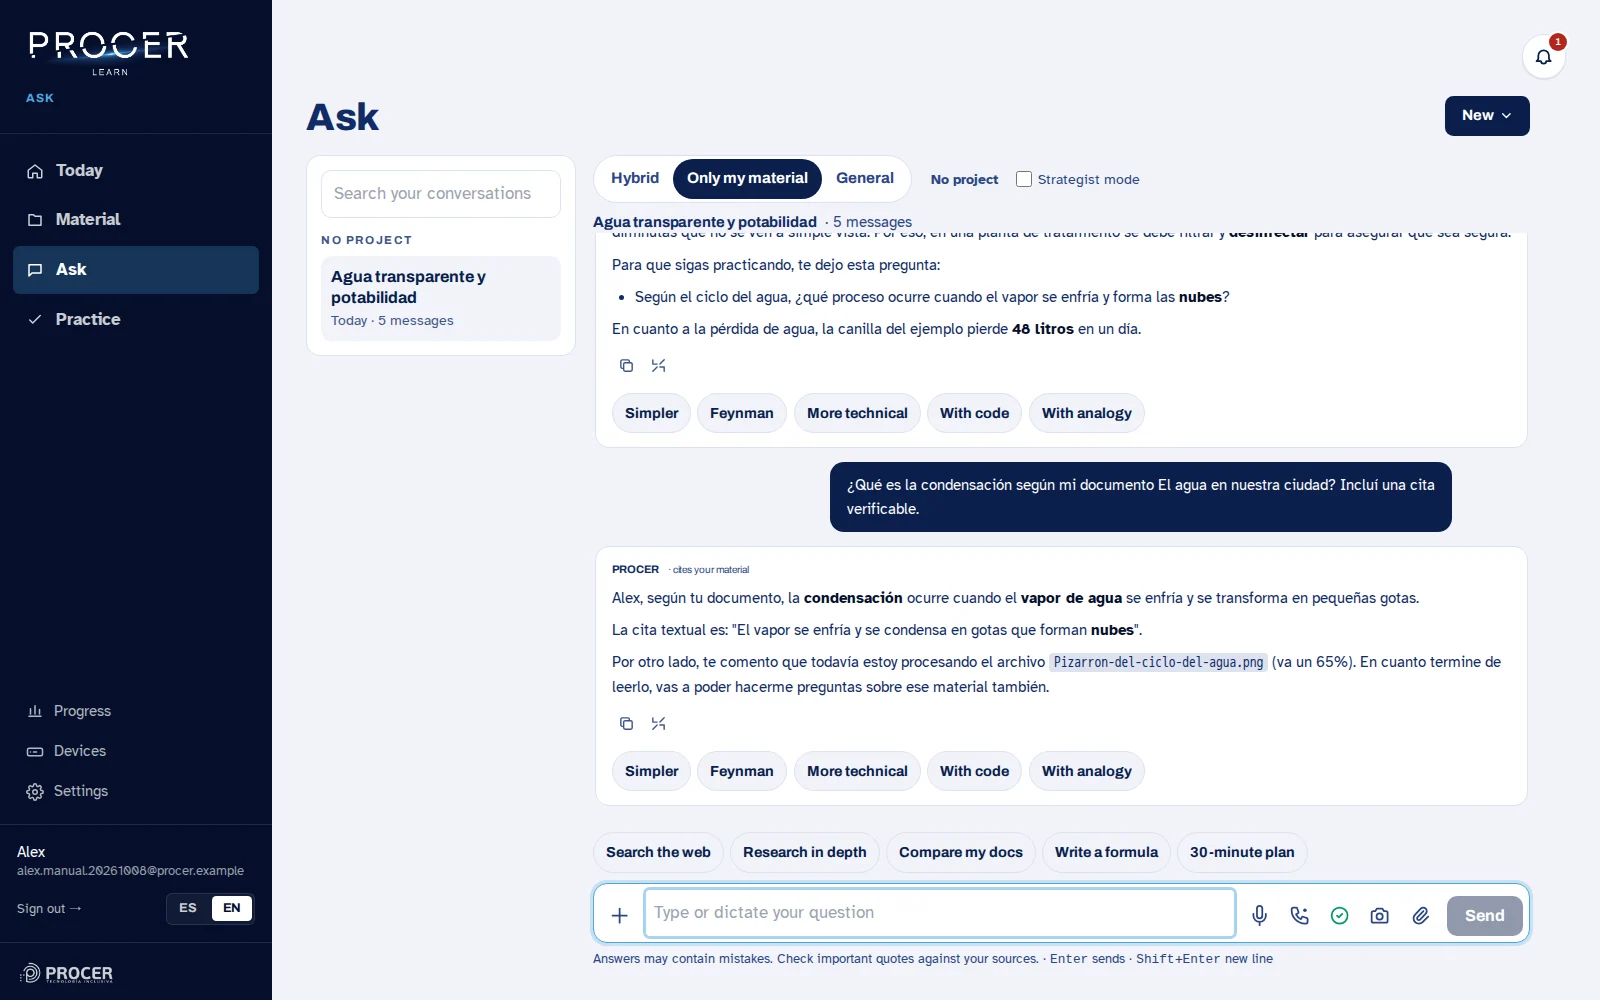
Go to Ask. Choose New to start a free conversation or one associated with a project, or look for an existing chat in the list. You can rename, pin, and delete them using their actions. Deleting a conversation does not automatically delete the document from the Biblioteca.
View the screen for this step
-
Choose the mode
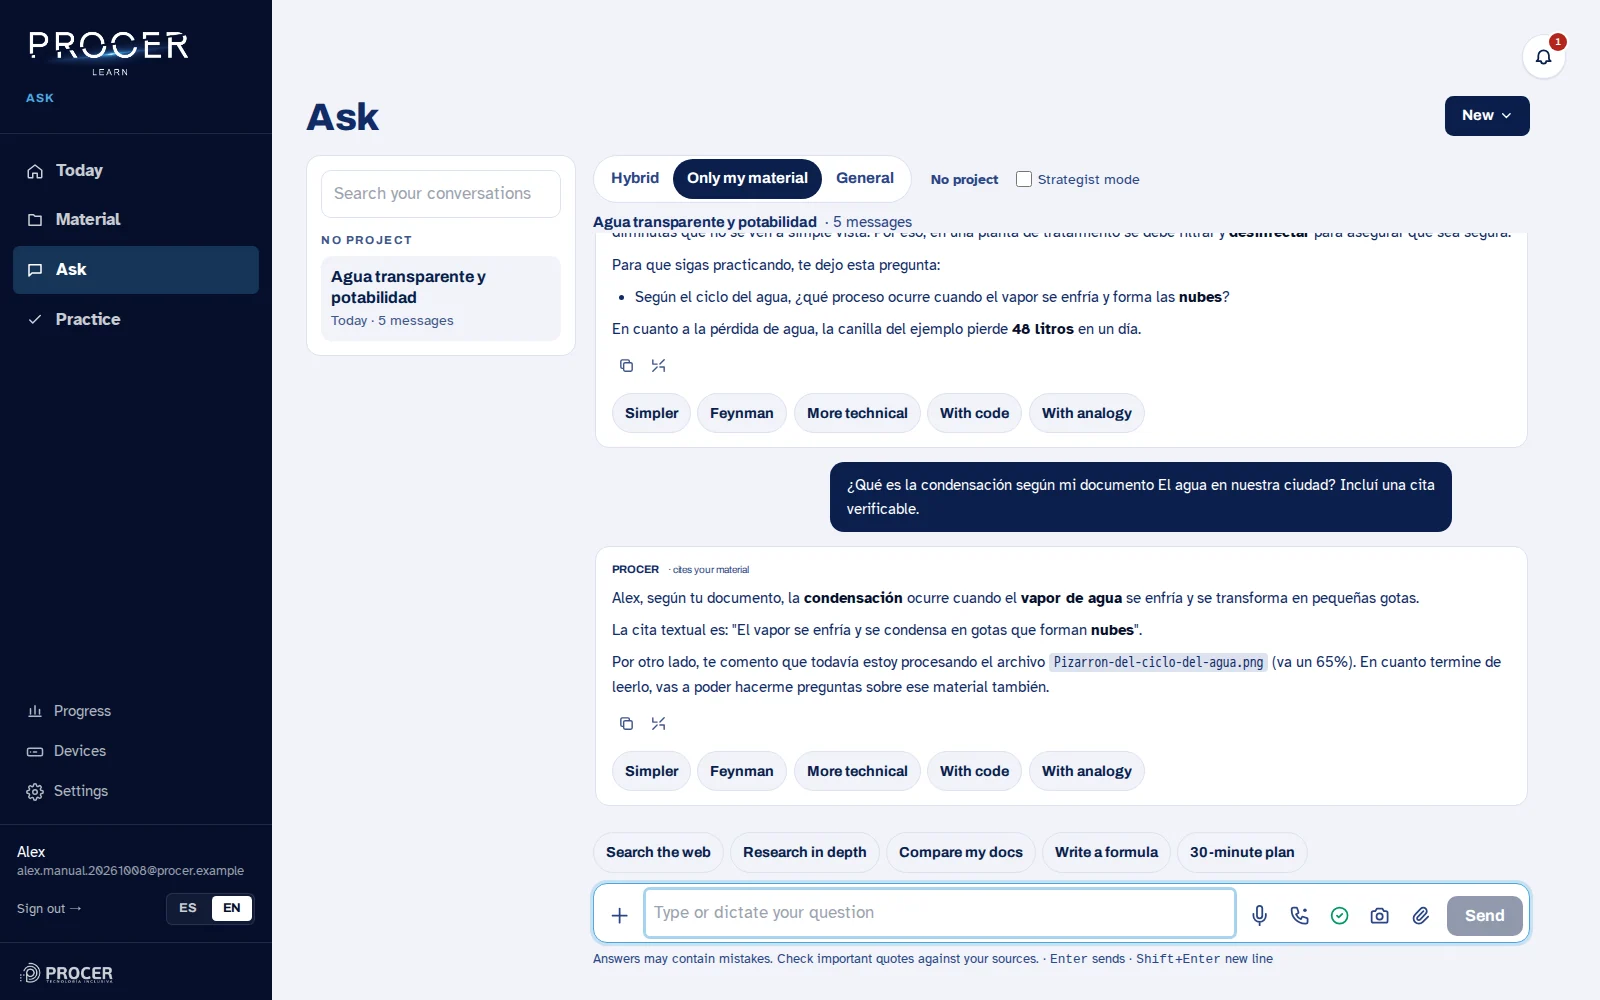
Hybrid combines the available tools. Only my material restricts the query to your content. General is for questions that do not start from the library. Also select the project when applicable; if you do not choose one, that project filter will not be applied.
View the screen for this step
-
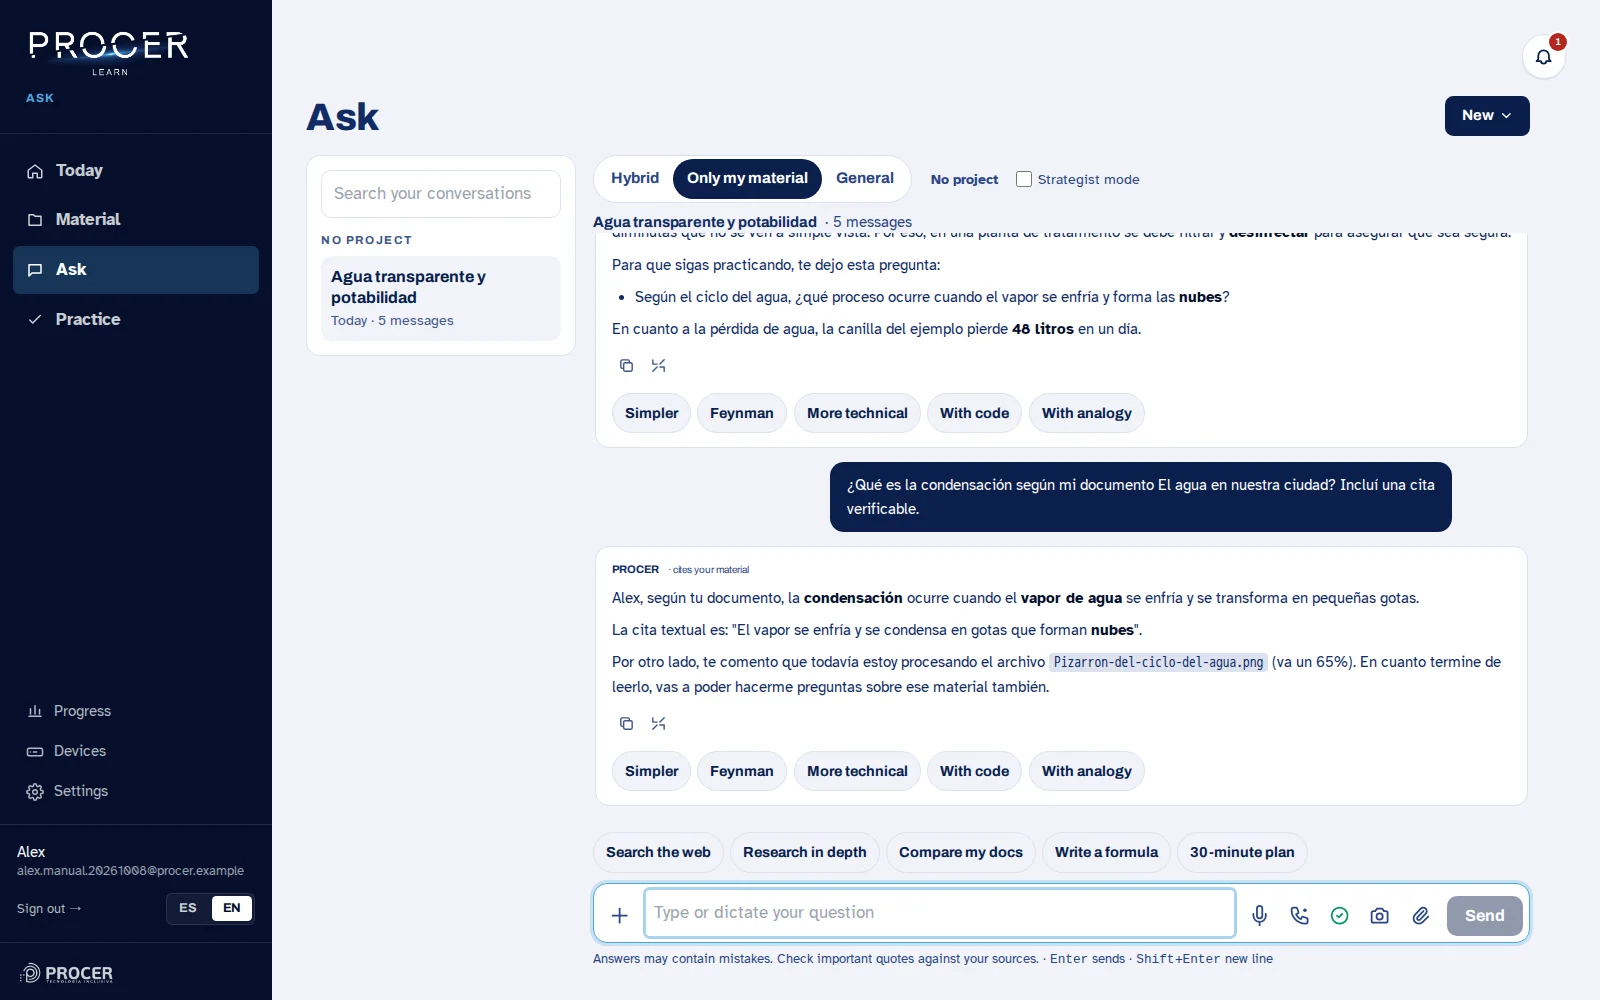
Write a specific question
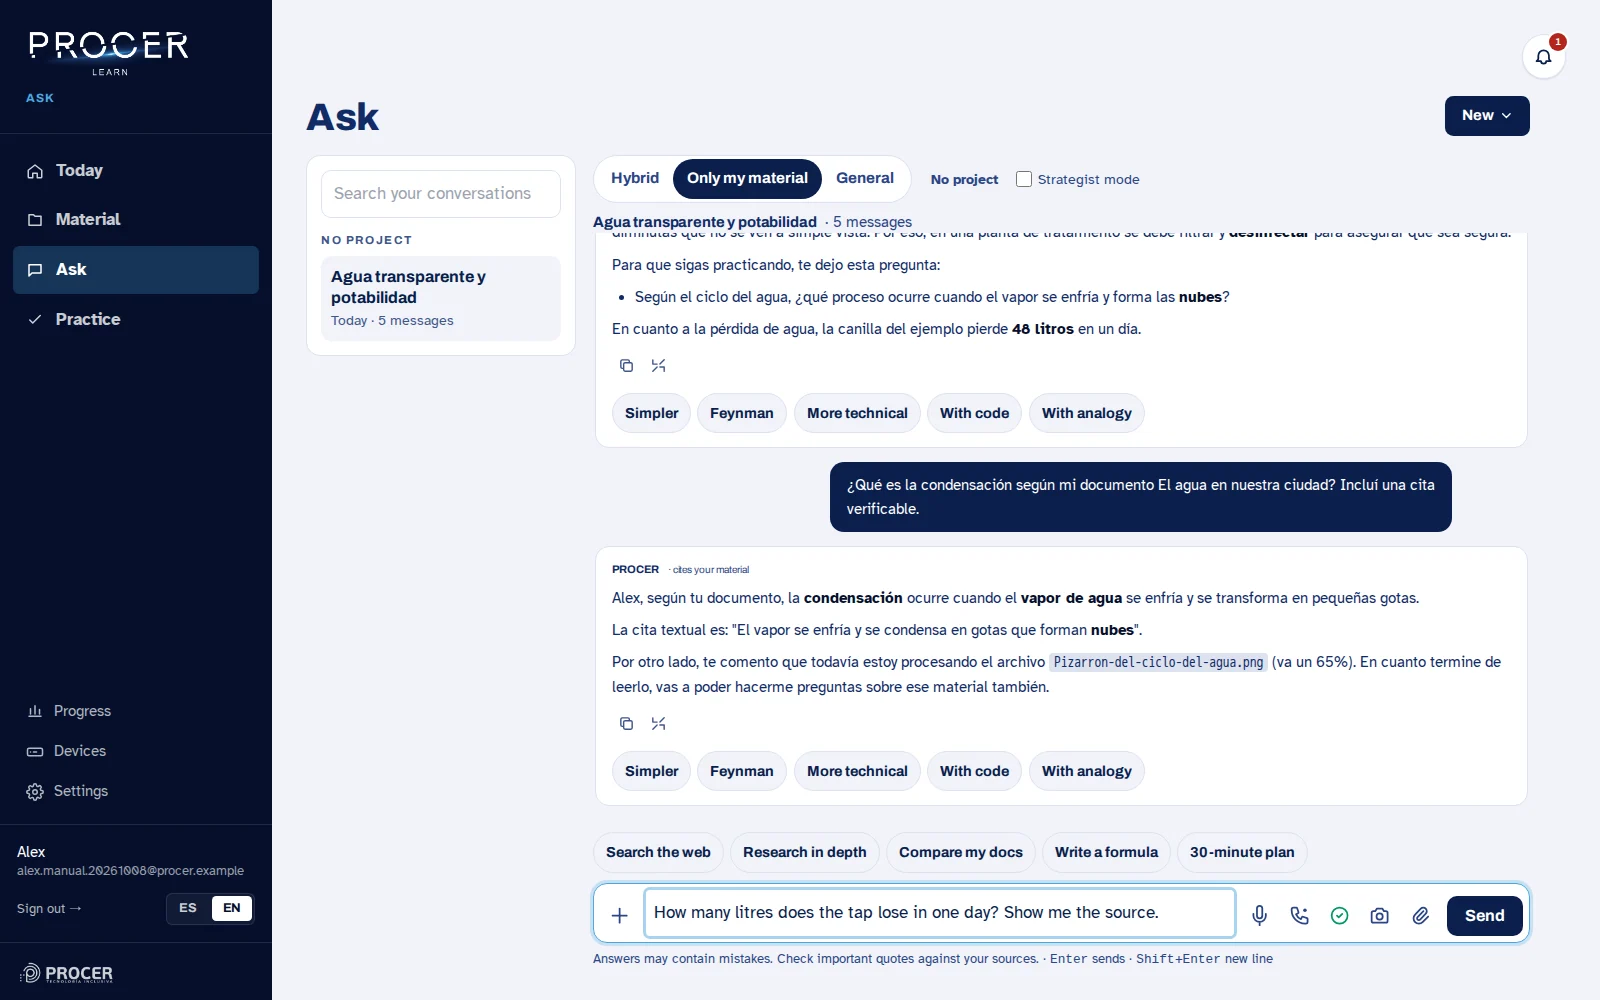
Indicate the document and what you want to achieve: explain, compare, solve, or practice. Enter sends the message and Shift plus Enter adds a line. In the example, we ask how many liters the faucet loses in a day and request the source.
View the screen for this step
-
Wait for or stop the response
During generation, Send turns into Stop. If you stop it, the turn may remain incomplete: rephrase or try again when you decide. When finished, Alt plus R takes you to the response and Alt plus I returns to the typing field.
View the screen for this step
-
Check the citations
A useful response must allow you to review its source when it uses material. Open the references that appear and compare the passage with the file. If there is no verifiable reference, ask it to point out the document and review it yourself; a label saying it used material does not prove every statement on its own.
View the screen for this step
Chapter 13 · Studying and practising
Attachments, actions and chat styles
The chat tools allow you to work on a question without navigating through all the sections separately.
-
Attach a file
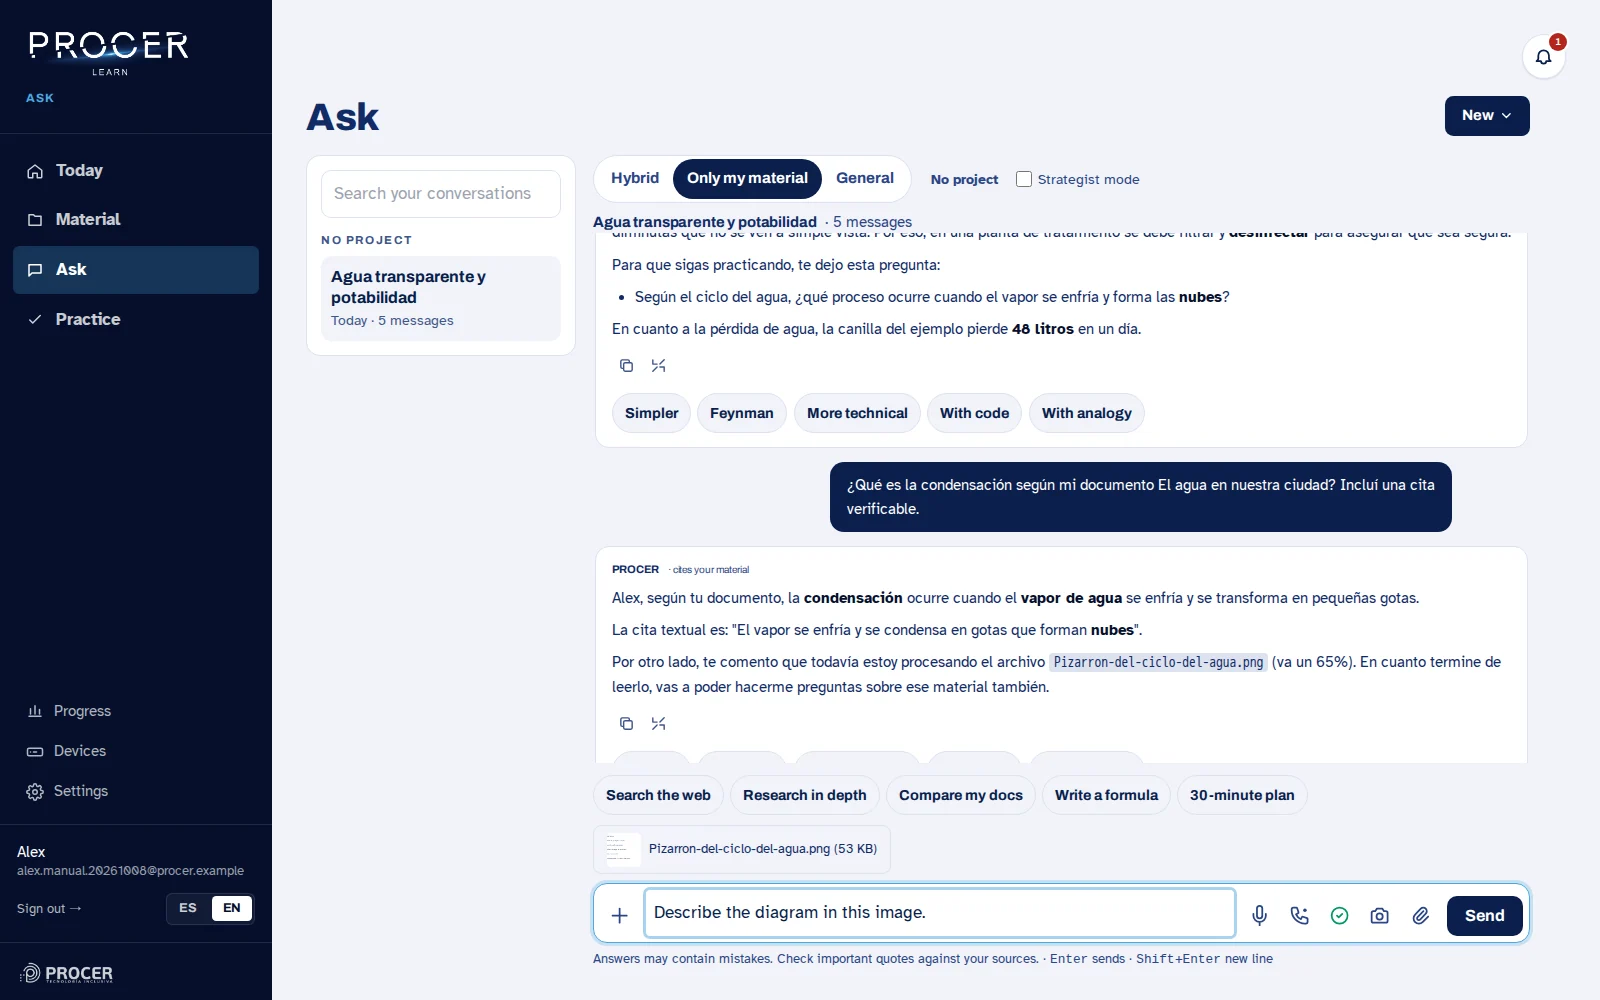
Use Attach file and review the preview before sending. If Save to Biblioteca appears, activate it only when you want to keep it as material. Attaching for a single question and uploading permanently are different decisions.
View the screen for this step
-
Request another type of explanation
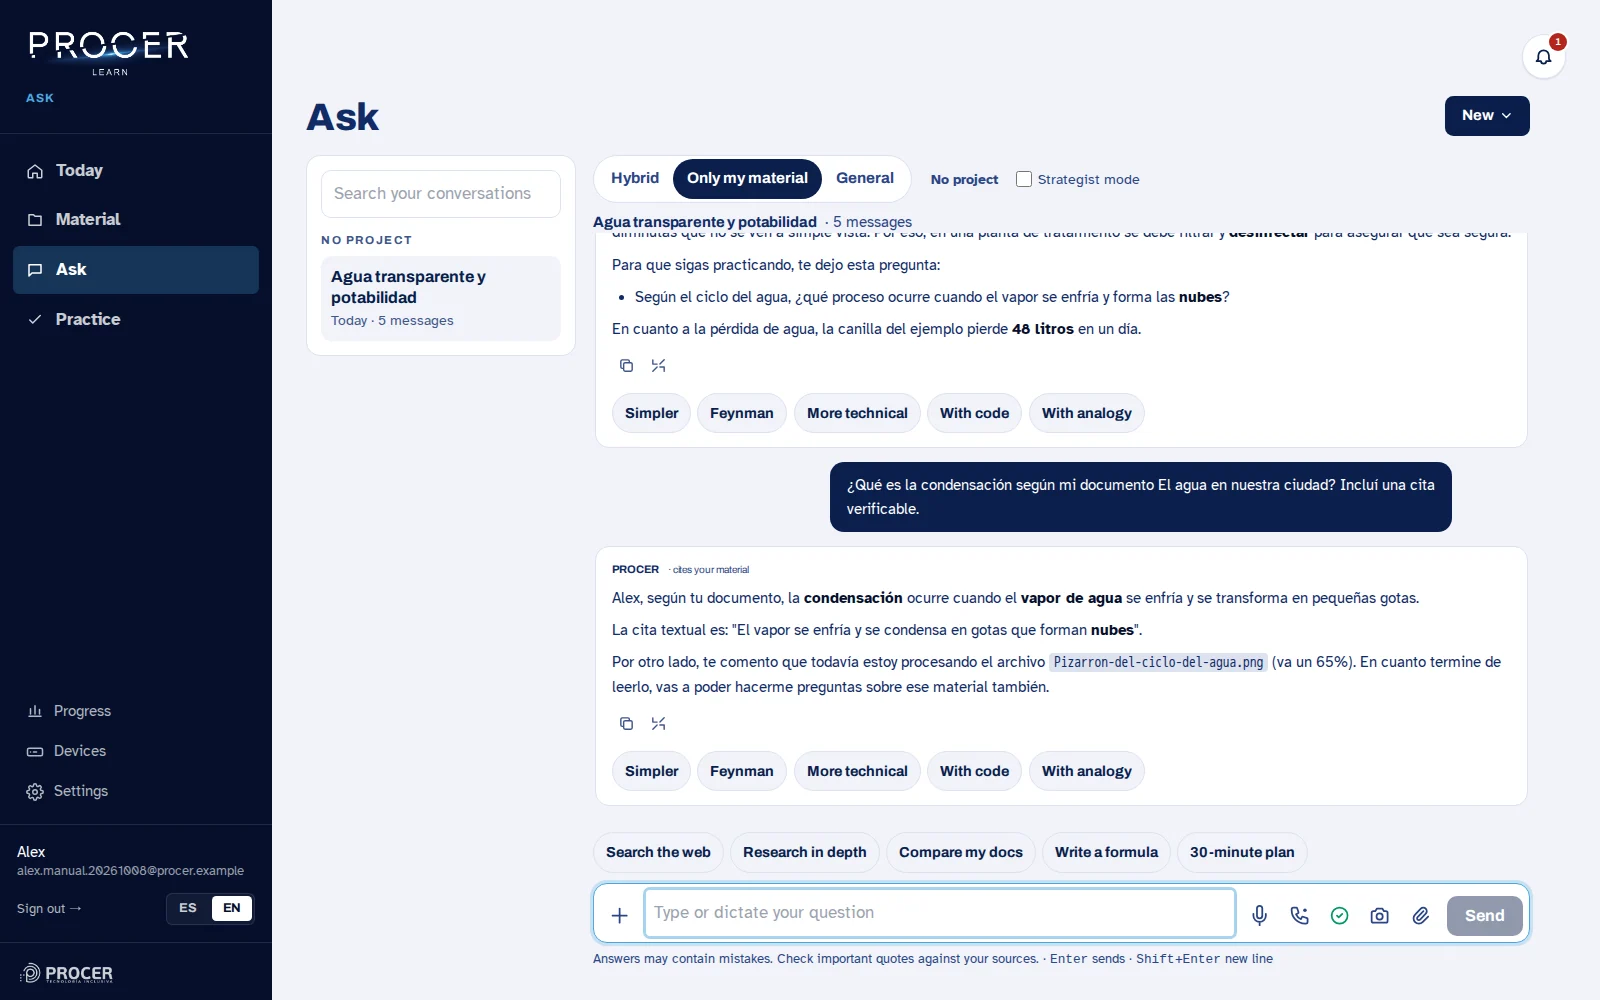
Below a response, you can choose Simpler, Feynman, More technical, With code, or With analogy. Use them to rephrase the explanation. If you need to correct the original question or regenerate it, use the message actions and compare the new response.
View the screen for this step
-
Choose an explicit action
The actions menu includes Search the internet, Research in depth, Write formula, Study with me, and Compare my docs. Select one and complete the topic or prompt. Research in depth creates a piece of work that can be consulted later in Material.
View the screen for this step
-
Compare with context
To compare documents, have both uploaded and indicate their names and the criteria: differences, similarities, arguments, or procedures. Ask for citations from each source. A shared project helps limit the set you want to analyze.
View the screen for this step
-
Use advanced options with a purpose
Strategist mode changes how a query is approached. Model and provider preferences are in Settings. You do not need to enter your own key to repeat the basic path shown in this manual.
View the screen for this step
Chapter 14 · Studying and practising
Voice conversation from the chat
Voice conversation requires a microphone, audio playback, and a stable connection. The experience may vary depending on the browser and sound output.
-
Open the voice conversation
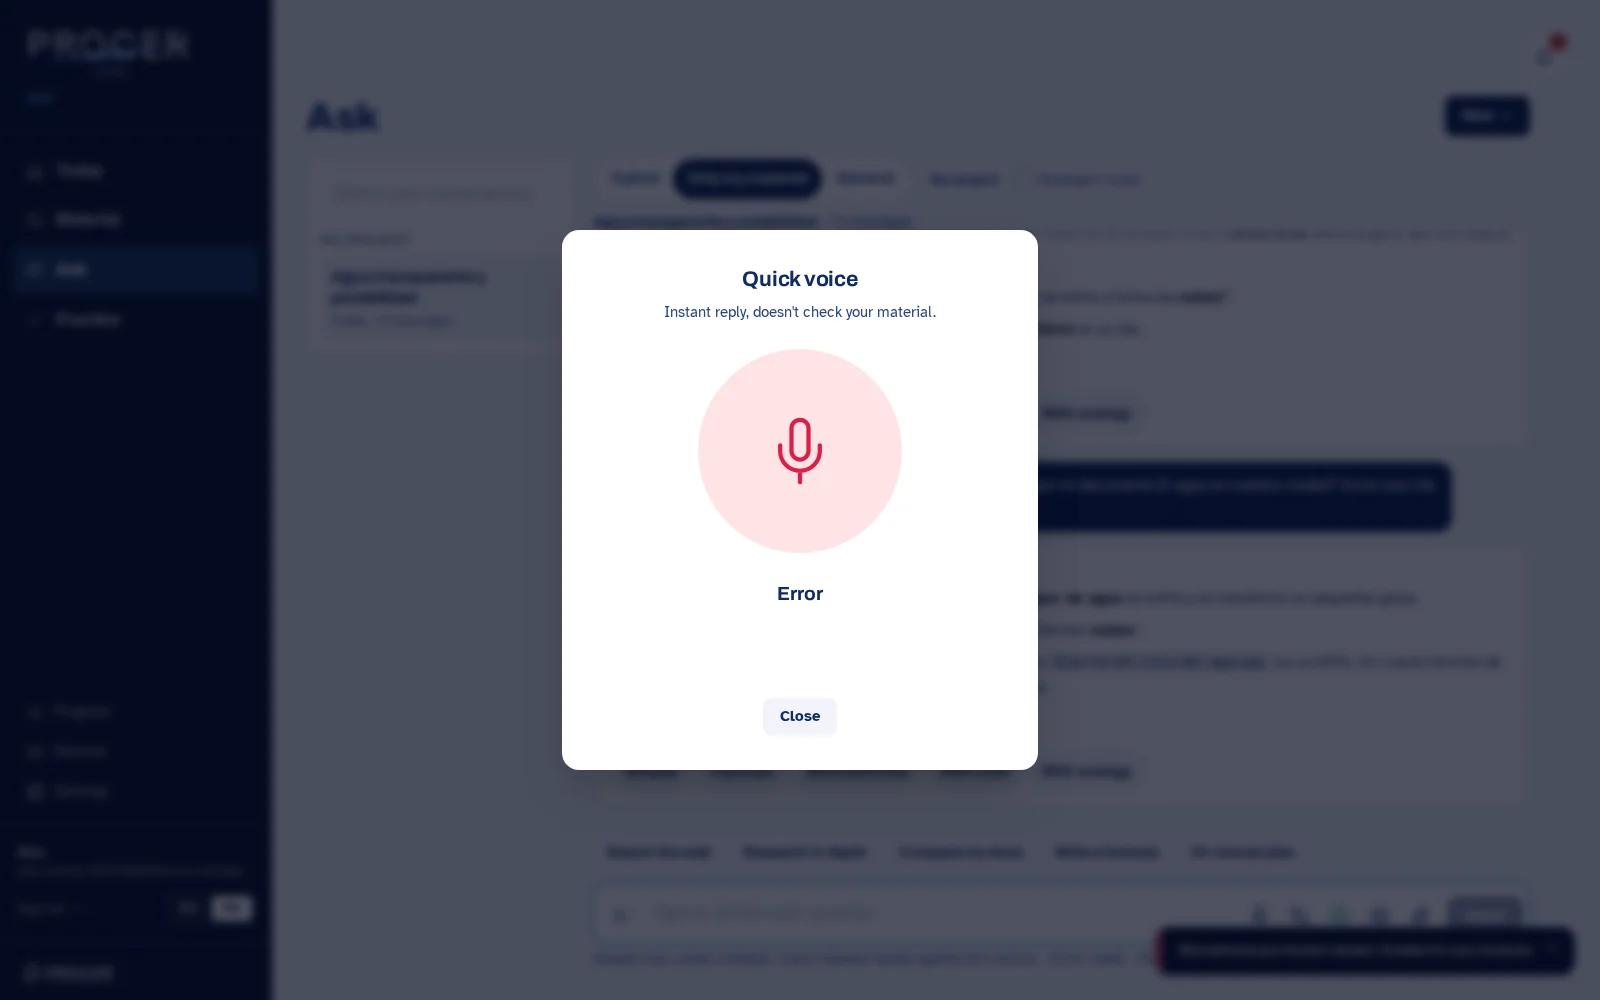
In Ask, there are different controls: Dictate question fills the text field. Quick voice responds without consulting your material. Intelligent voice uses the library, internet, and memory. Choose the mode according to your needs; the indicated shortcuts are Alt plus M to dictate, Alt plus V for quick voice, and Alt plus S for intelligent voice.
View the screen for this step
-
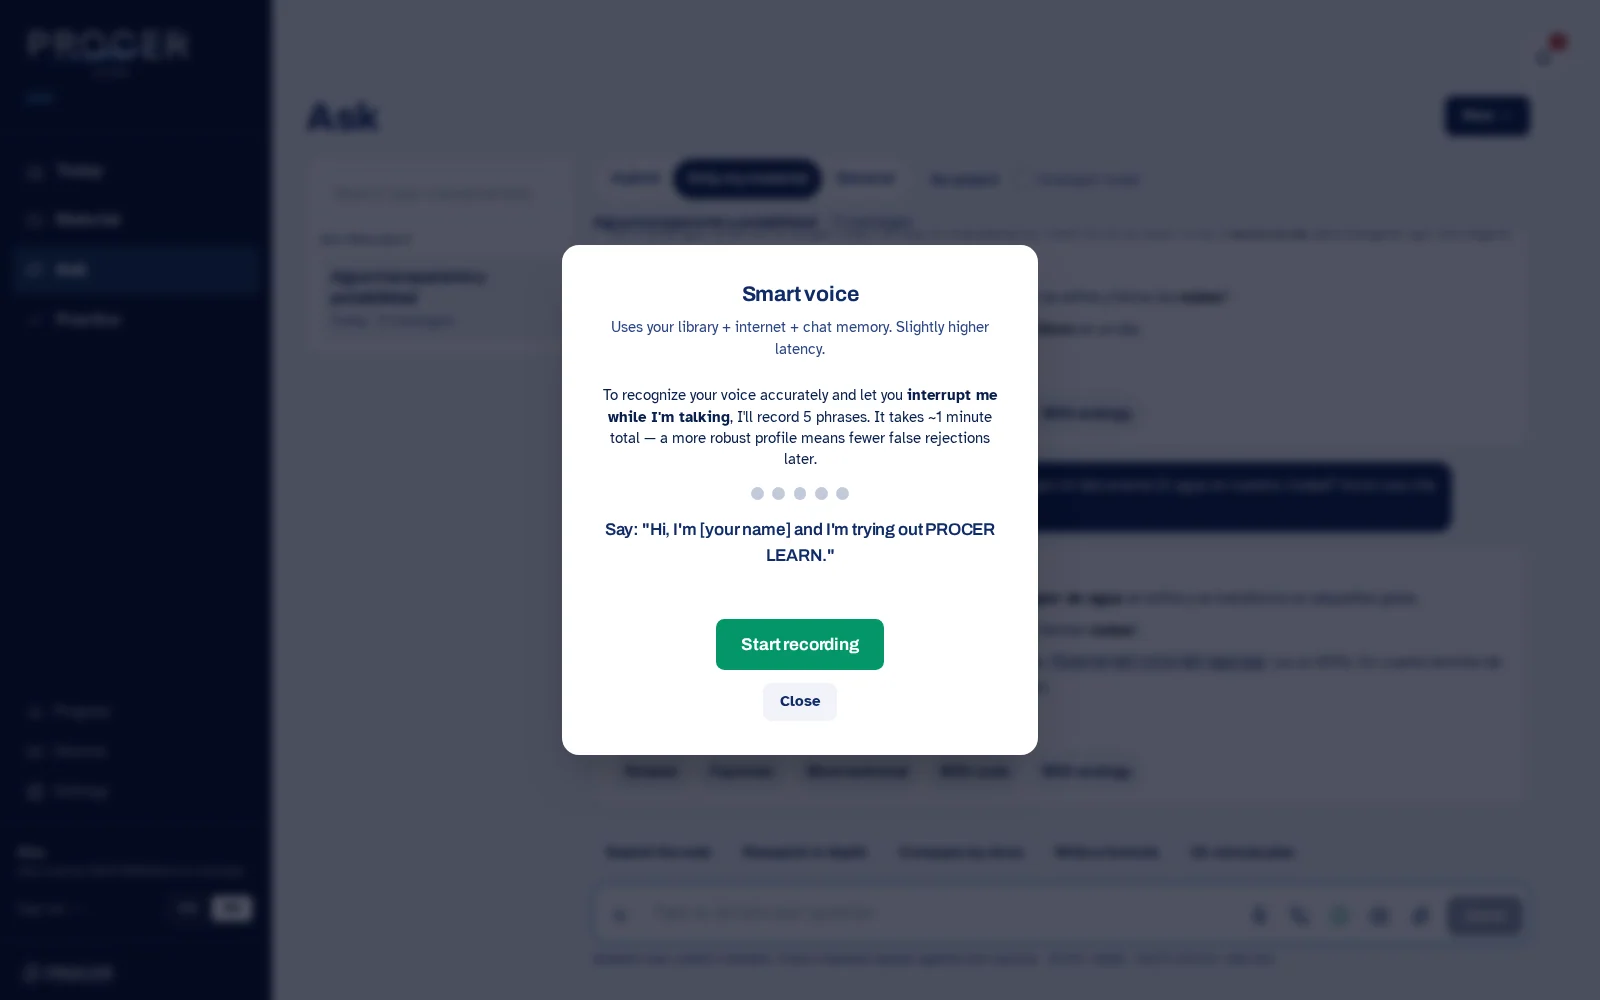
Register your voice if requested
Intelligent voice may open a guided registration if you do not yet have a voice associated. Follow the five prompts: record, stop, and move to the next one. Use your own voice in a quiet environment and wait for confirmation. This registration alone does not guarantee that any other voice or echo will be ignored.
View the screen for this step
-
Speak and follow the status
Wait for the listening indication, speak naturally, and leave a pause to end the turn. Follow the listening, processing, and response statuses. The dictation that fills a field and a continuous conversation are different controls.
View the screen for this step
-
Interrupt with an explicit control
If voice detection does not cut off the response when you want, use the available button to stop or interrupt. Avoid opening two voice conversations or two captures at the same time. Close the dialog when finished to release the microphone.
View the screen for this step
-
Adjust the environment
Using headphones usually makes it easier to prevent the microphone from picking up the assistant's voice again. The browser requests echo cancellation and noise suppression, but their effectiveness depends on the device. A synthetic test does not demonstrate how it works in a noisy room.
View the screen for this step
Chapter 15 · Studying and practising
Research
Research develops a topic using searches and sources. It is a longer process than a brief chat response.
-
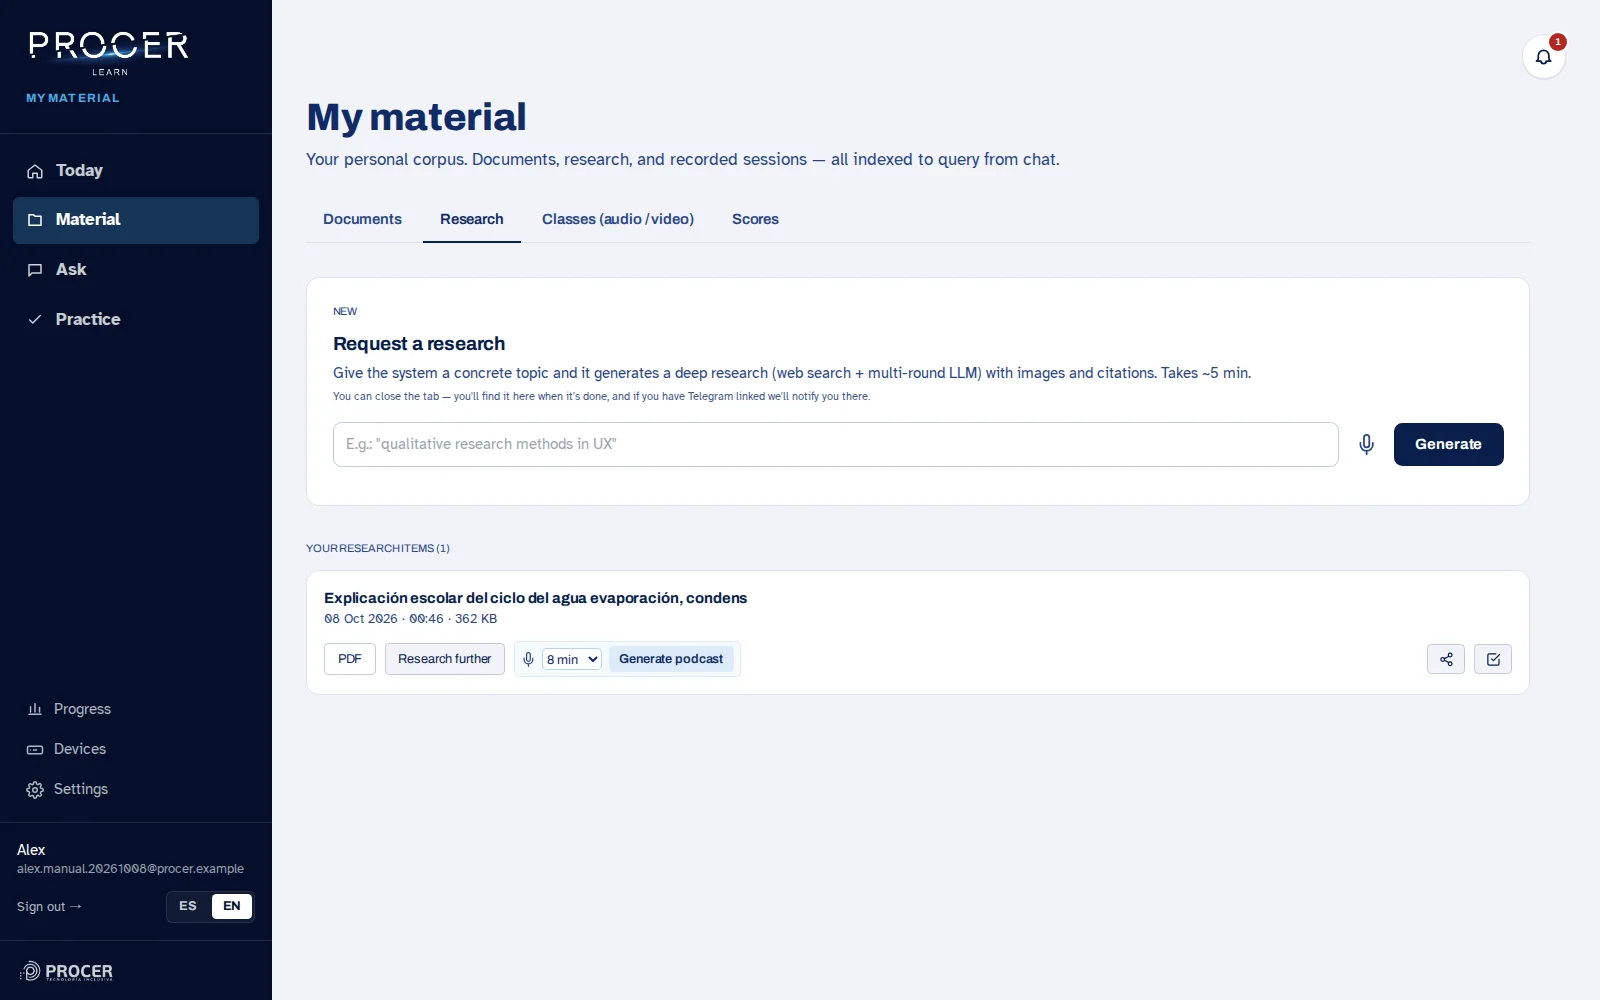
Define the topic
In Material, open Research or choose Research in depth from Ask. Type a specific topic and indicate who it is for, what depth you need, and which questions you want to answer. Avoid words that are too broad, such as 'science'.
View the screen for this step
-
Start only once
Select Generate and wait for the reception confirmation. You can continue using Learn and come back later. Research usually requires several minutes; closing the tab should not force you to create another identical request.
View the screen for this step
-
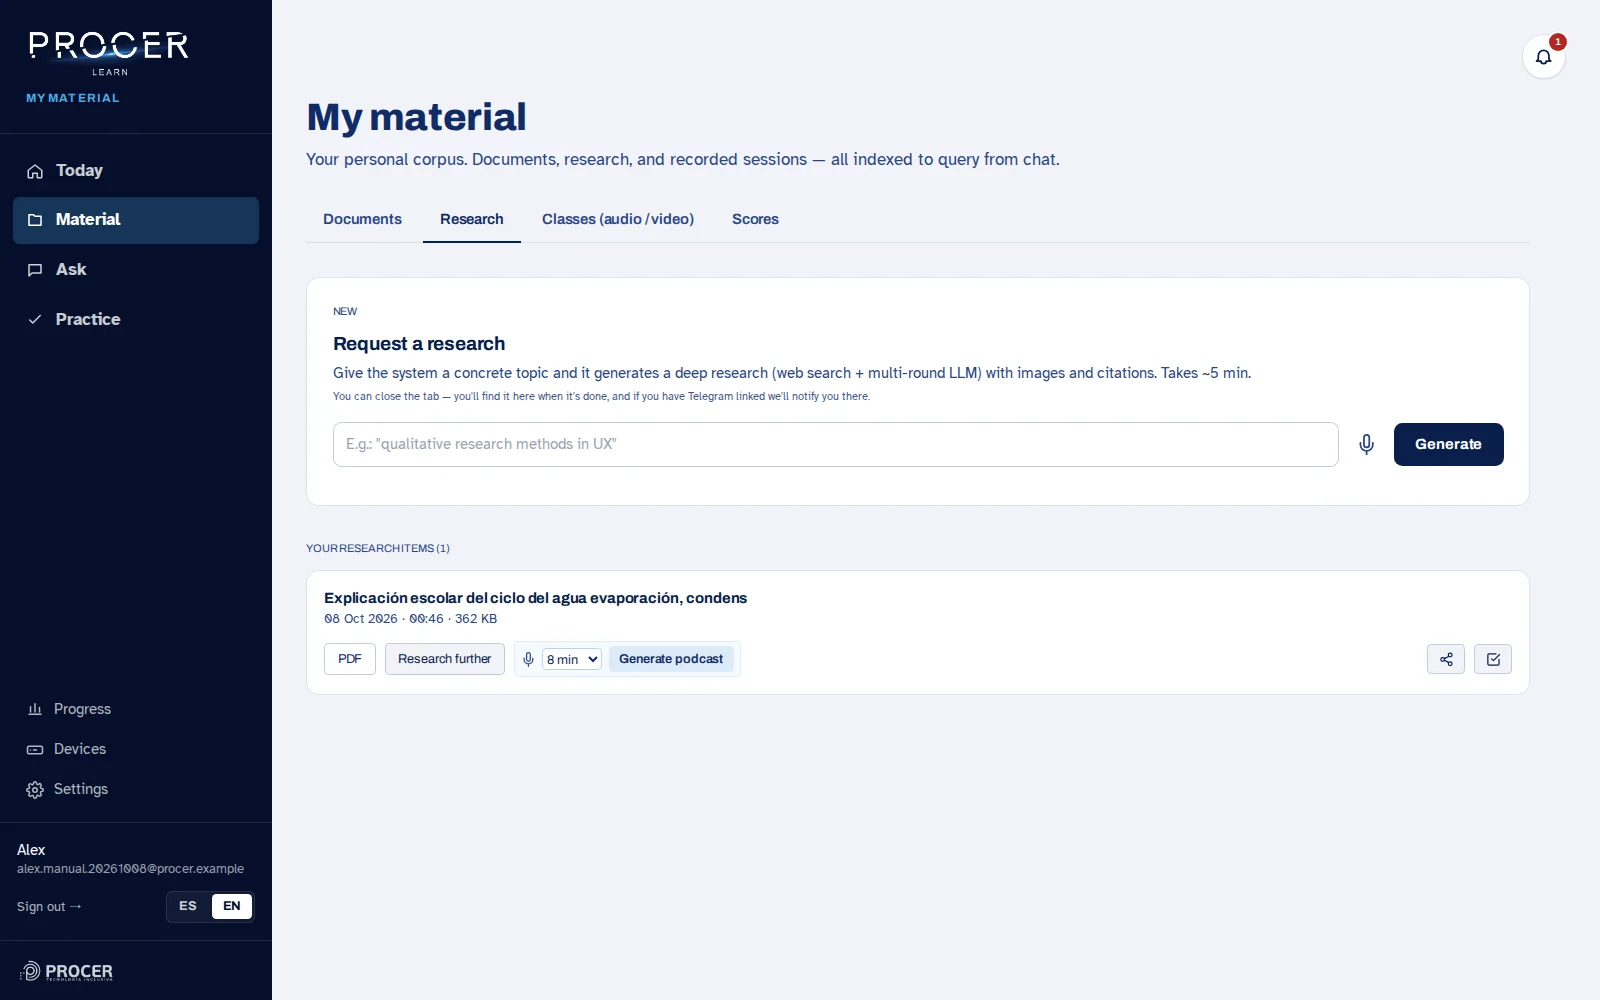
Read and cross-reference
Open the finished report, go through its sections, and visit the important sources. When there are images or a downloadable PDF, check that they correspond to the topic. Research generates a synthesis: it does not replace consulting the original sources.
View the screen for this step
-
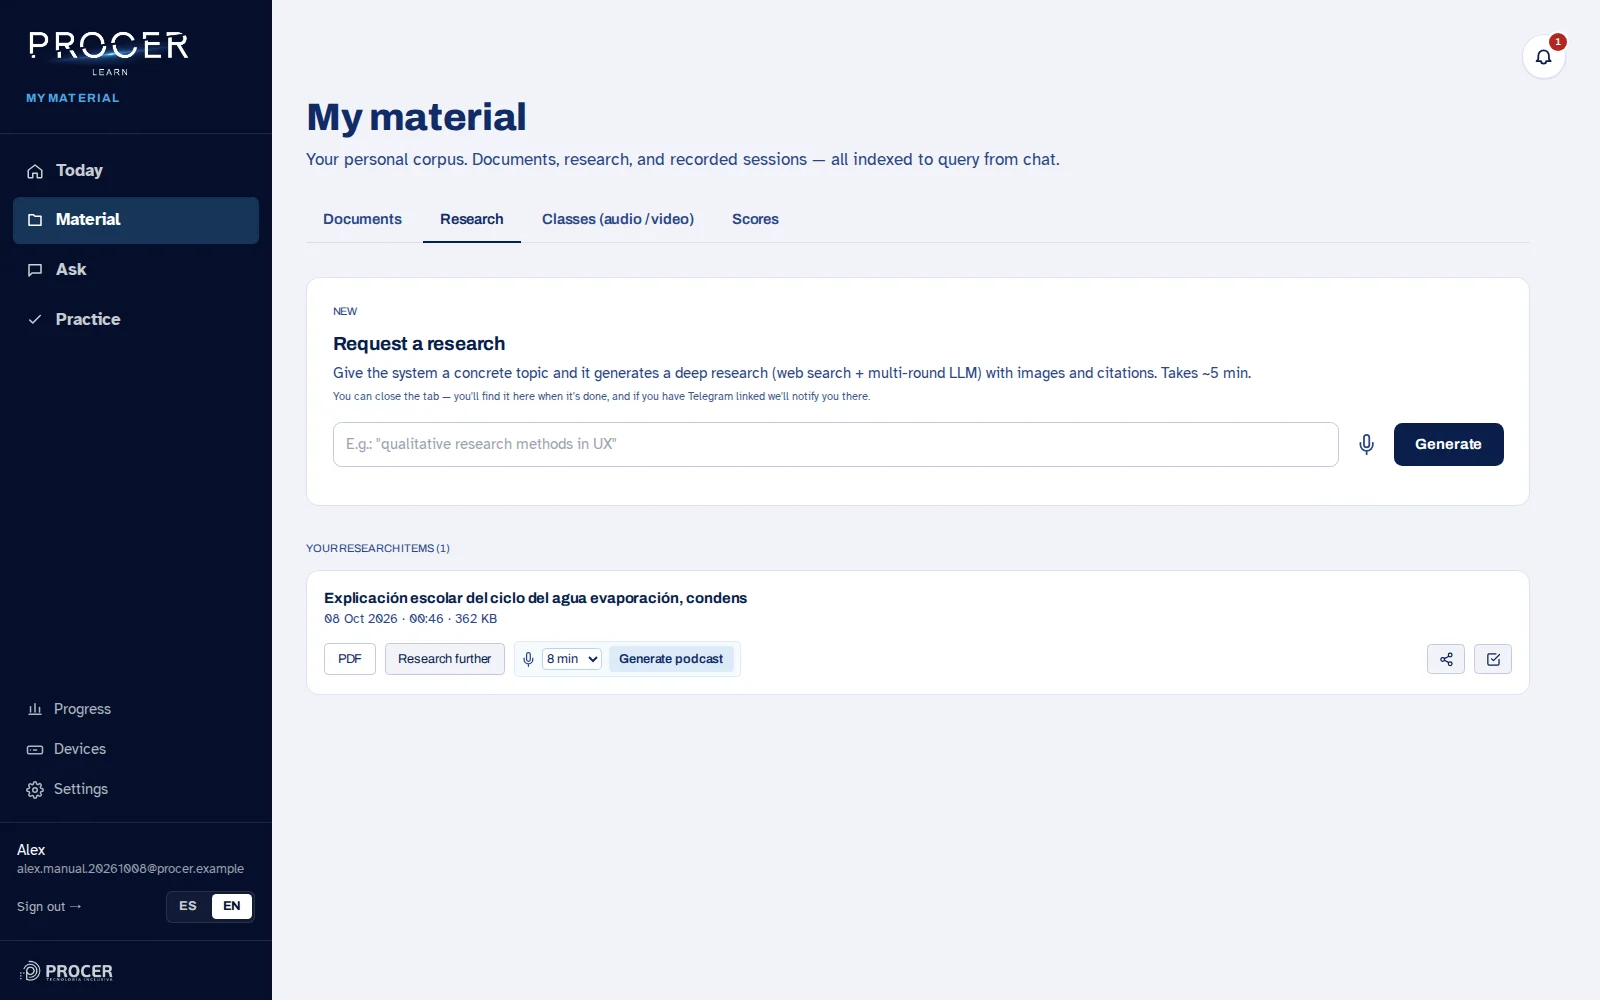
Reuse the report
Once it is available as material, you can ask it questions, create flashcards, and practice. If the job fails, keep its status and use the available retry options; do not consider it finished just because the request appears in the list.
View the screen for this step
Chapter 16 · Studying and practising
Listening to podcasts of your materials
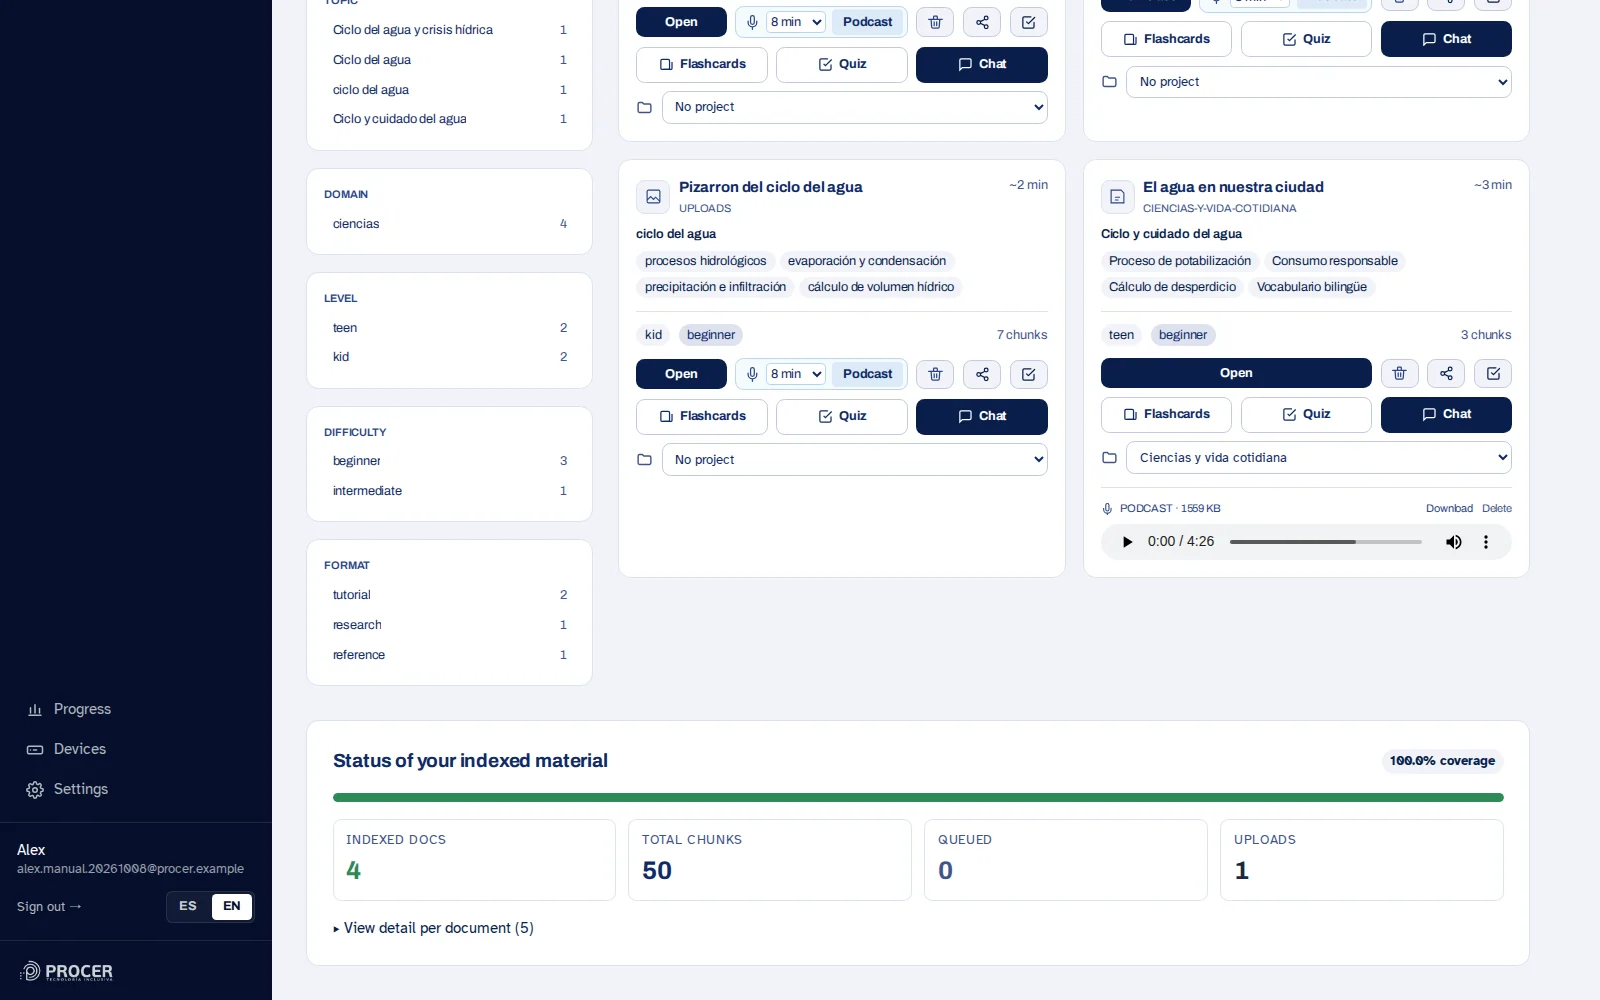
The podcast transforms a material into a spoken explanation. It is a way to review; it is advisable to return to the text when you need an exact piece of data.
-
Choose the source material
From the document menu, enter Podcast. The full Library allows you to locate the file and request the generation. Verify its name before starting so you do not generate audio for a different set of notes.
View the screen for this step
-
Wait for the audio
Generation requires time. Check the status and return to the same material when it is ready. While waiting, you can read or use another tool. It is not necessary to request a new podcast just because the player has not appeared yet.
View the screen for this step
-
Play and resume
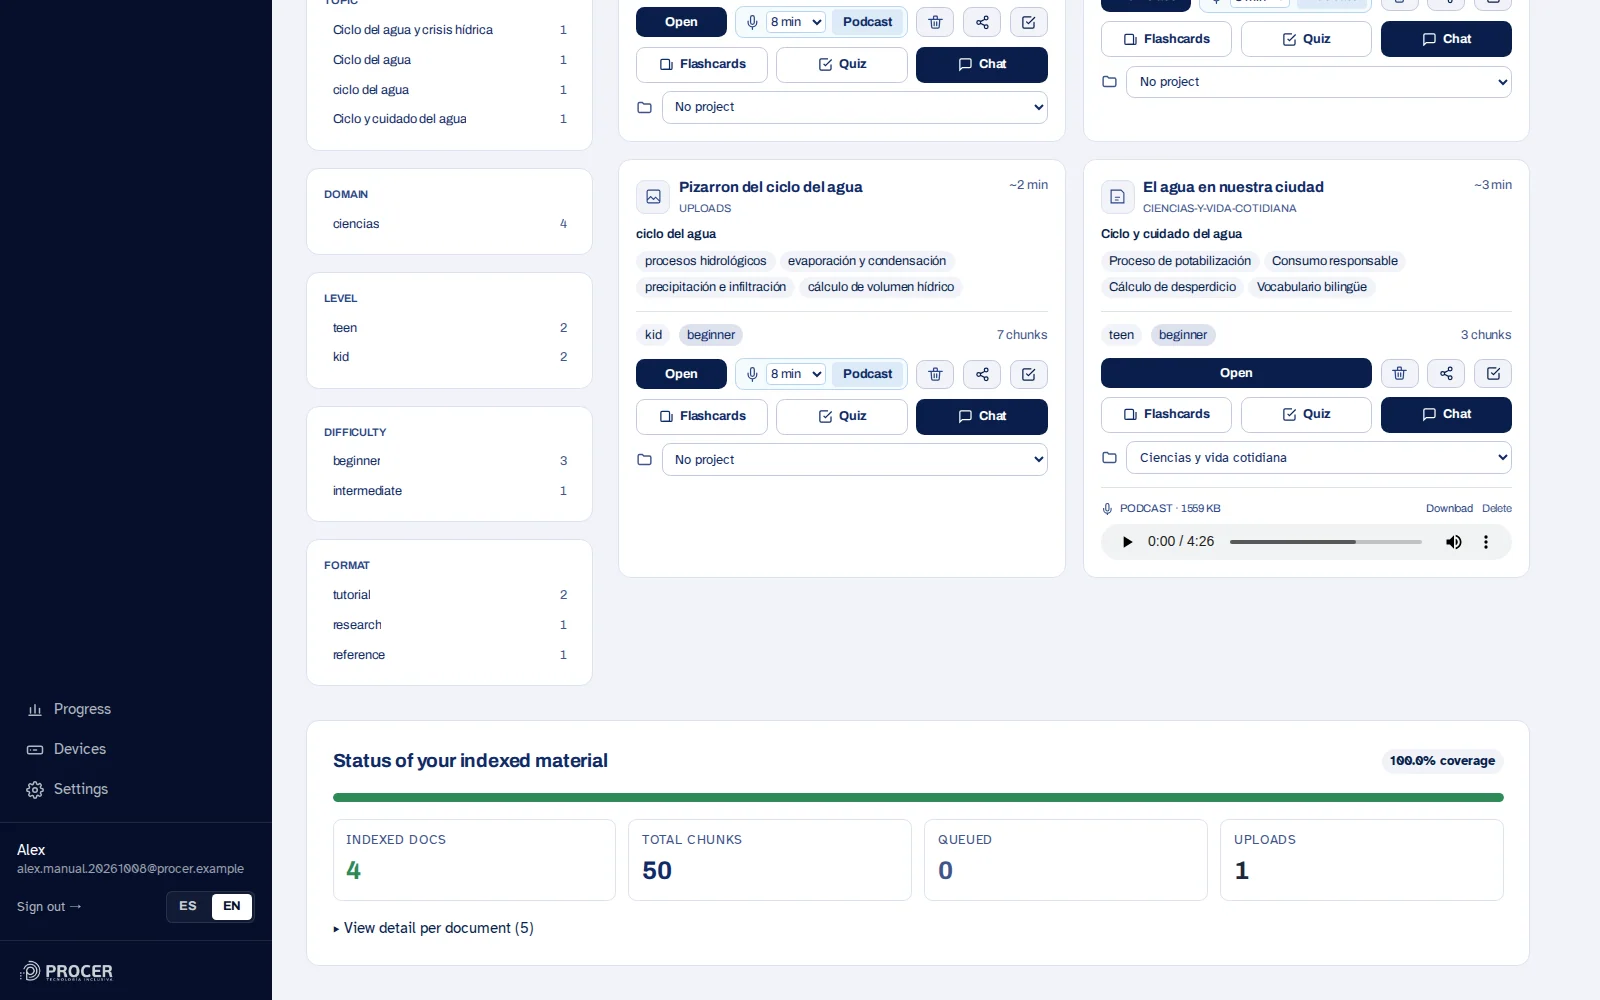
Use play, pause, and scroll in the player. If a download option appears, you can keep the audio. Delete actions apply to the selected podcast; check the confirmation and differentiate the audio from the source document.
View the screen for this step
-
Turn listening into practice
After listening, explain the topic in your own words or solve Tarjetas (Flashcards) from the same document. If a phrase from the audio creates doubts, contrast it with the written source.
View the screen for this step
Chapter 17 · Studying and practising
Flashcards and review
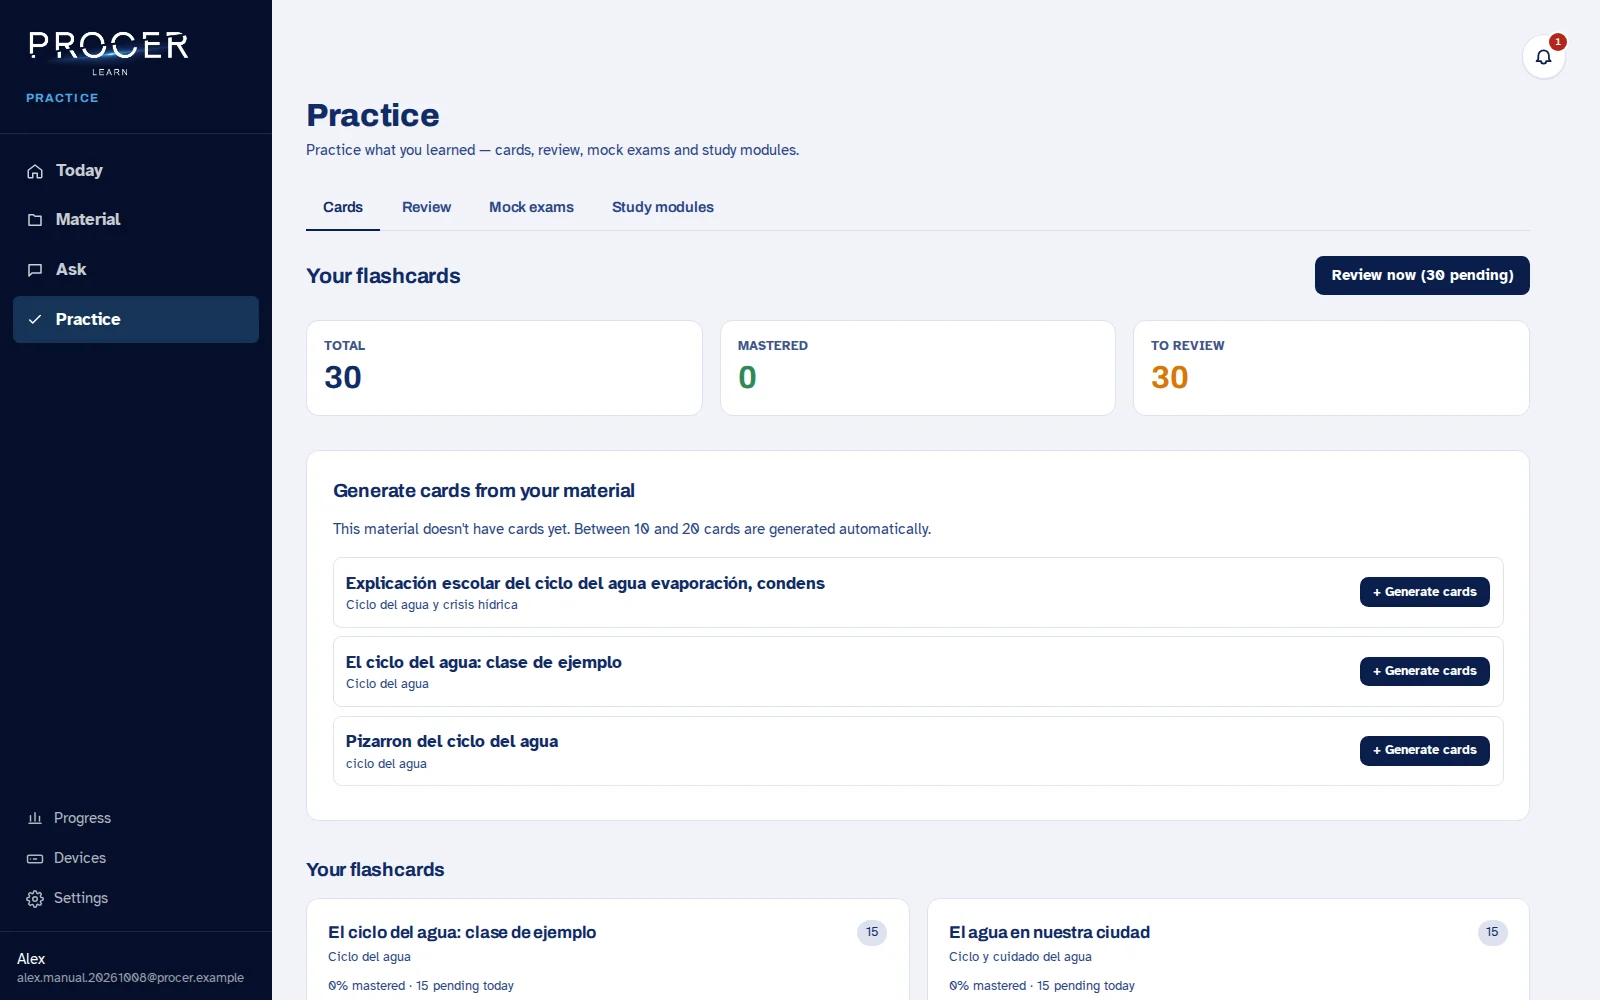
Flashcards help you retrieve an idea from memory. Reviewing shows you what needs practice again; it is not just a list to read.
-
Generate flashcards
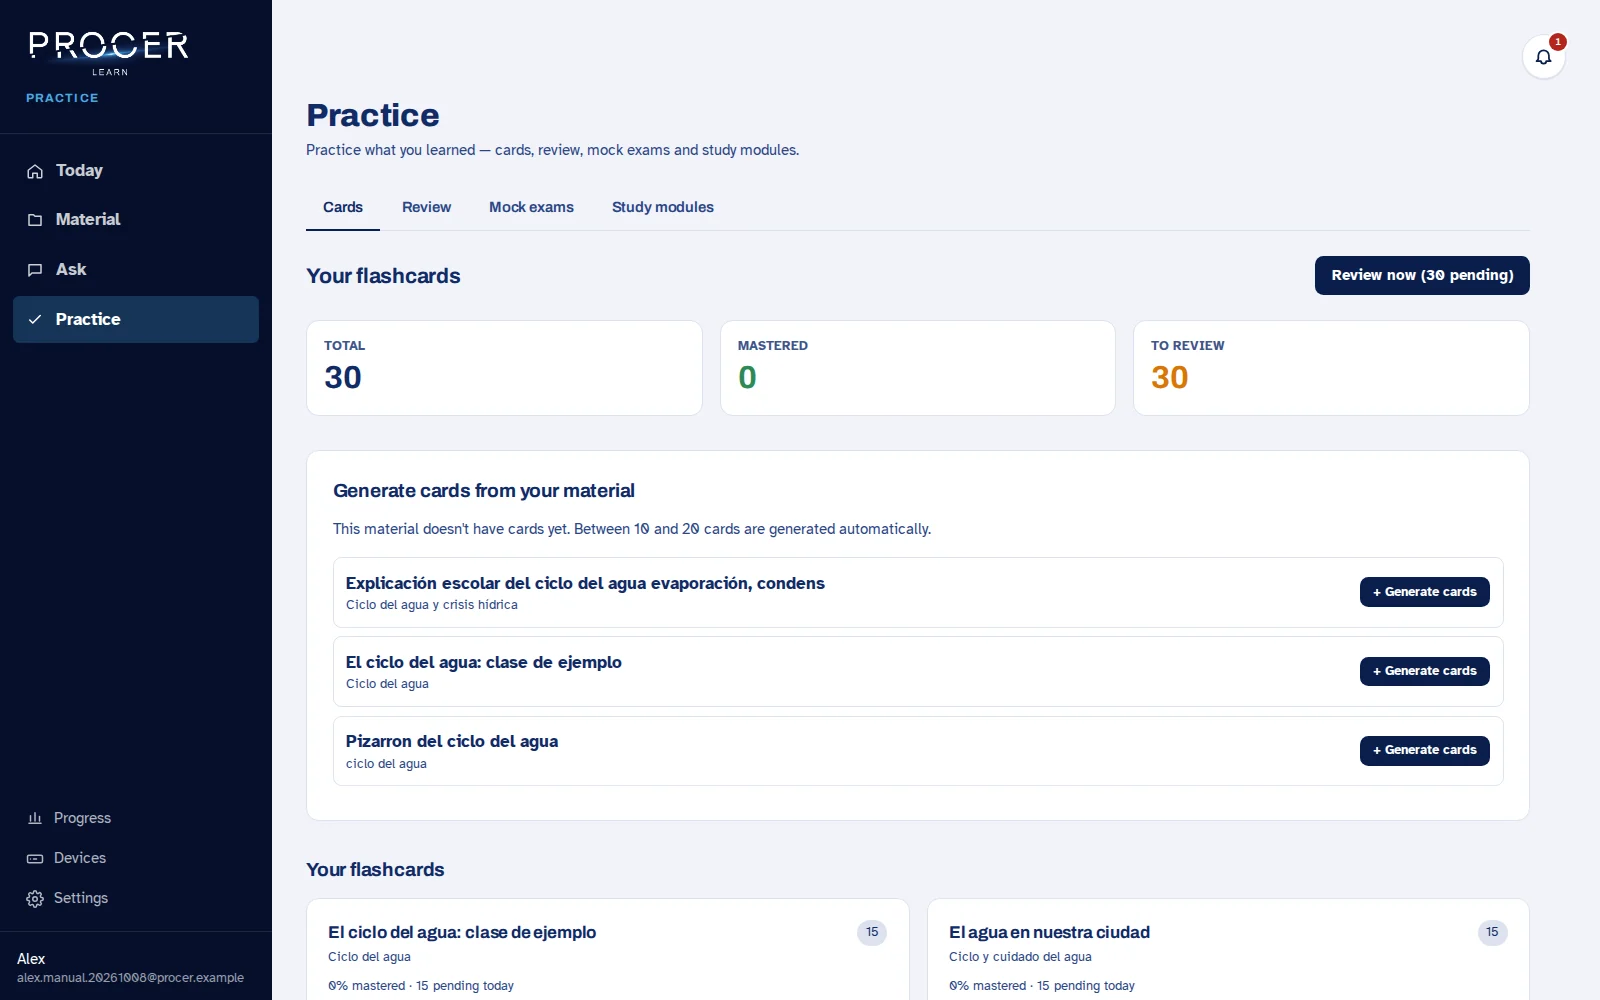
In Practice, open Flashcard review or enter from Create flashcards within a document. If they do not exist yet, choose Generate flashcards for that material. Wait for confirmation and review the deck before studying it.
View the screen for this step
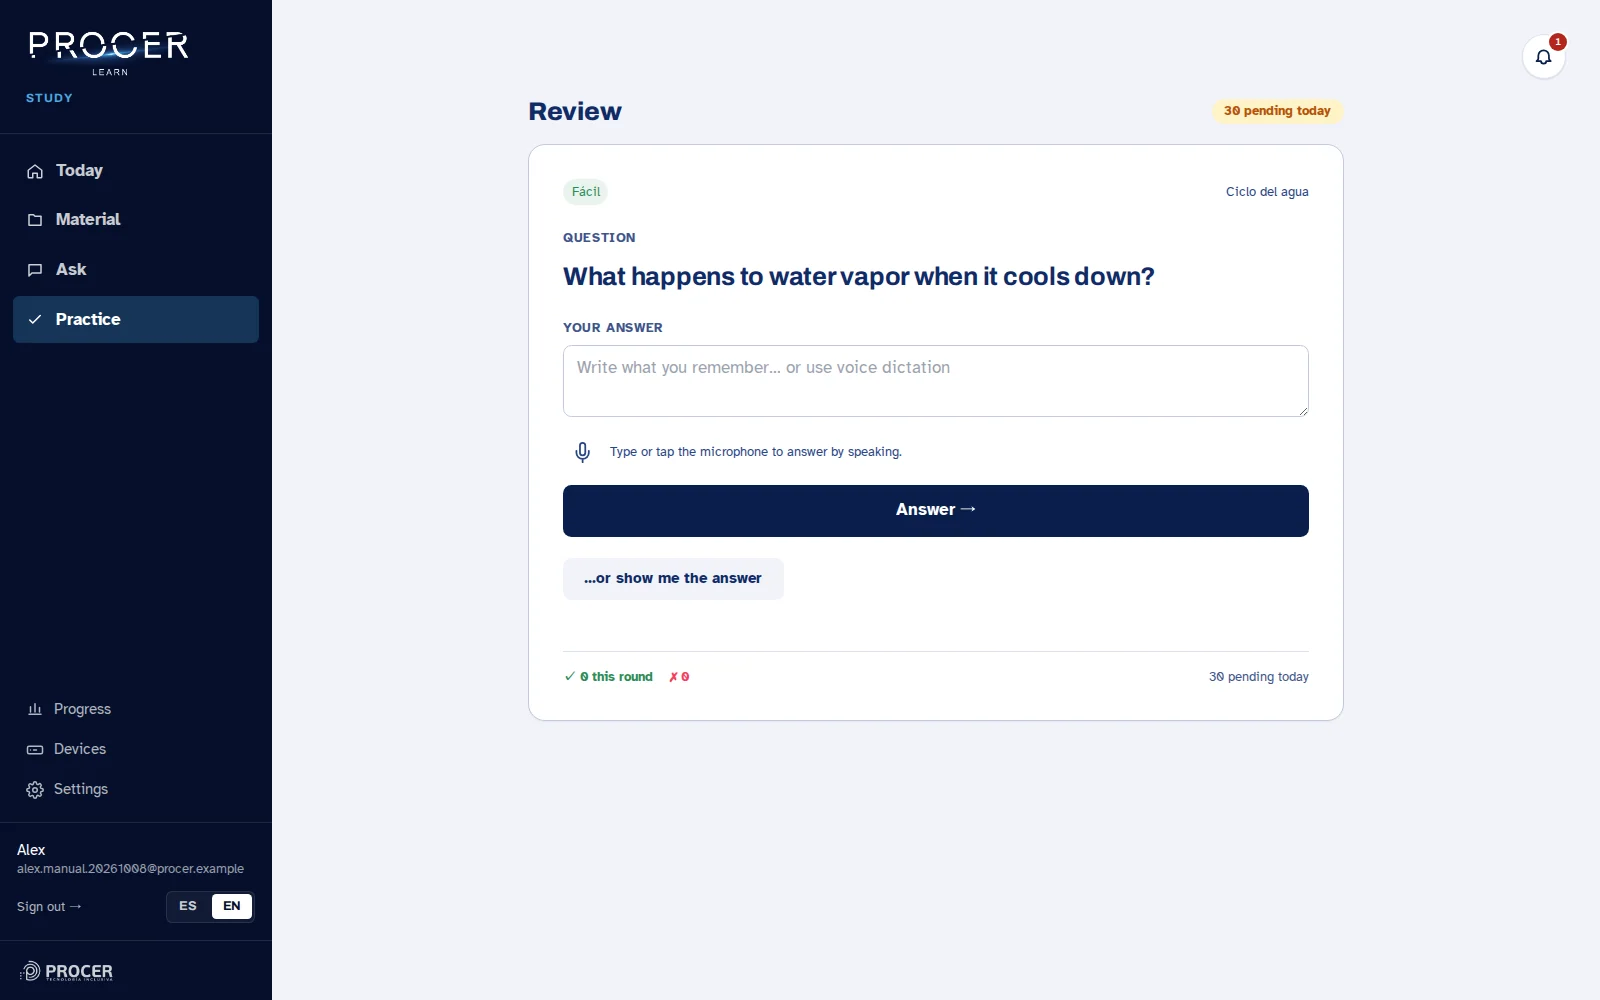
-
Answer before looking
Open the deck or the pending review. Read or listen to the prompt, try to answer, and then check the solution or feedback. When there is a response field, use it so your explanation can be evaluated.
View the screen for this step
-
Mark what you remembered
Indicate if you remembered it or if you need to review it according to the controls for that mode. If an automatic correction does not reflect your answer, use the review option or mark it as correct when available. Do not memorize an incorrect card: contrast it with the material.
View the screen for this step
-
Return at another time
Today and Practice show pending items. If there are many cards, they may suggest a limited set. Having no pending items does not mean you lost your cards: it may mean it is not yet time to review them again.
View the screen for this step
Chapter 18 · Studying and practising
Quizzes and modules with assessment
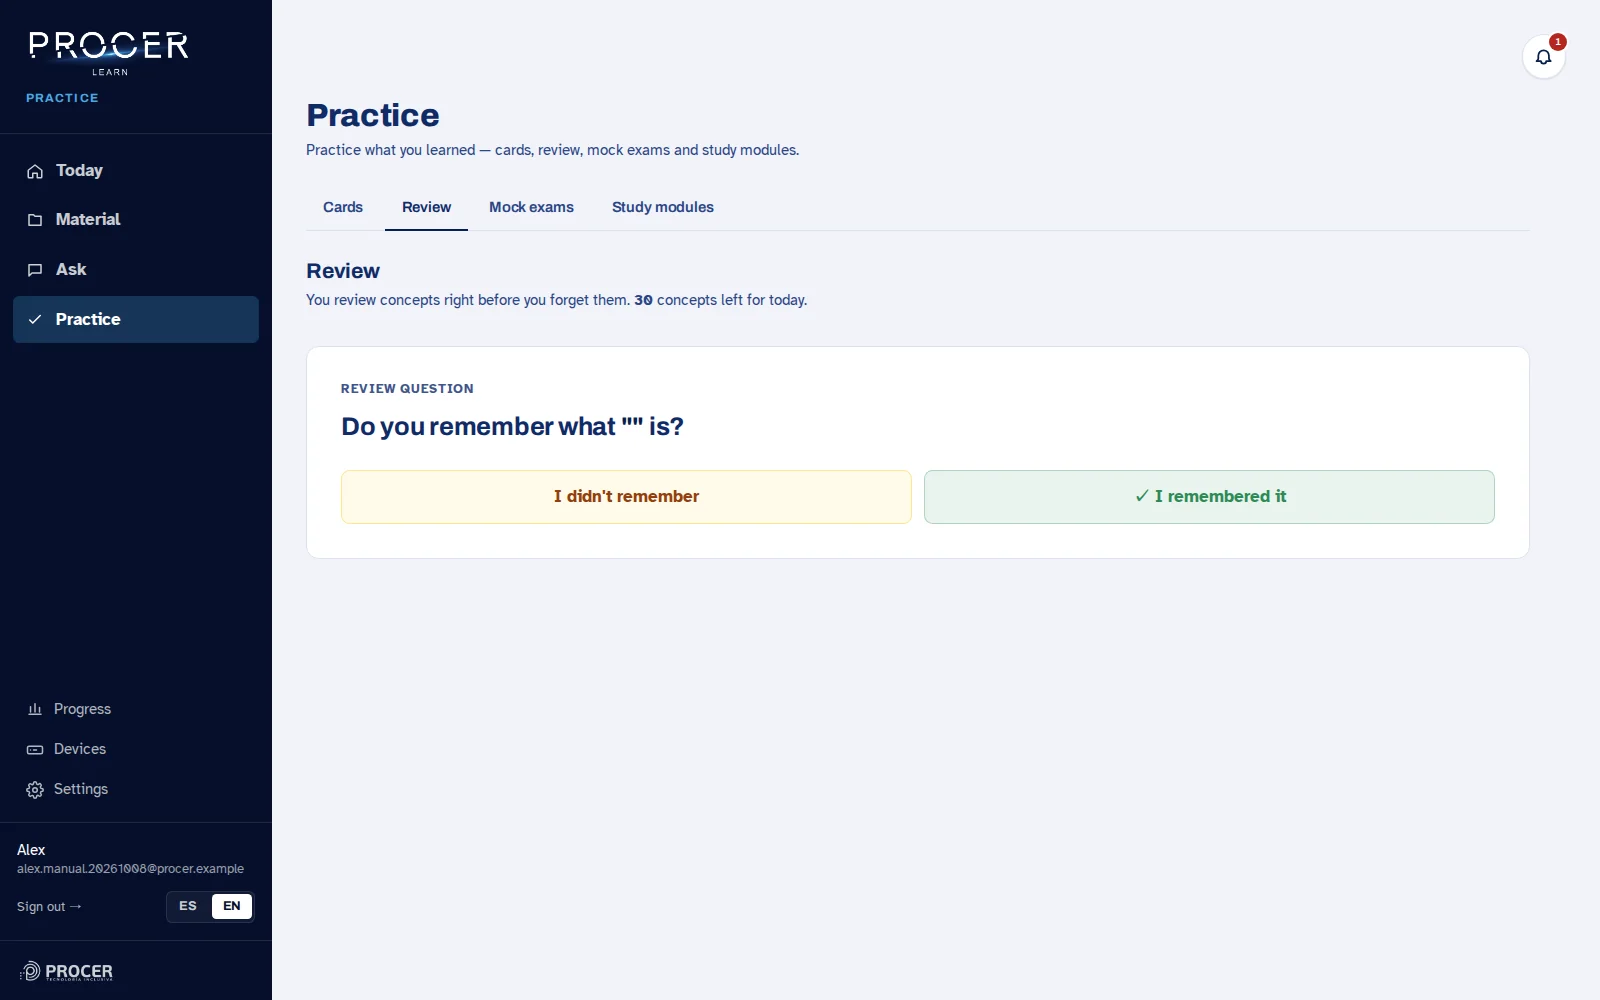
A quiz practices a topic. A module allows you to compare an initial assessment with a subsequent one after studying.
-
Choose the content
Open Quiz of a topic from Practice or Take a quiz from the material. If no questions are available, generate the practice from a document. Check that the prompt corresponds to the topic you are studying.
View the screen for this step
-
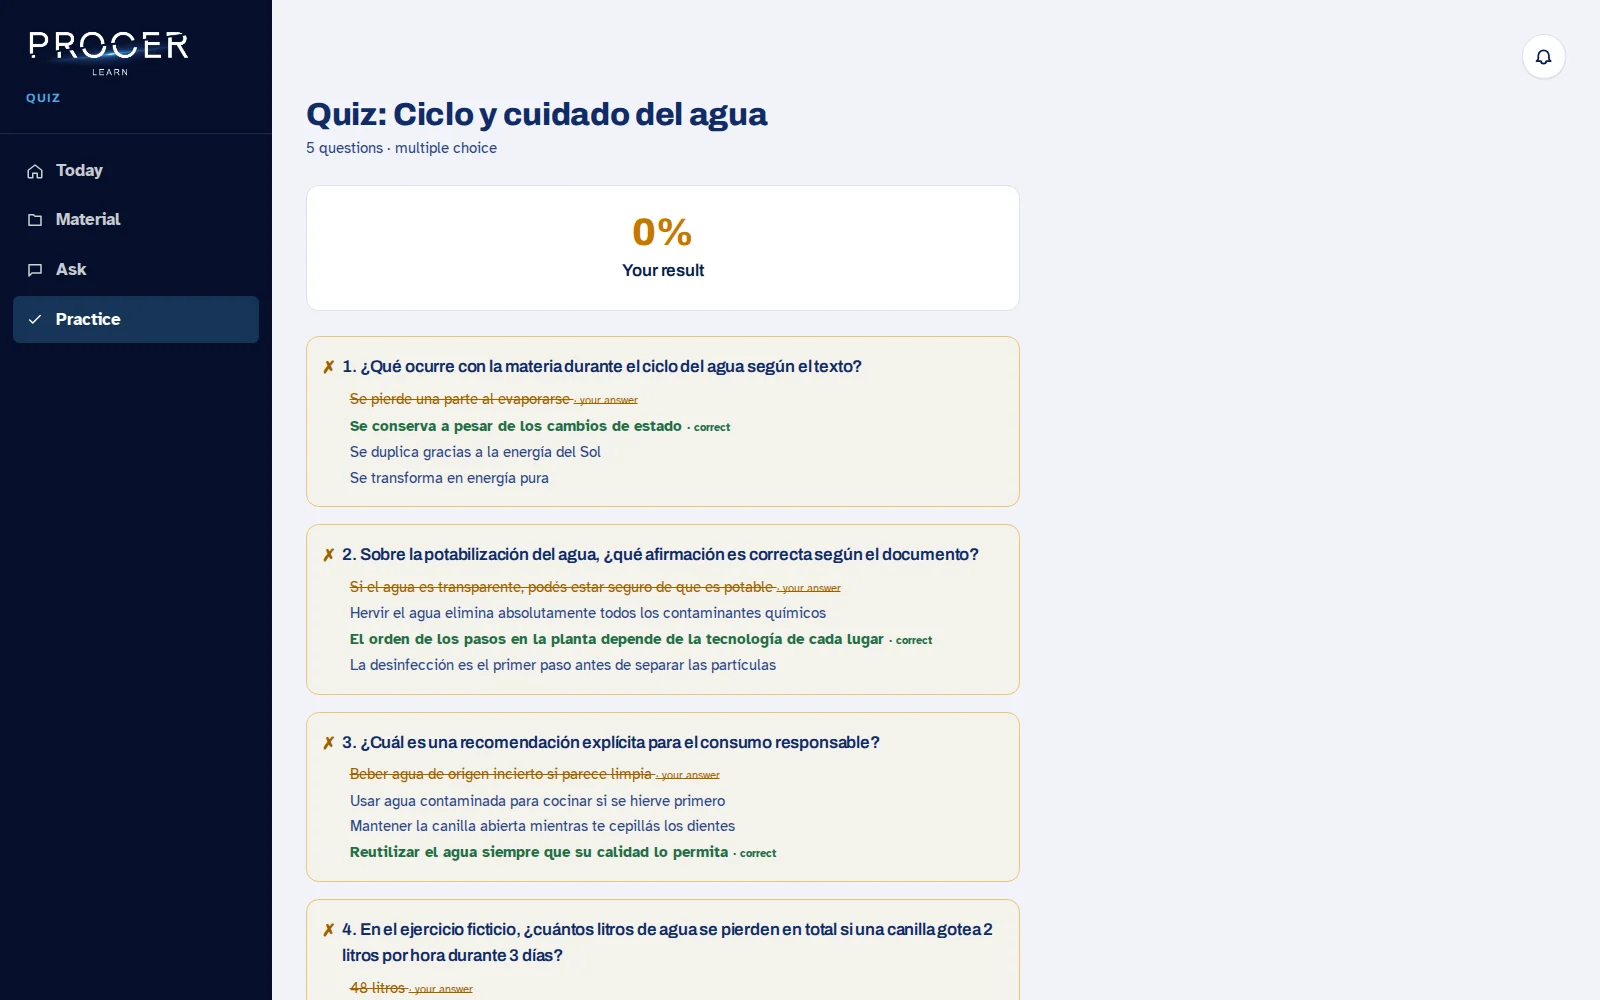
Respond and read the feedback
Send your answer or choose the corresponding option. Read why it is correct or what needs improvement. If an AI correction is involved, use it as guidance and contrast doubtful cases with your notes.
View the screen for this step
-
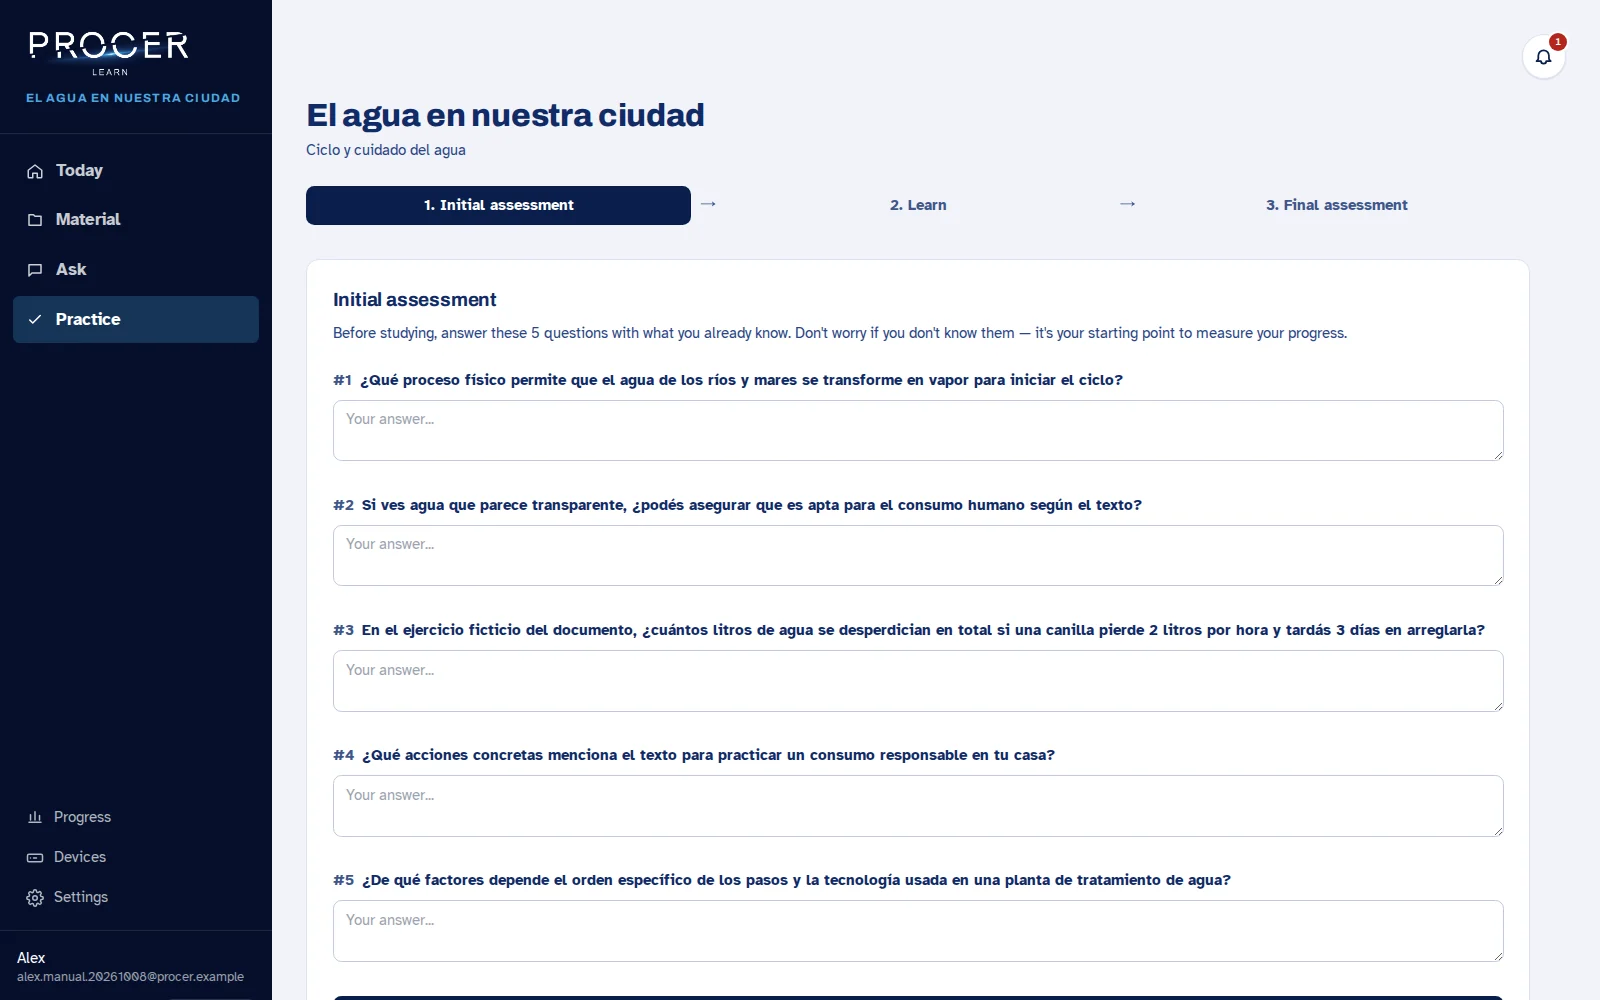
Create a module
In Study modules, choose a material and Create the module. The flow prepares questions for an initial assessment. Answer without looking at the solution so that the subsequent comparison makes sense.
View the screen for this step
-
Study and re-evaluate
After the initial assessment, use the material and suggested activities. Complete the final assessment and review the change. The result indicates performance on those questions; it is not equivalent to an official grade or mastering an entire topic.
View the screen for this step
Chapter 19 · Studying and practising
Mock exams based on an exam
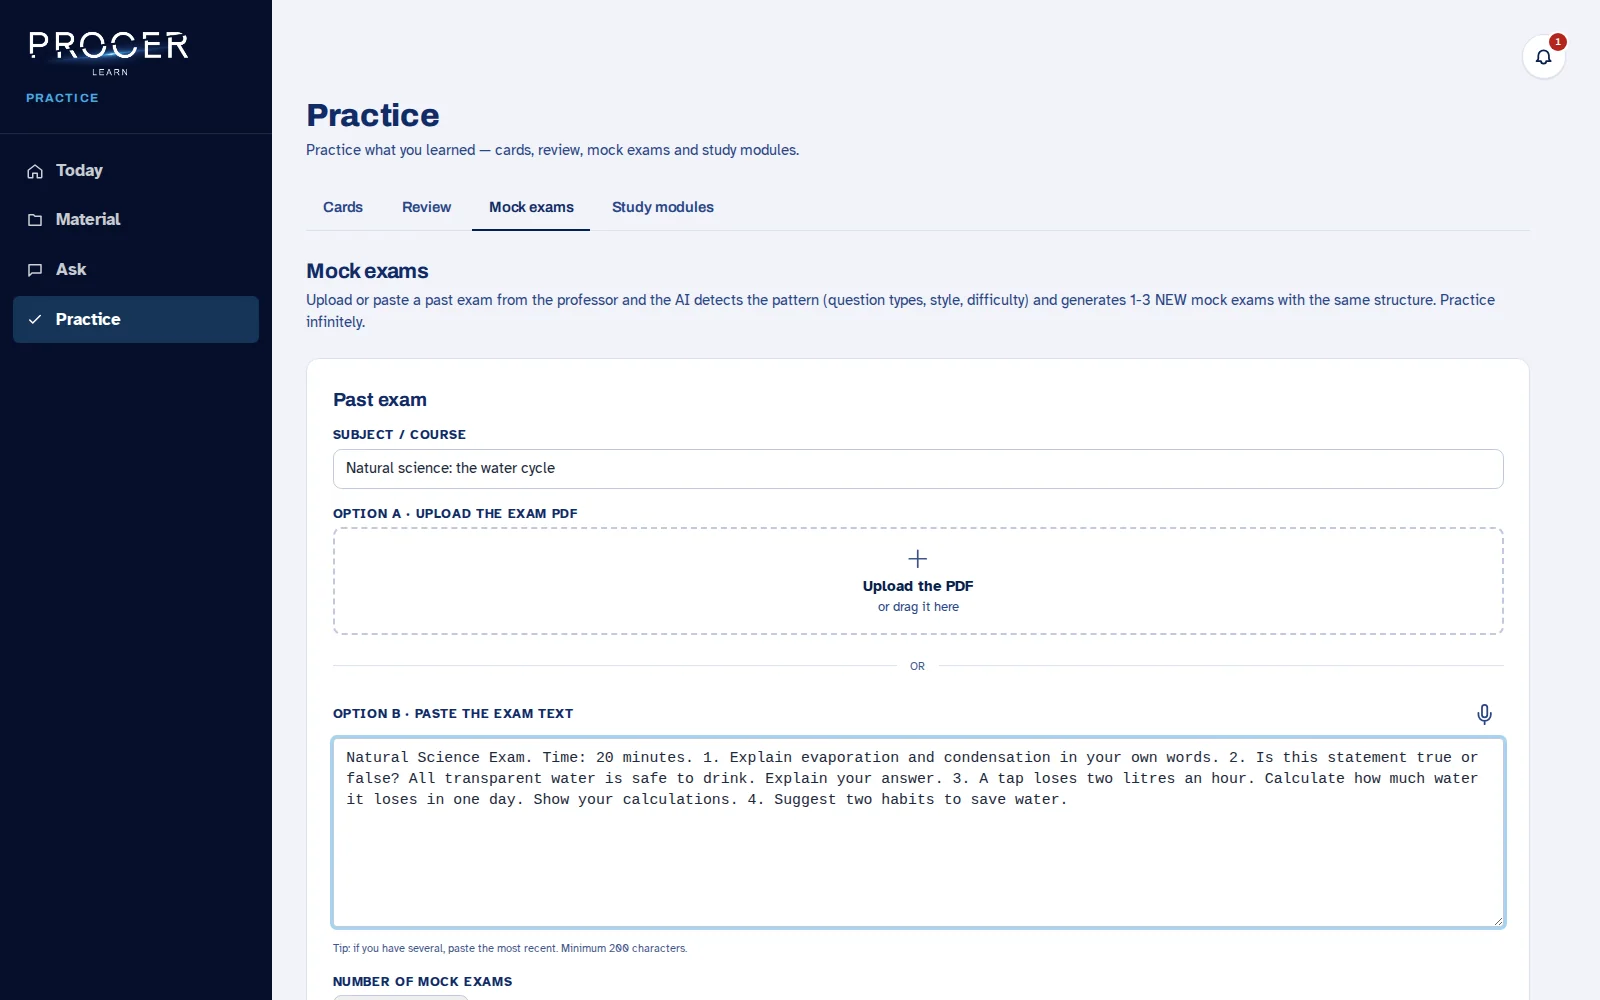
Mock exams attempt to reproduce the style of a previous evaluation using an example that you provide.
-
Provide a sufficiently complete exam
Open Mock exams. Indicate the subject and paste the previous exam or upload its PDF. Include questions and instructions, not just a title. The form needs at least two hundred characters of useful text to analyze the pattern.
View the screen for this step
-
Choose how many to generate
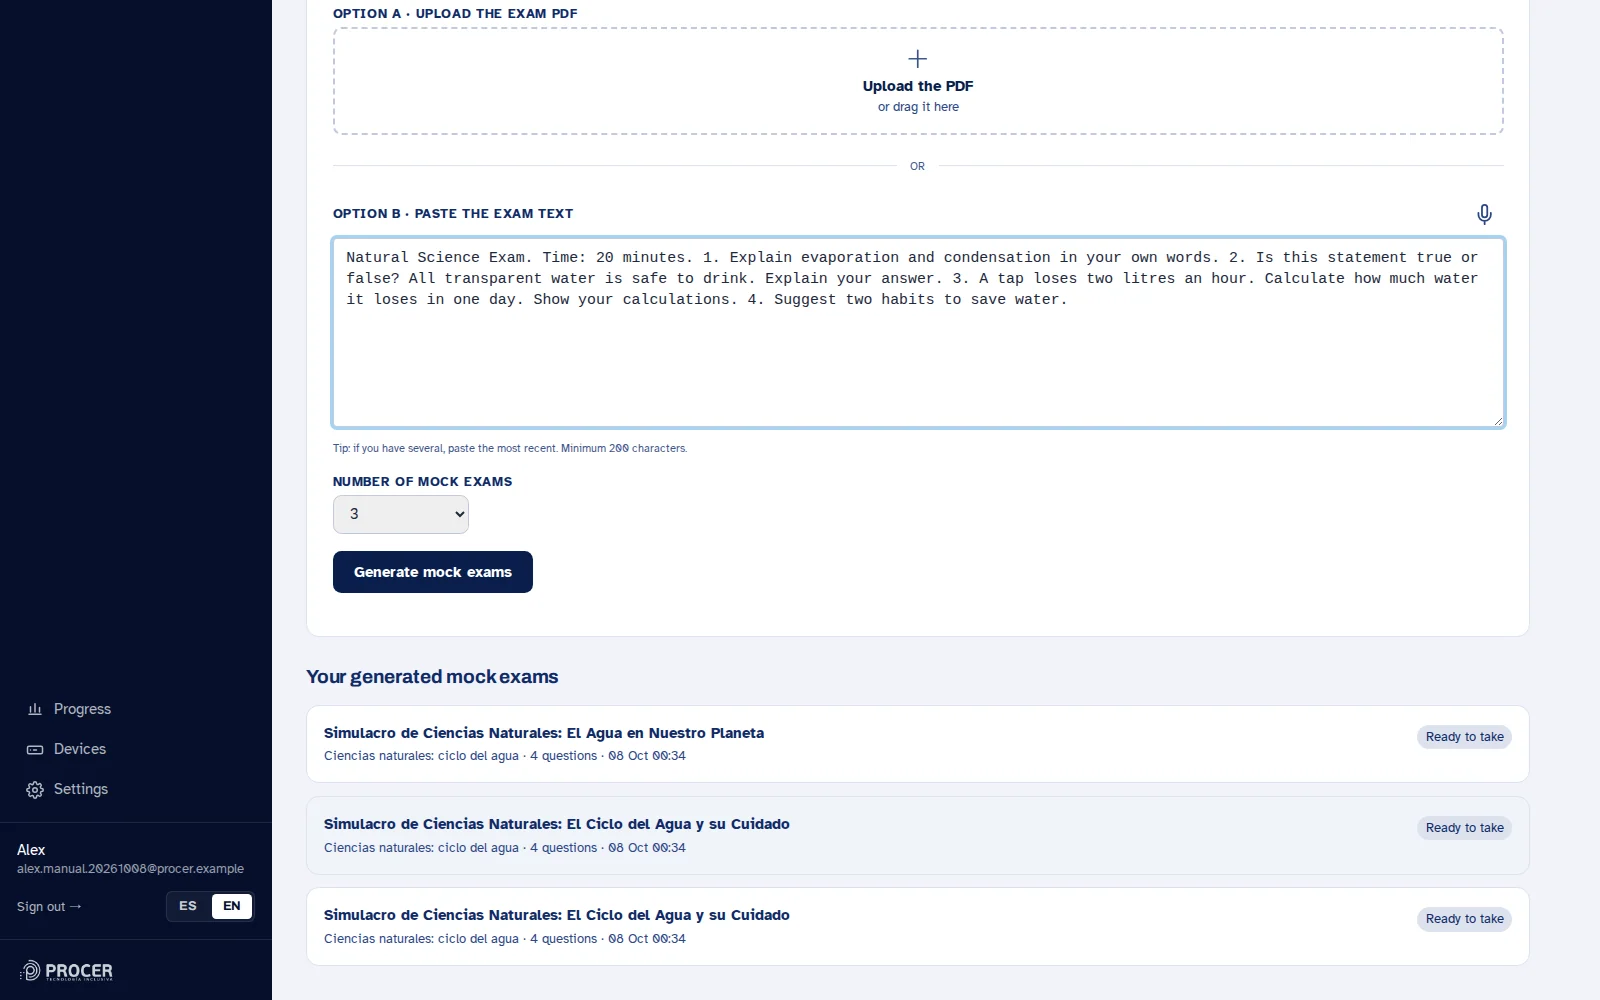
Select one, two, or three and press Generate mock exams. The service first analyzes question types and then creates the exercises. Wait for the result before resubmitting.
View the screen for this step
-
Review the result before solving
Open each generated mock exam and check the topic, instructions, and difficulty. If it says it could not extract the pattern, the mock exam is not ready. Try with a more complete example; if it fails with a legible exam, report it to support.
View the screen for this step
-
Use it as a rehearsal
Solve the exercise and review the corrections. The implementation shares the module flow with evaluation; do not assume that it imposes the same time, score, or exact format as the original exam.
View the screen for this step
Chapter 20 · Studying and practising
Short games for practice
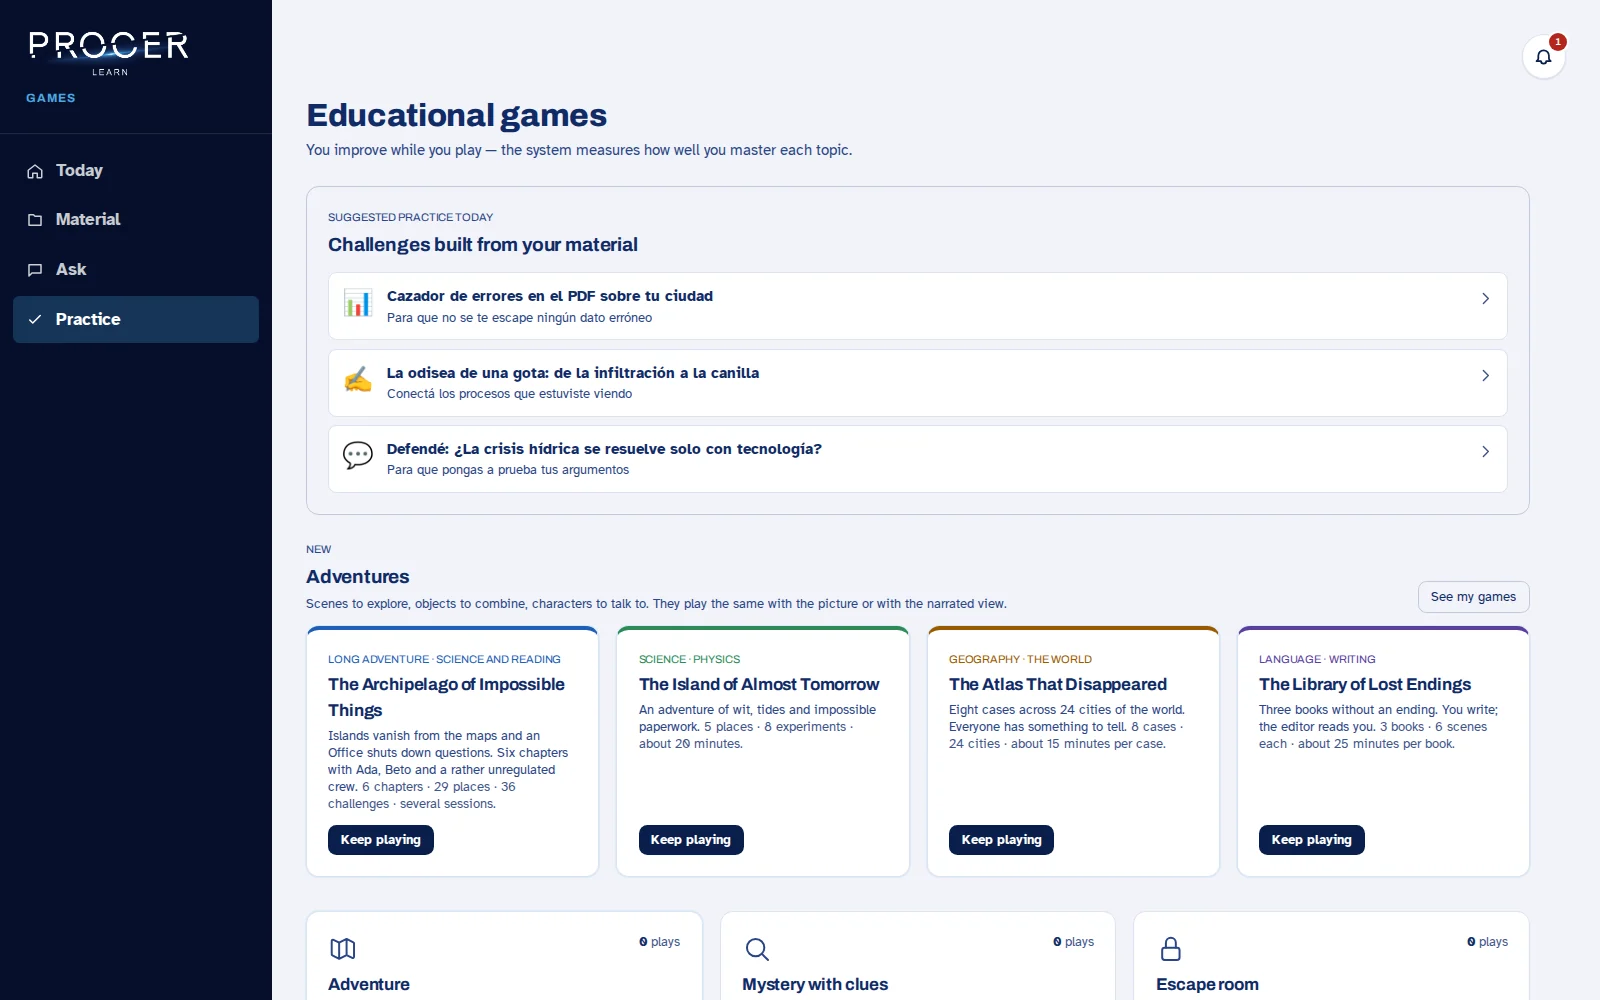
Games offers several mechanics. Some use a material you choose; others appear based on the topics available in your account.
-
Adventure and Mystery with clues
In Adventure, choose a material and a style, read or listen to the scene, and select a decision. In Mystery with clues, review the case evidence before choosing. These are games generated from the material, different from the graphic adventures in the top catalog.
View the screen for this step
-
Escape room and Order the sequence
The room presents challenges to move forward; answer and use the feedback. In Order the sequence, reconstruct a process or an order and check it. Read the game objective before acting: not all games expect the same type of response.
View the screen for this step
-
Data detector and Quick review
In Data detector, identify the false statement among those proposed and review the explanation. Quick review presents brief tasks about the chosen concepts. Its historical name may be related to mathematics, but it also practices other topics.
View the screen for this step
-
Story and Code challenge
Explain with a story asks you to build a narrative to develop concepts. Code challenge poses programming exercises and may only appear when your material is related to that topic. The feedback helps you review; it should not be taken as infallible.
View the screen for this step
-
Resume a game
Recent games allow you to continue or review what you have played. Before deleting one, check if you want to keep the progress. To practice by speaking, use the voice controls for that activity when available.
View the screen for this step
Chapter 21 · Studying and practising
Graphic adventures: controls and accessibility
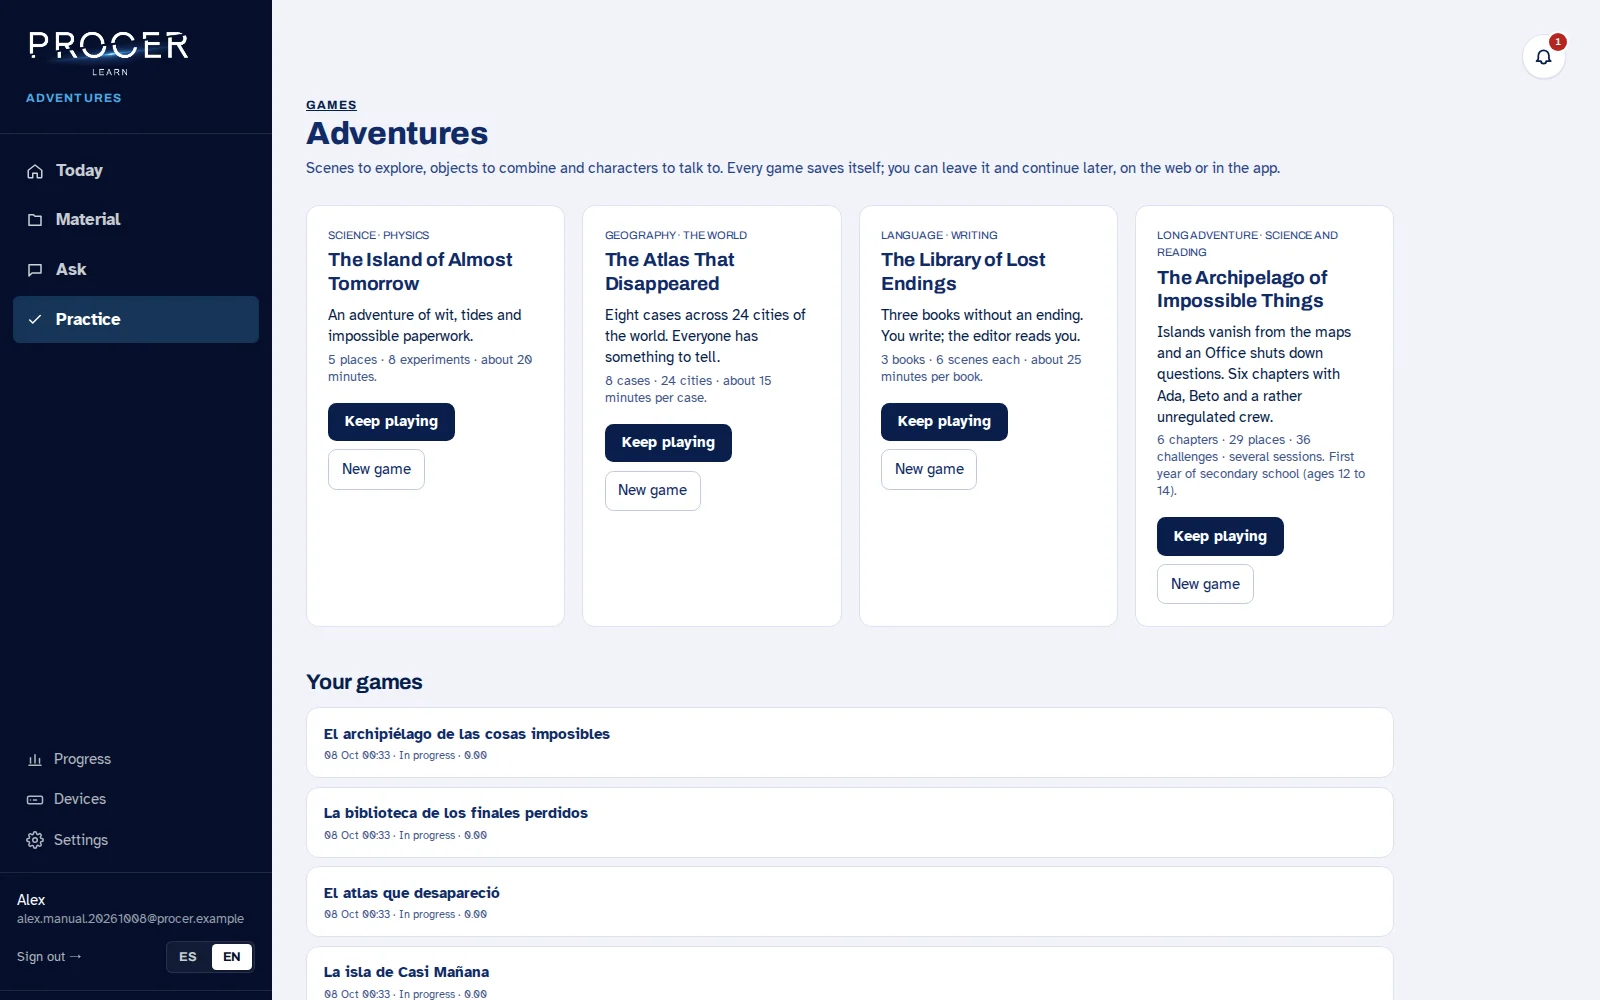
The four graphic adventures share a single engine: scenes, characters, inventory, and objectives. The narrated view allows you to play using written controls and a screen reader.
-
Choose an adventure
Go to Adventures from the Games section. Choose Start or Continue playing. 'New game' creates a different playthrough; do not confuse it with resuming the one you already had. You do not need to know the solutions beforehand: explore and ask for hints when needed.
View the screen for this step
-
Look and talk
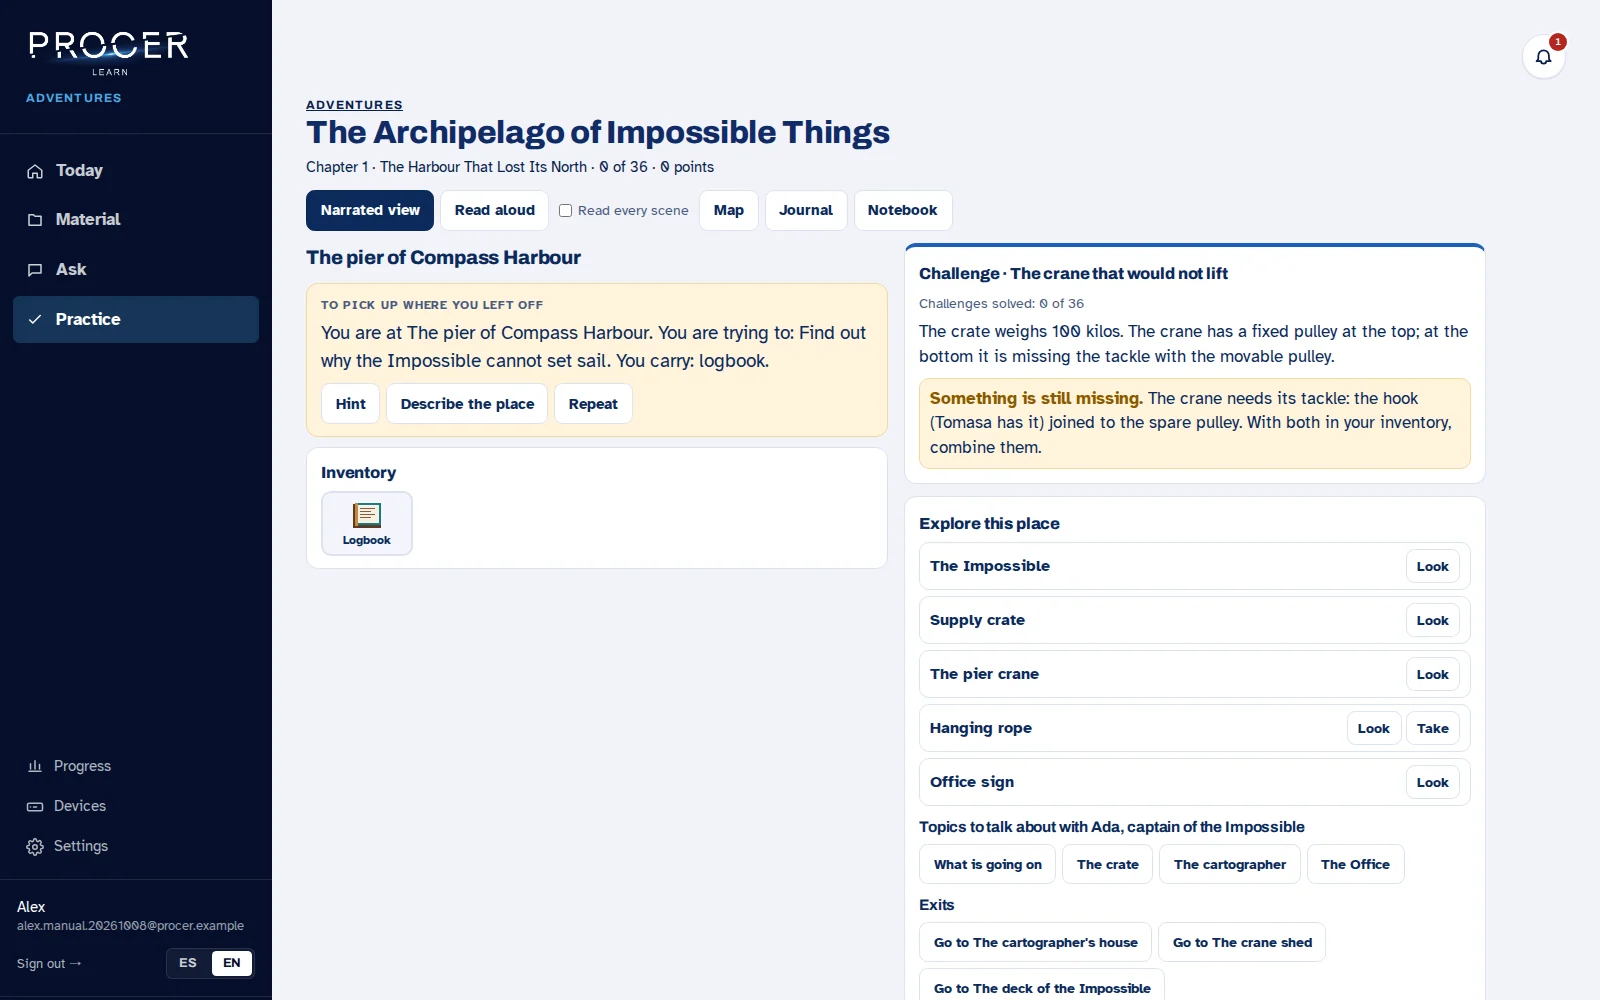
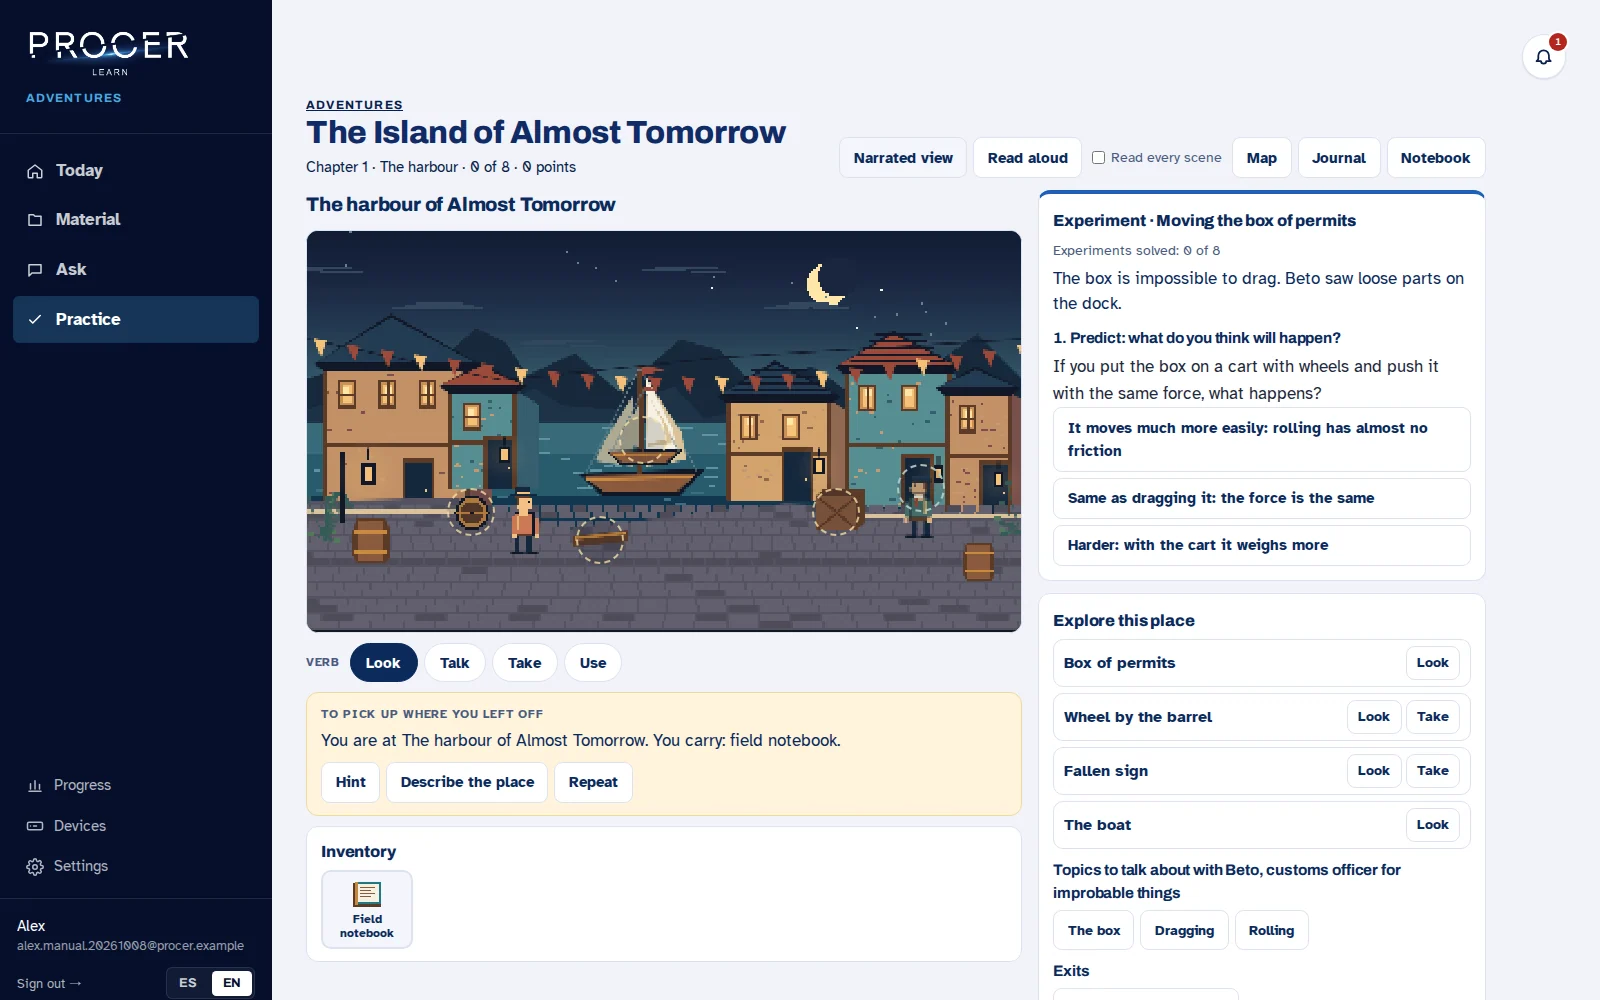
Read the scene description. Choose Look to inspect an element or Talk to converse with a character; specific actions and topics appear in the side list. A conversation can unlock an objective or a new possibility.
View the screen for this step
-
Use the inventory
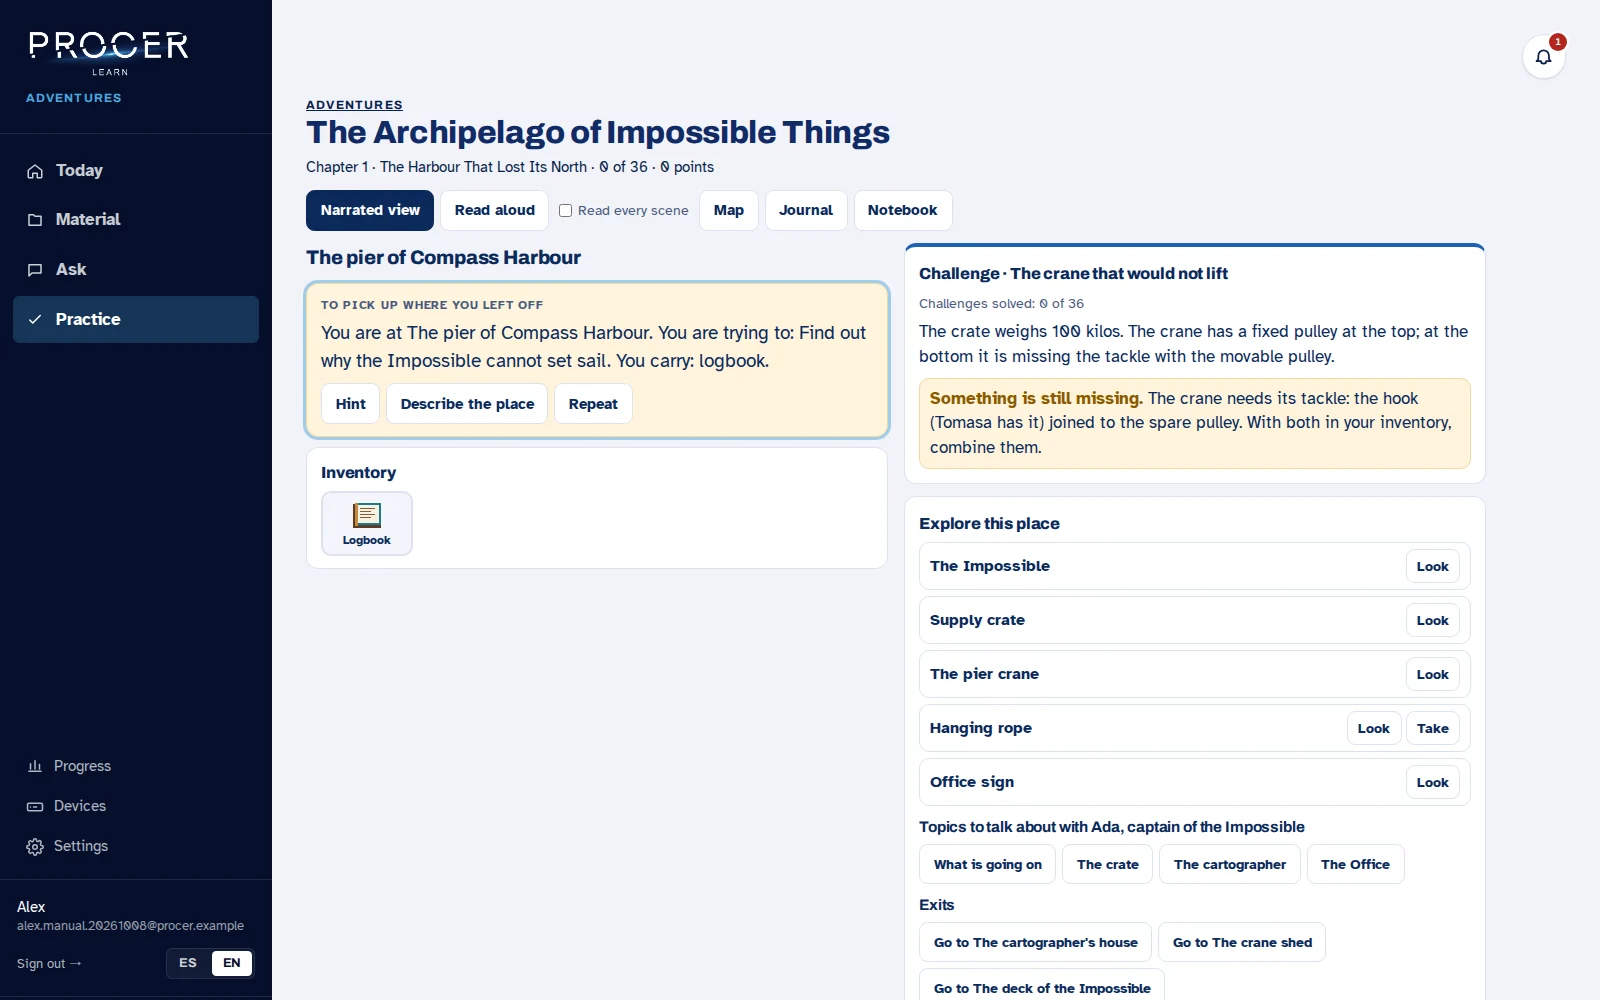
Pick up the available items. To use one, select the item from the inventory and then the element you want to apply it to. When there are two compatible items, select them and use Combine both. If something is missing, the game explains why it could not be done.
View the screen for this step
-
Activate the narrated view
Choose Narrated view. Elements, characters, and exits remain available as text controls. Read aloud plays the description; Read each scene activates successive reading. If you use a screen reader, avoid playing two voices simultaneously when they make understanding difficult.
View the screen for this step
-
Orient yourself and resume
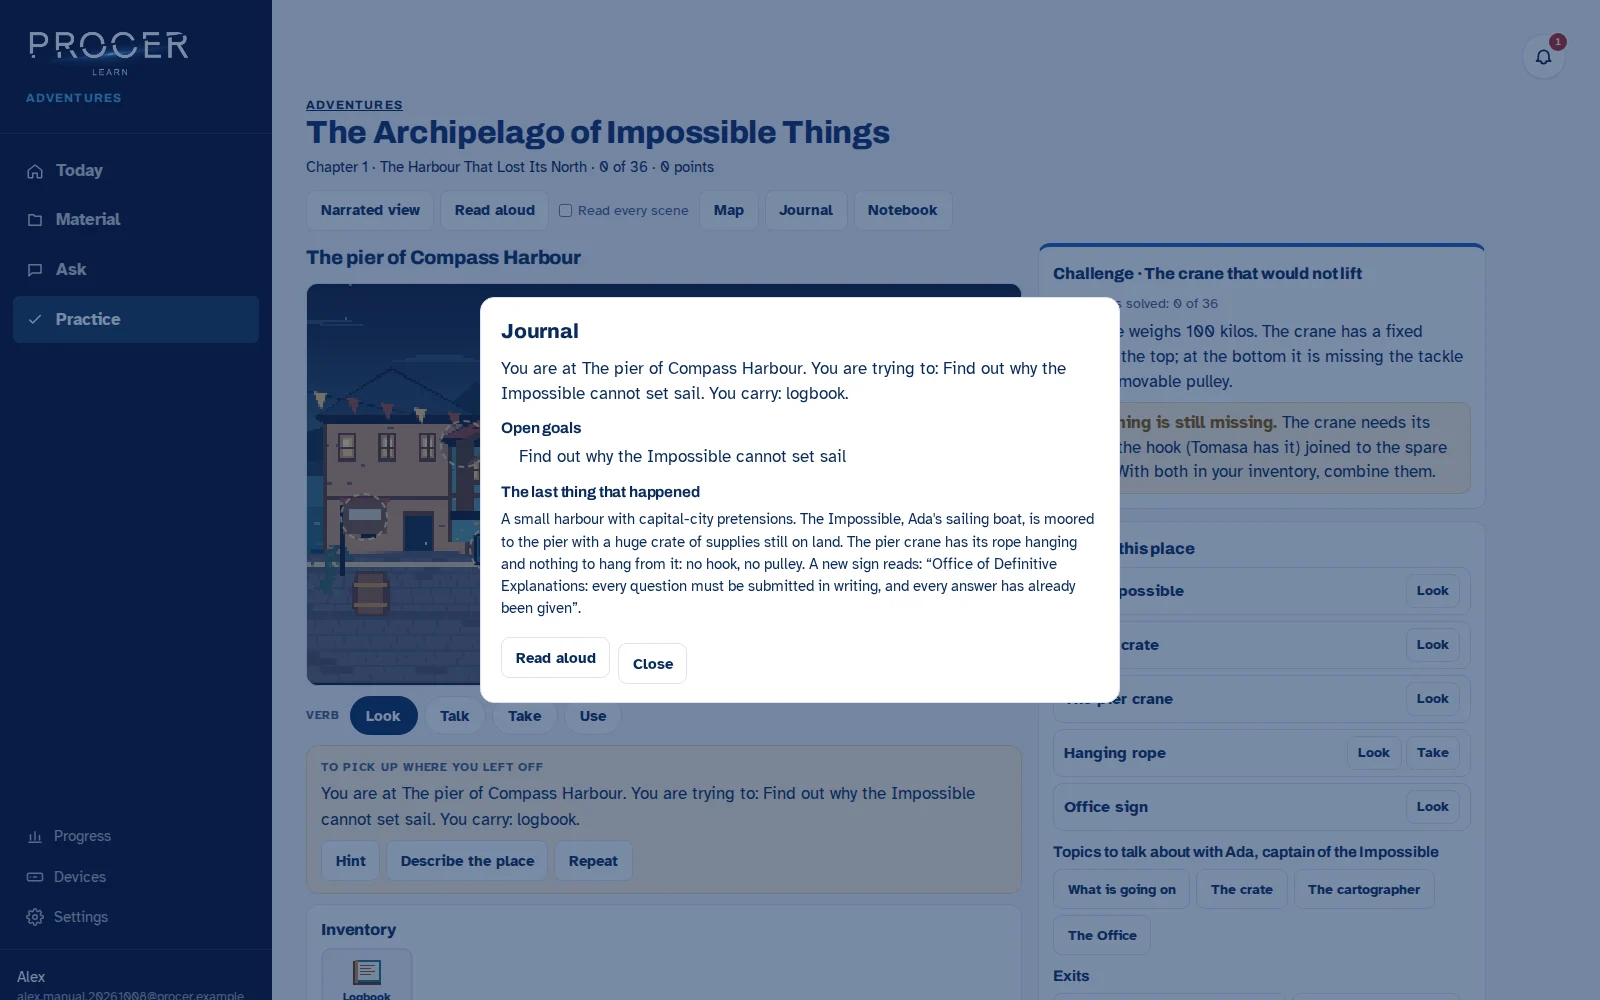
Map shows locations and exits. Diary reminds you where you are, your objectives, and the last thing that happened. Notebook gathers the knowledge found. Hint guides the next step; Describe the place and Repeat retrieve information. The game is saved after accepted actions.
View the screen for this step
Chapter 22 · Studying and practising
The four adventures: what you do in each one
Each adventure has a different objective. They share controls, but they should not be solved in the same way.
-
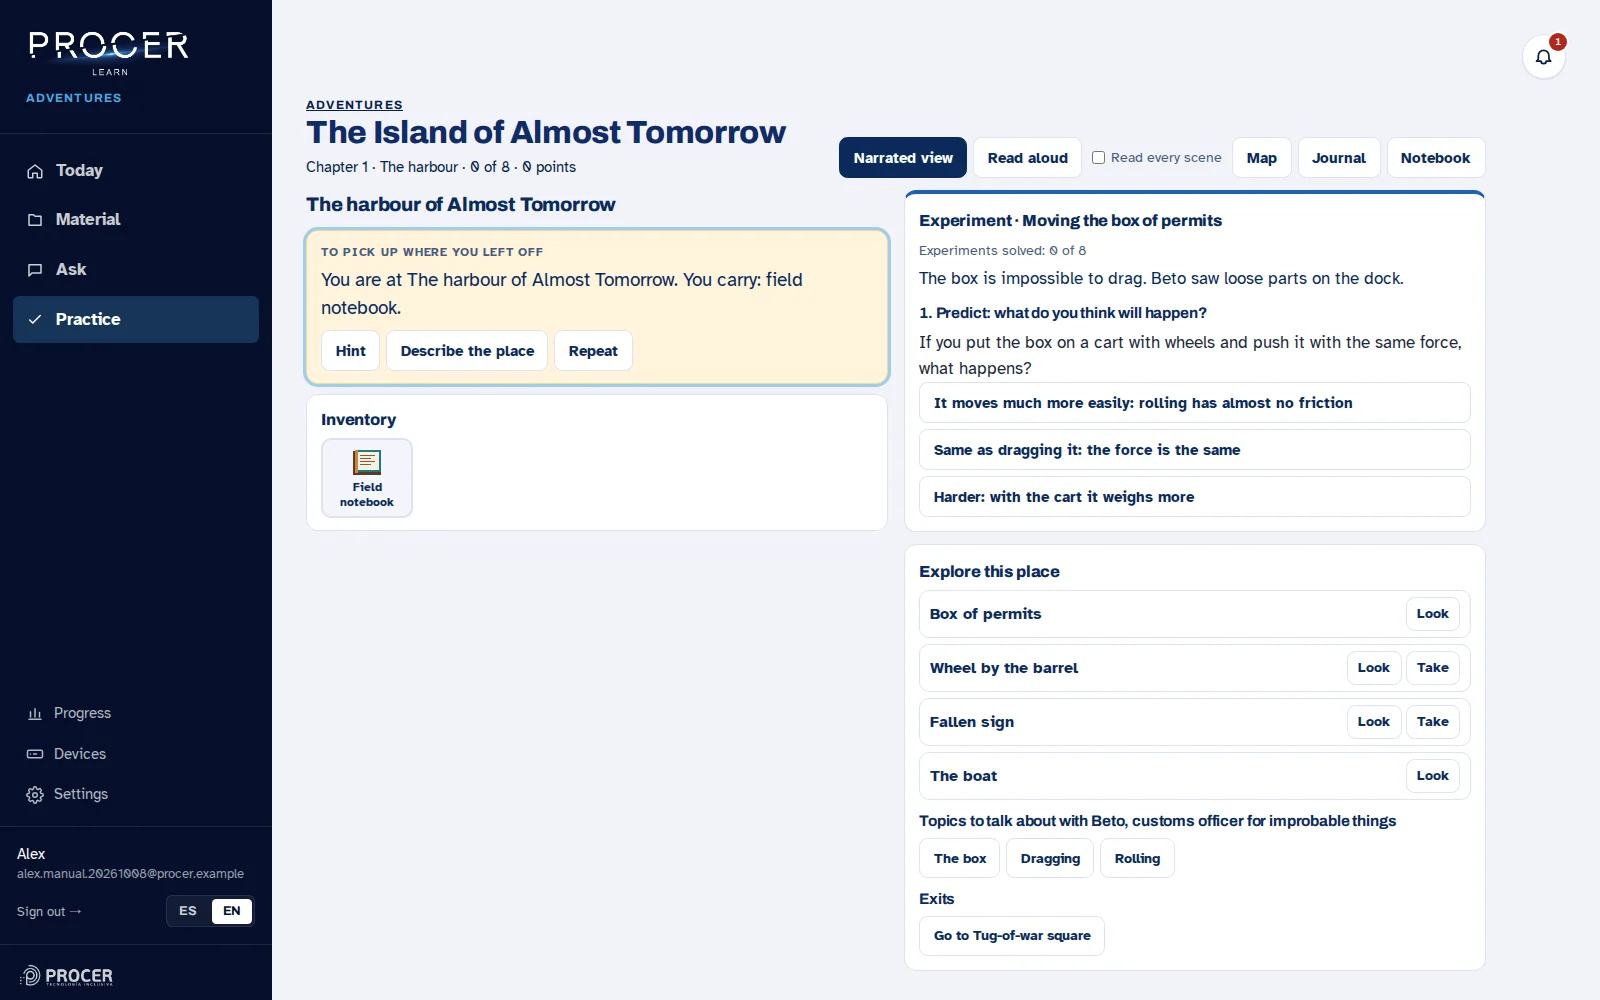
La isla de Casi Mañana (Almost Tomorrow Island)
Explore the locations, talk to the characters, and collect pieces. The experiments ask you to predict what will happen, test it, and compare the result. Use the observations to adjust mechanisms. The Notebook preserves the concepts found.
View the screen for this step
-
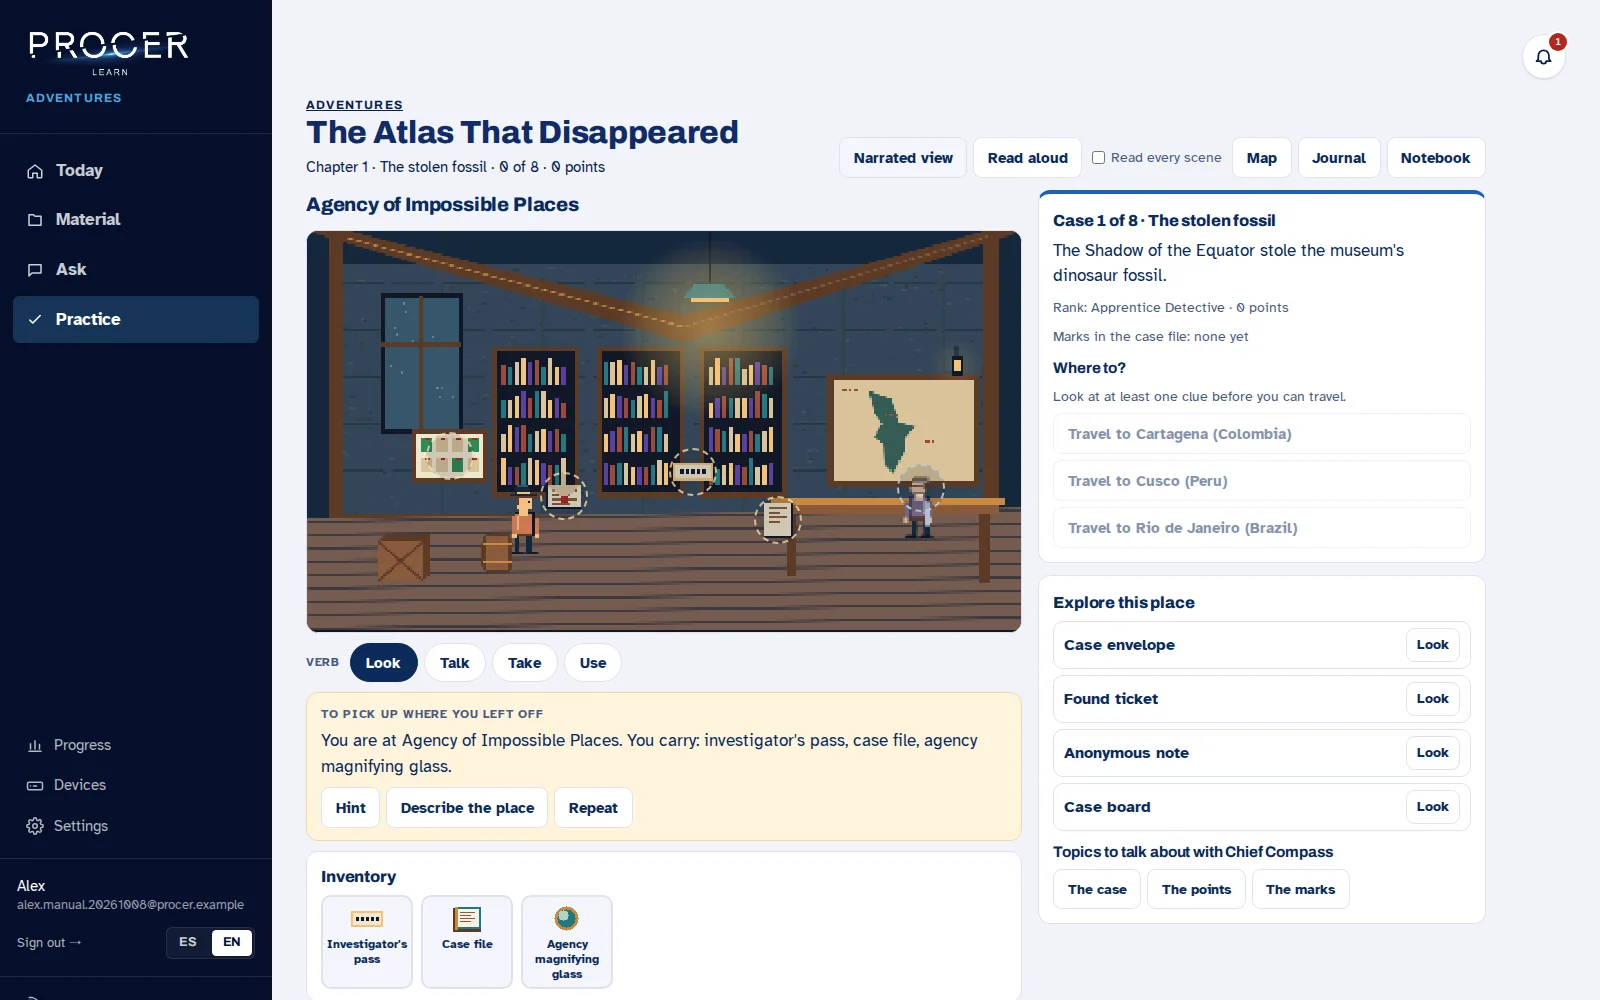
El atlas que desapareció (The Atlas that Disappeared)
Investigate the case by reading the clues. Compare destinations, travel, and gather evidence about the suspect. The extra questions allow you to practice geography. If you make a mistake, review which clue you misinterpreted before choosing another location.
View the screen for this step
-
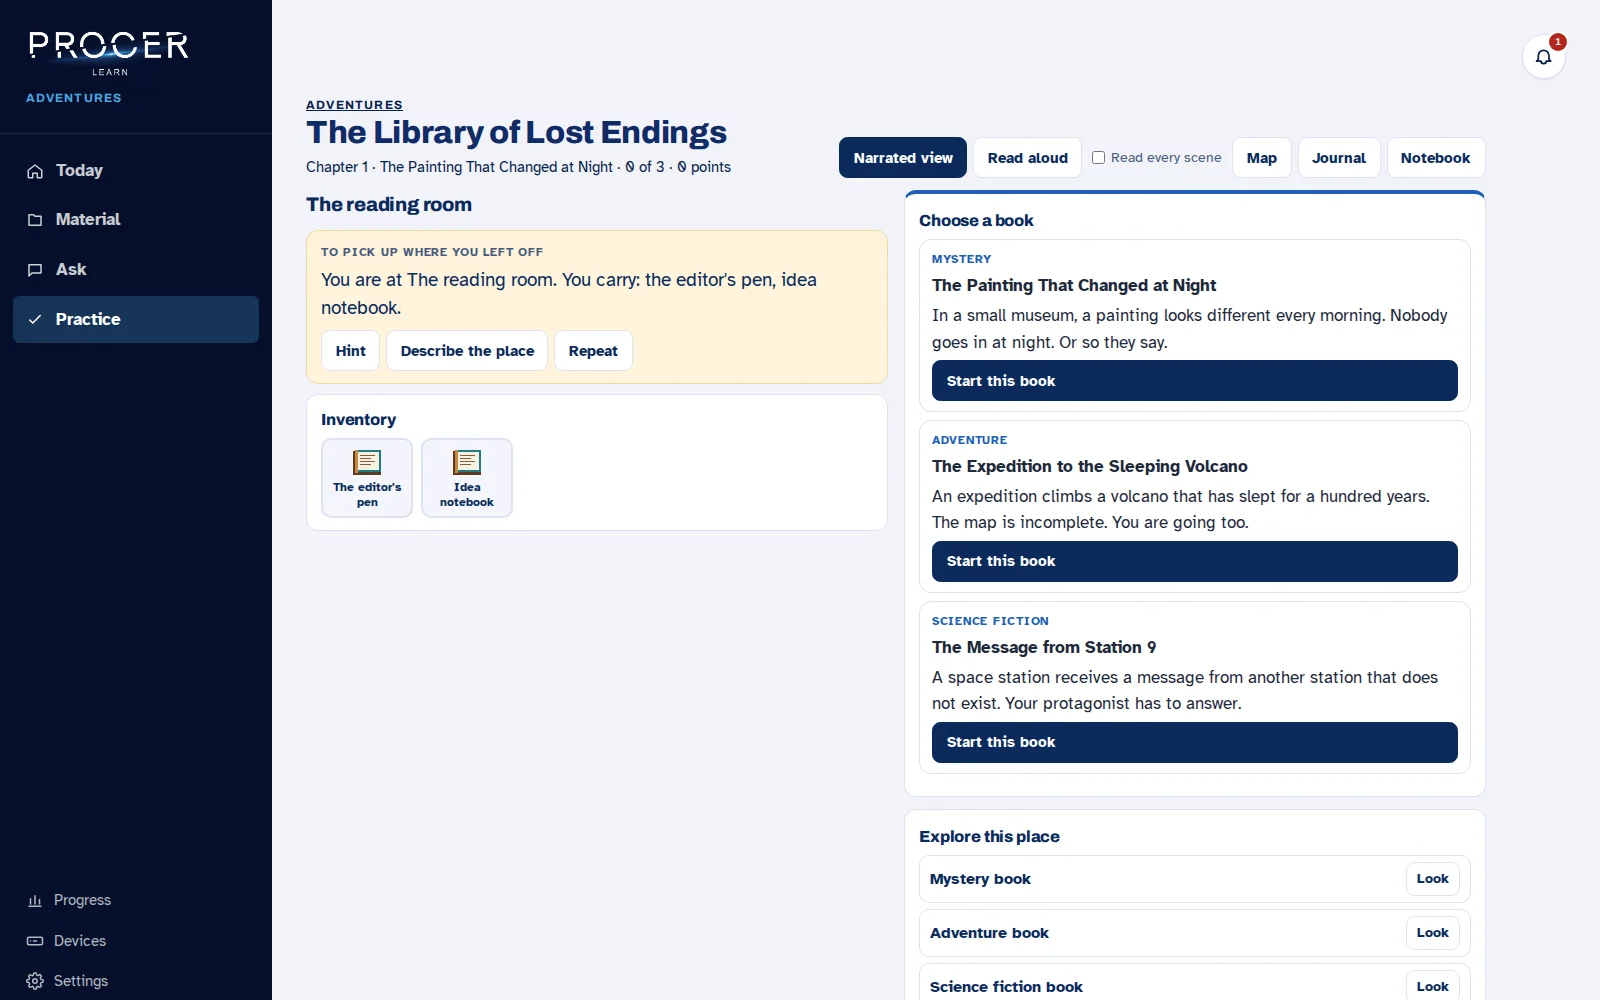
La biblioteca de los finales perdidos (The Library of Lost Endings)
Choose a book and write your part of the story following the prompt. Send the text to the editor, review their feedback, and continue the scenes. When finished, provide a title and use Save to Material to save your story when that action is available.
View the screen for this step
-
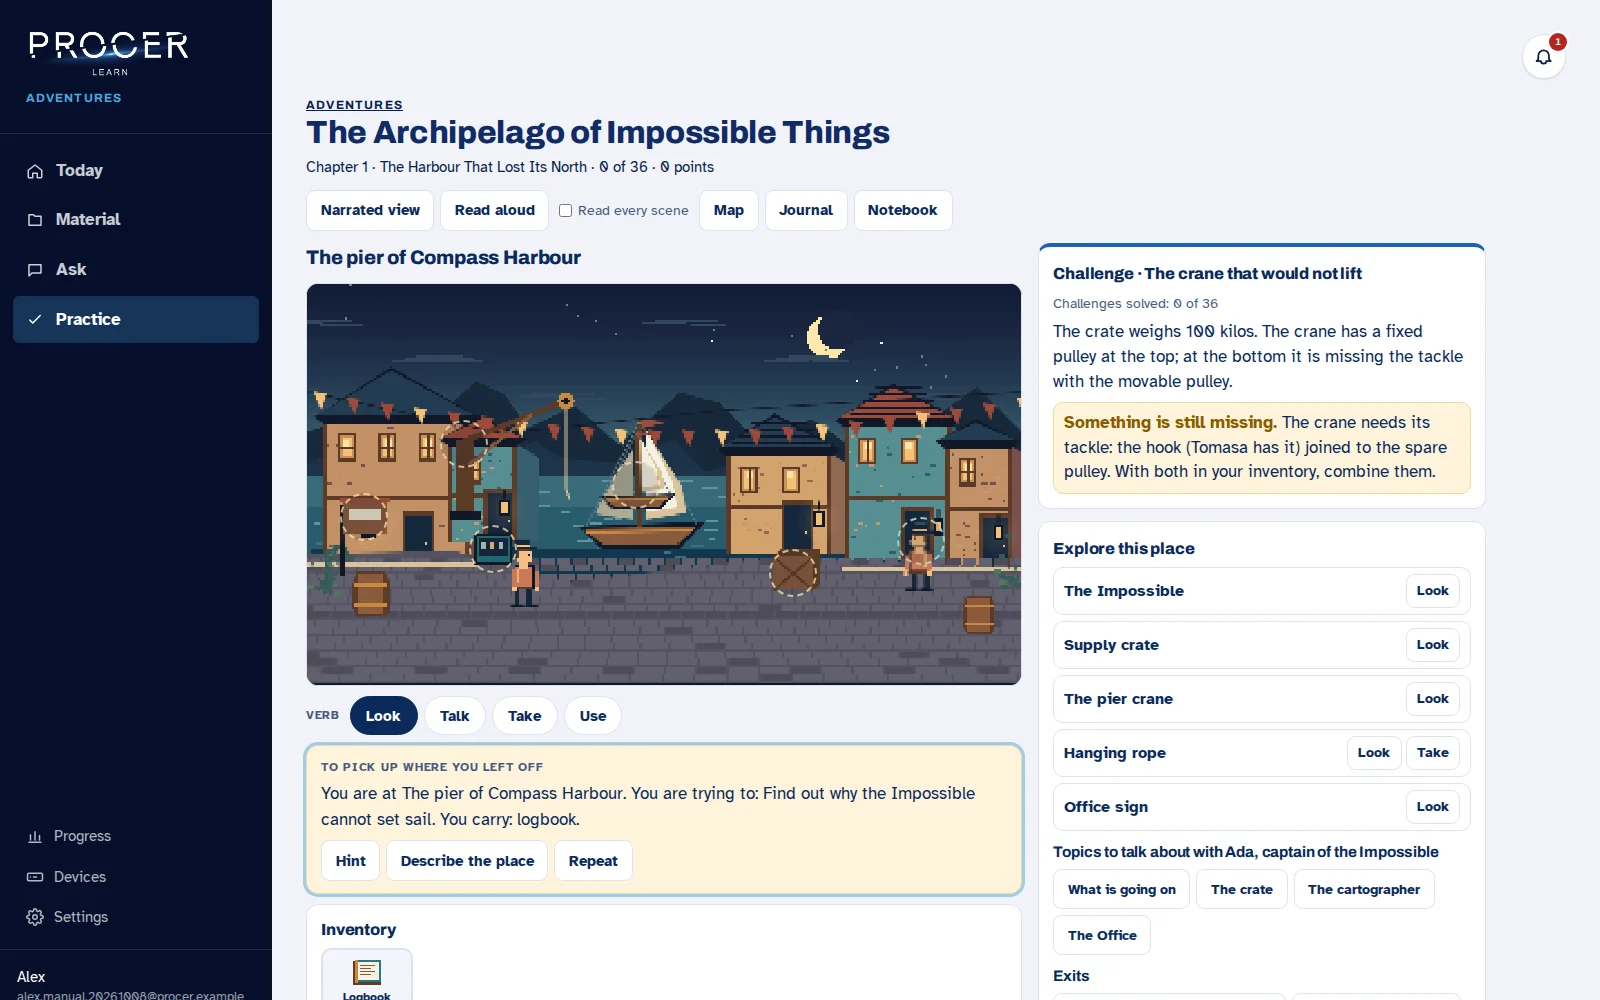
El archipiélago de las cosas imposibles (The Archipelago of Impossible Things)
This is the long-form adventure, organized into chapters and challenges. Conversations and objects change what can be done. At the beginning, the crane needs a rig: the diary and clues help gather the pieces. Knowledge is applied to solve situations, not just to answer a questionnaire.
View the screen for this step
-
Adapted material without losing the rules
Some explanations in the archipelago can be prepared using material from your account and show their citation. This adaptation does not mean that any PDF is transformed into a new world nor that the solutions change with every move. If there is no relevant adaptation, the game's original content is preserved.
View the screen for this step
Chapter 23 · Studying and practising
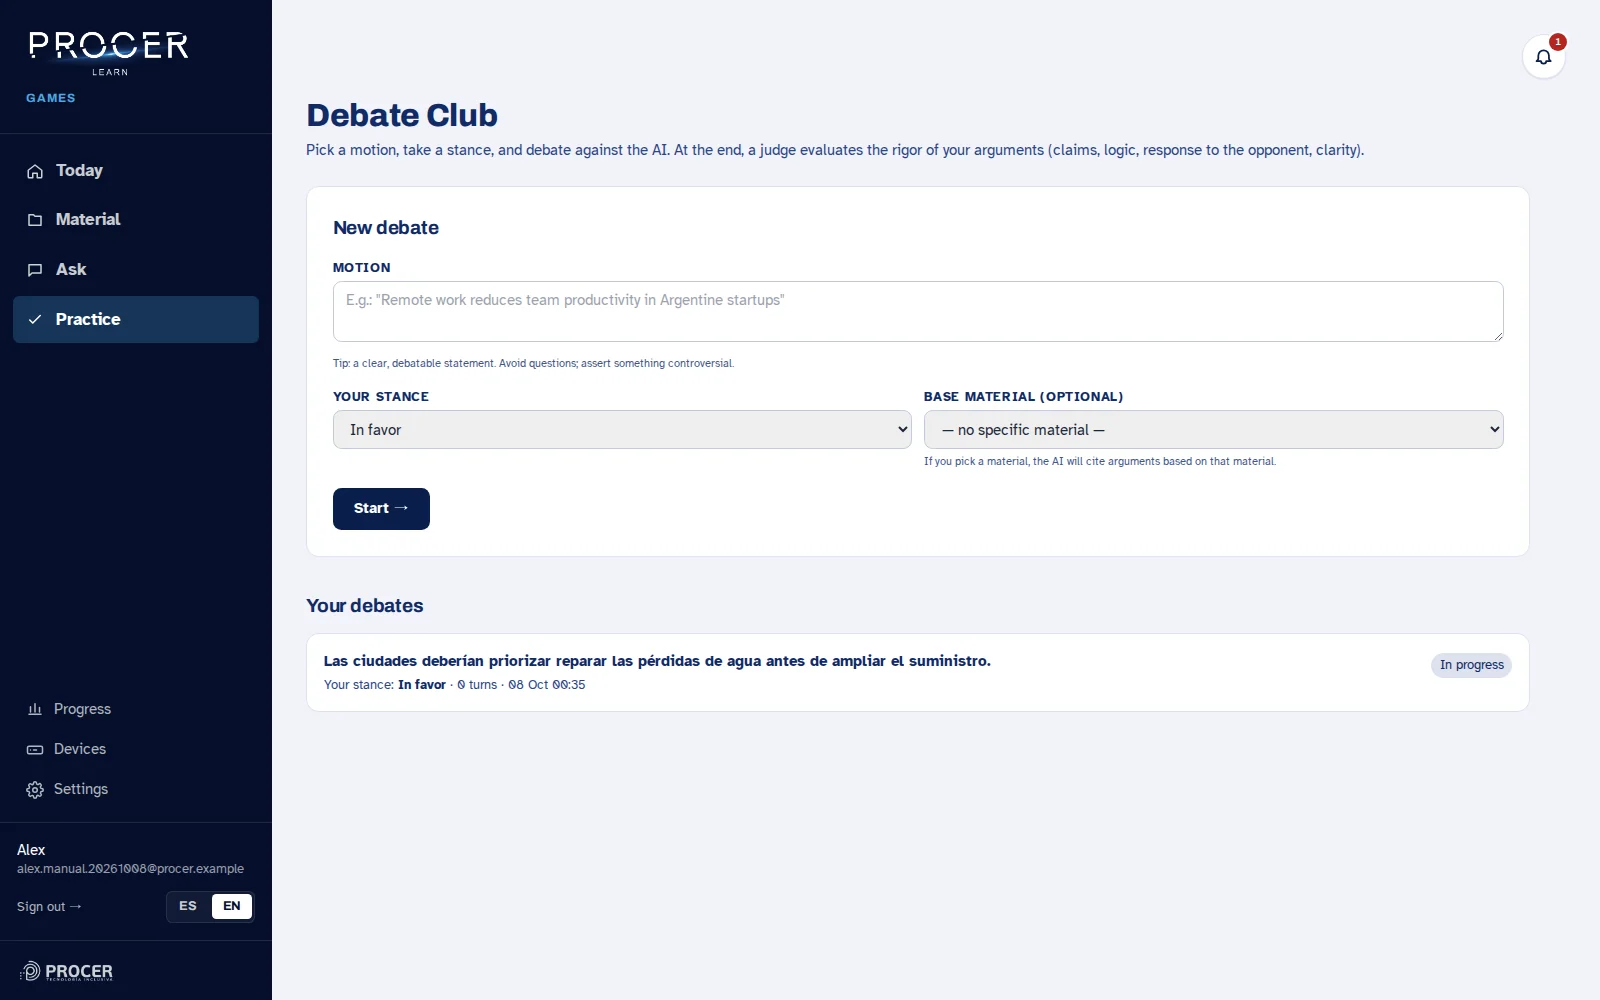
Debating an idea
The Debate Club allows you to practice how to defend a position and respond to objections.
-
State a claim
Write a motion that allows for discussion, choose whether you are going to defend or question it, and select a material if you want to base the debate on your library. For example: prioritizing the repair of water leaks in a city.
View the screen for this step
-
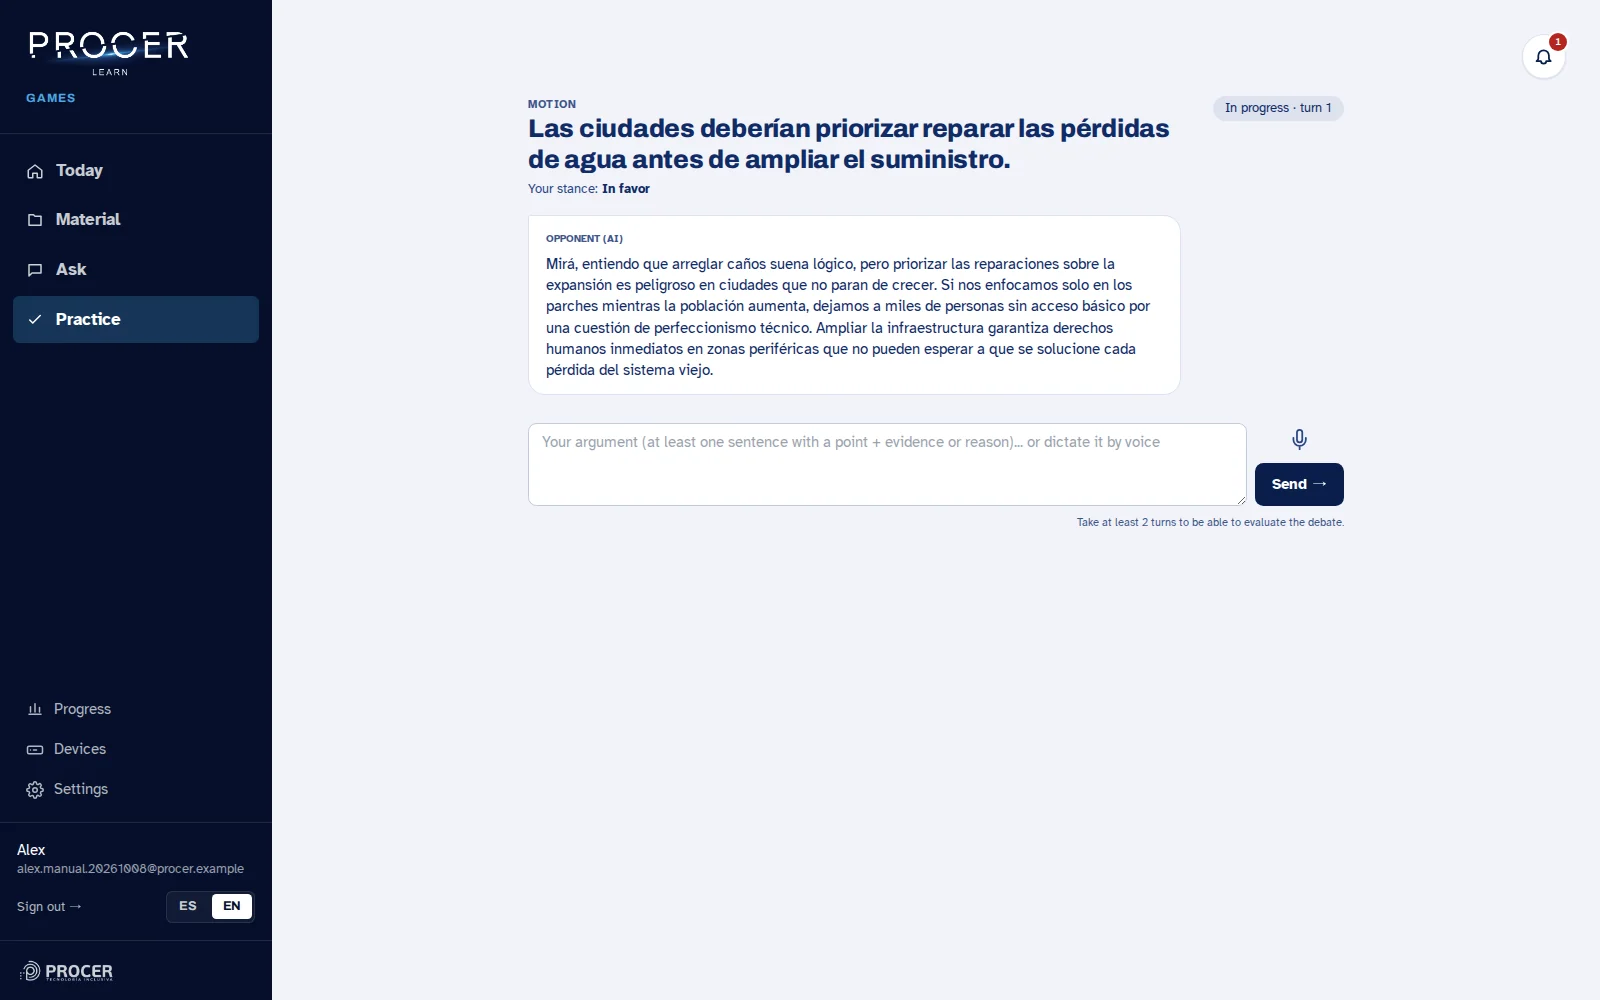
Start and respond
Start the debate, read the argument from the other side, and write your response. Develop one idea per turn and use evidence. If you use voice, check the transcript before sending when the control allows it.
View the screen for this step
-
Close and review
End the session to receive feedback on the arguments. Review which claims you supported, which remained weak, and what you could answer better. An automatic evaluation of the debate does not determine which position is true.
View the screen for this step
-
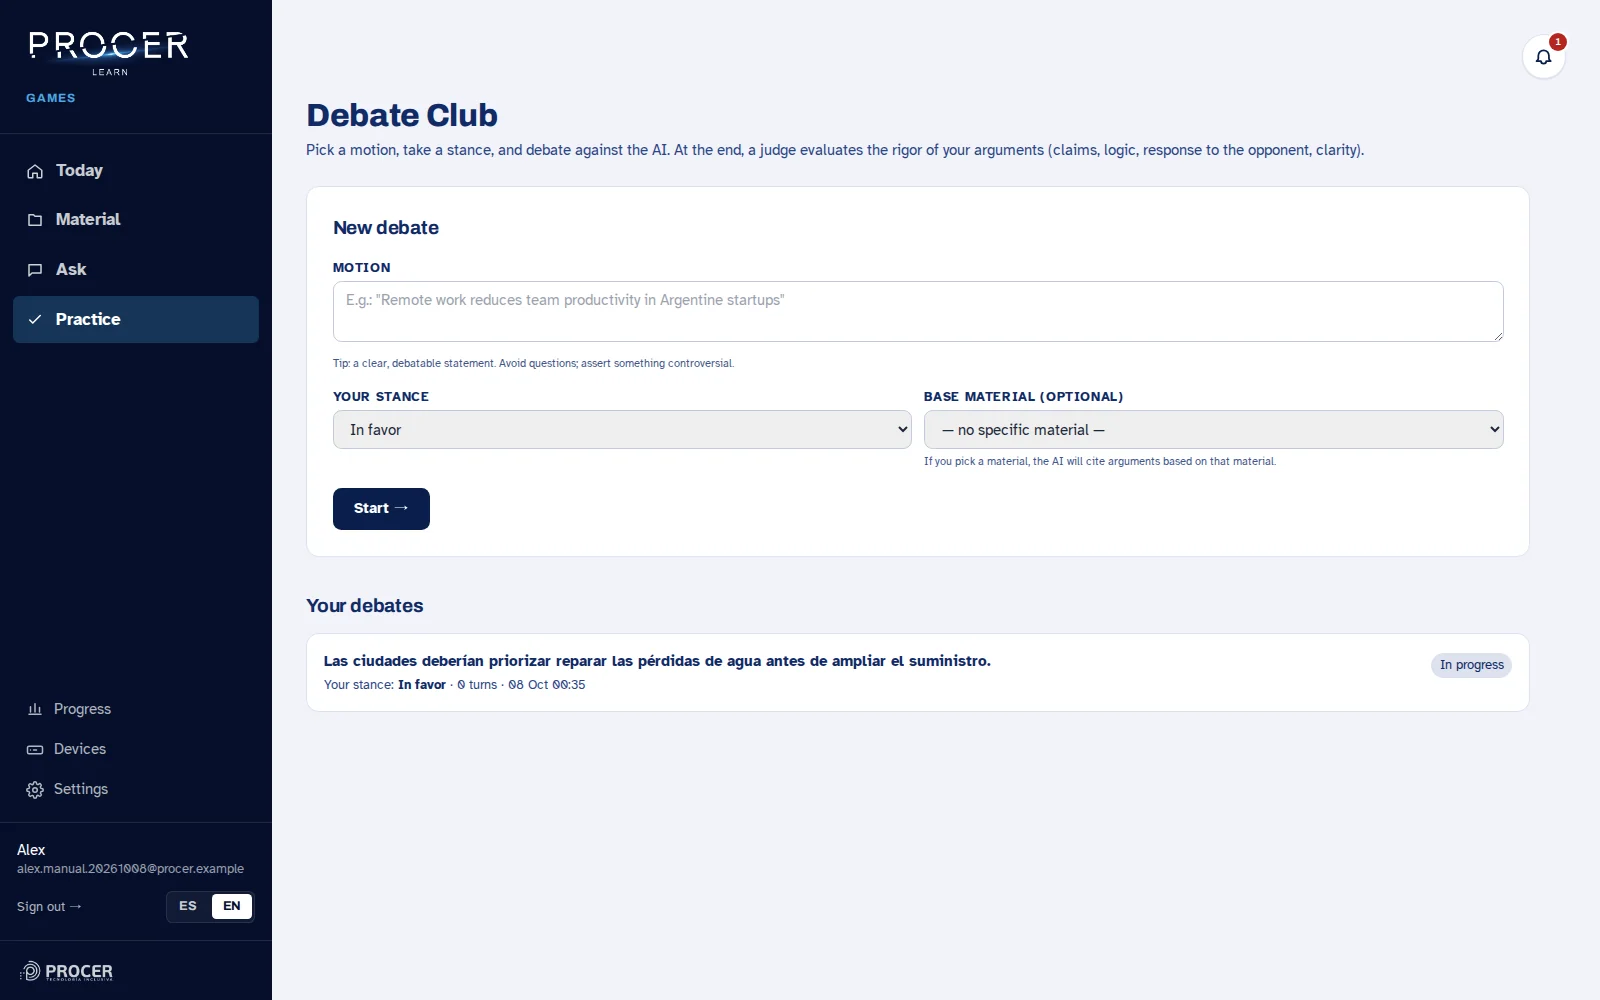
Resume from the list
Your debates saves the sessions. Open the corresponding one if you want to reread the conversation or continue. There is no need to create a new debate to review a previous one.
View the screen for this step
Chapter 24 · English
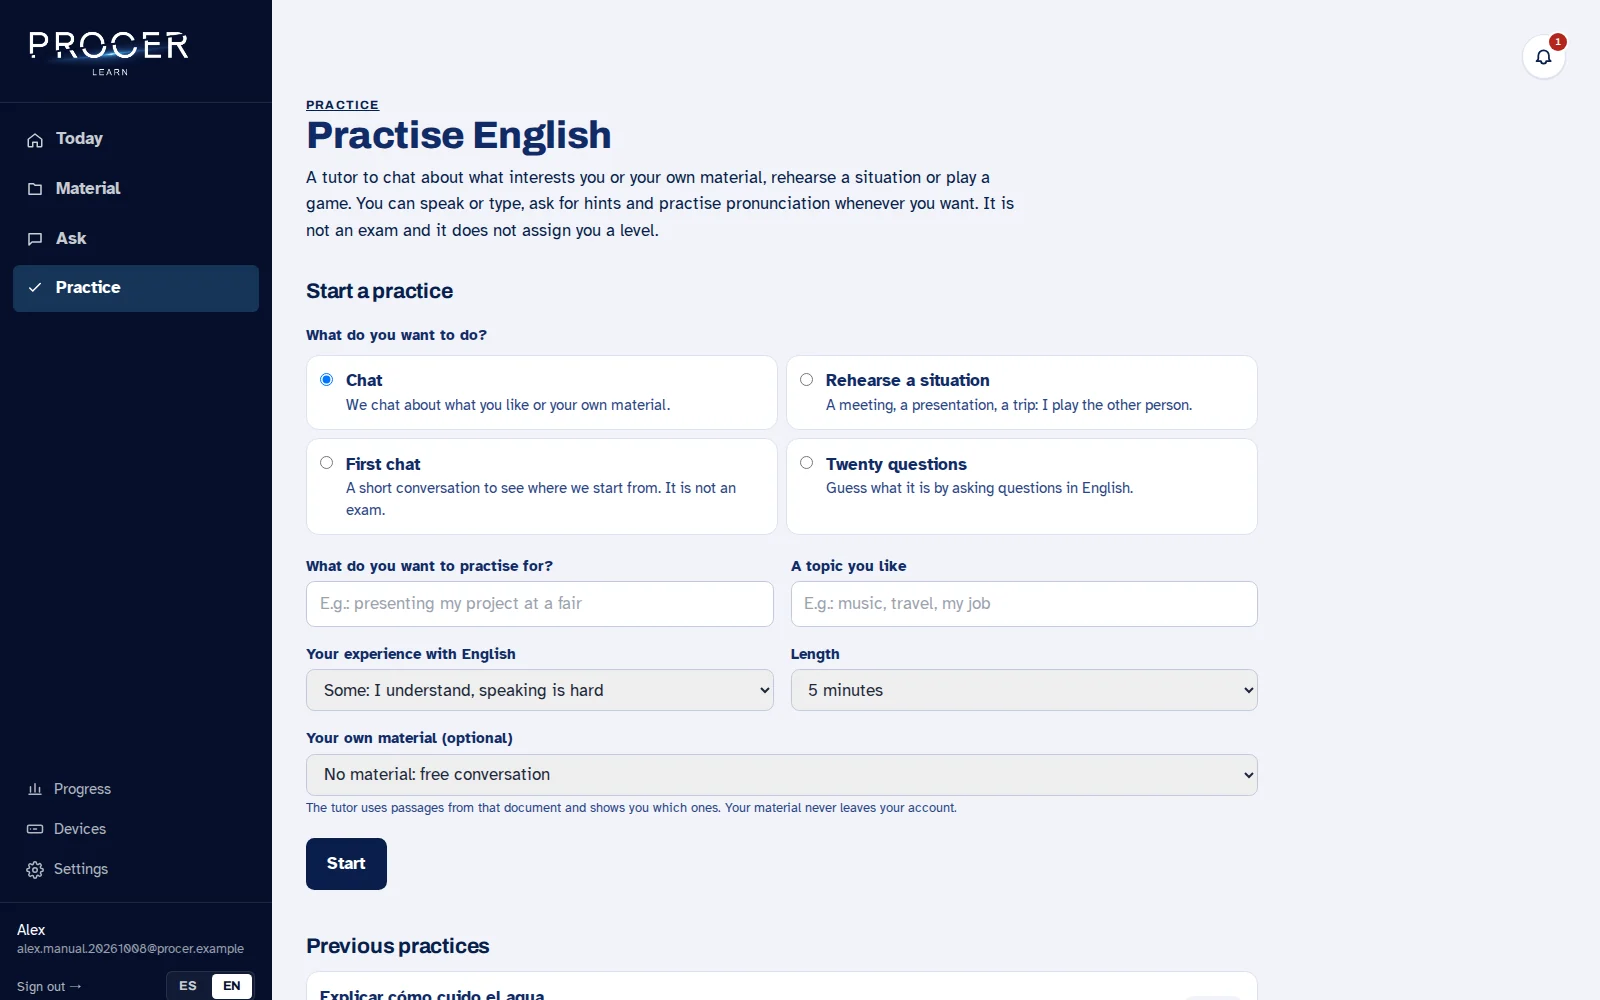
Preparing an English practice session
The tutor is designed for practicing with a specific purpose: a conversation, a situation, or a game. It does not certify an English level.
-
Choose the mode
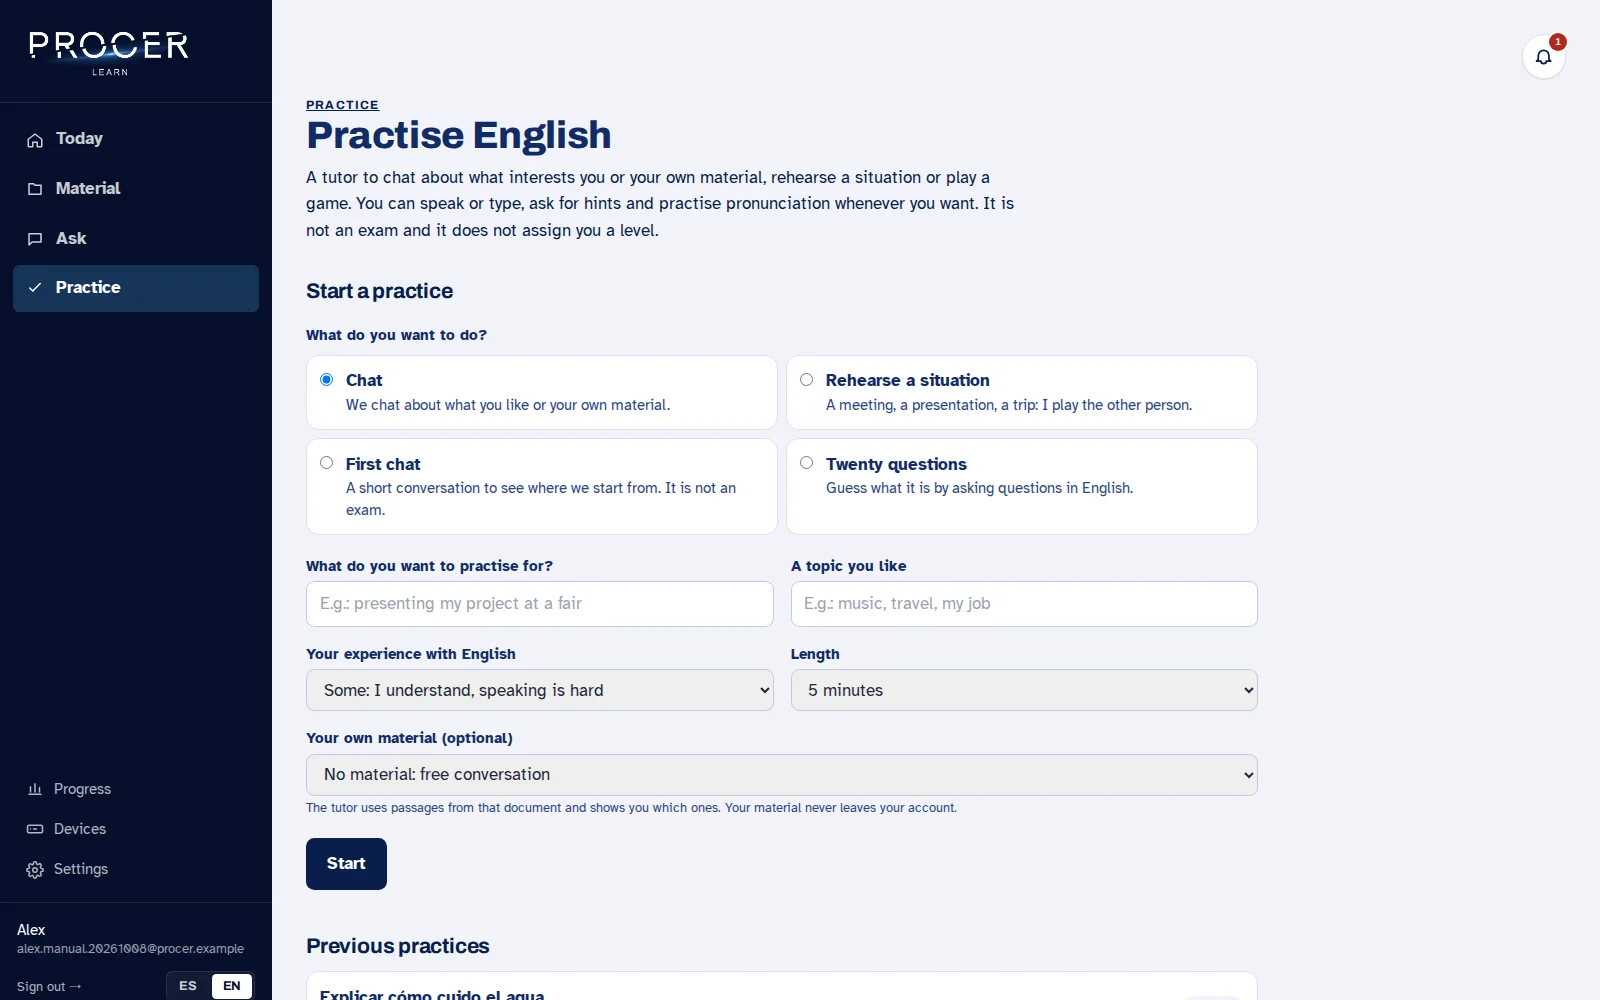
From Practice, open Converse in English. Choose Converse, Rehearse a situation, First chat, or Twenty questions. In a situation, the tutor represents the other person; in the game, you progress by asking questions in English.
View the screen for this step
-
Tell it what interests you
Complete the purpose and the topic, indicate your experience, and choose a duration of five, ten, or fifteen minutes. A concrete goal, such as explaining a project or talking about music, provides more direction than practicing general English.
View the screen for this step
-
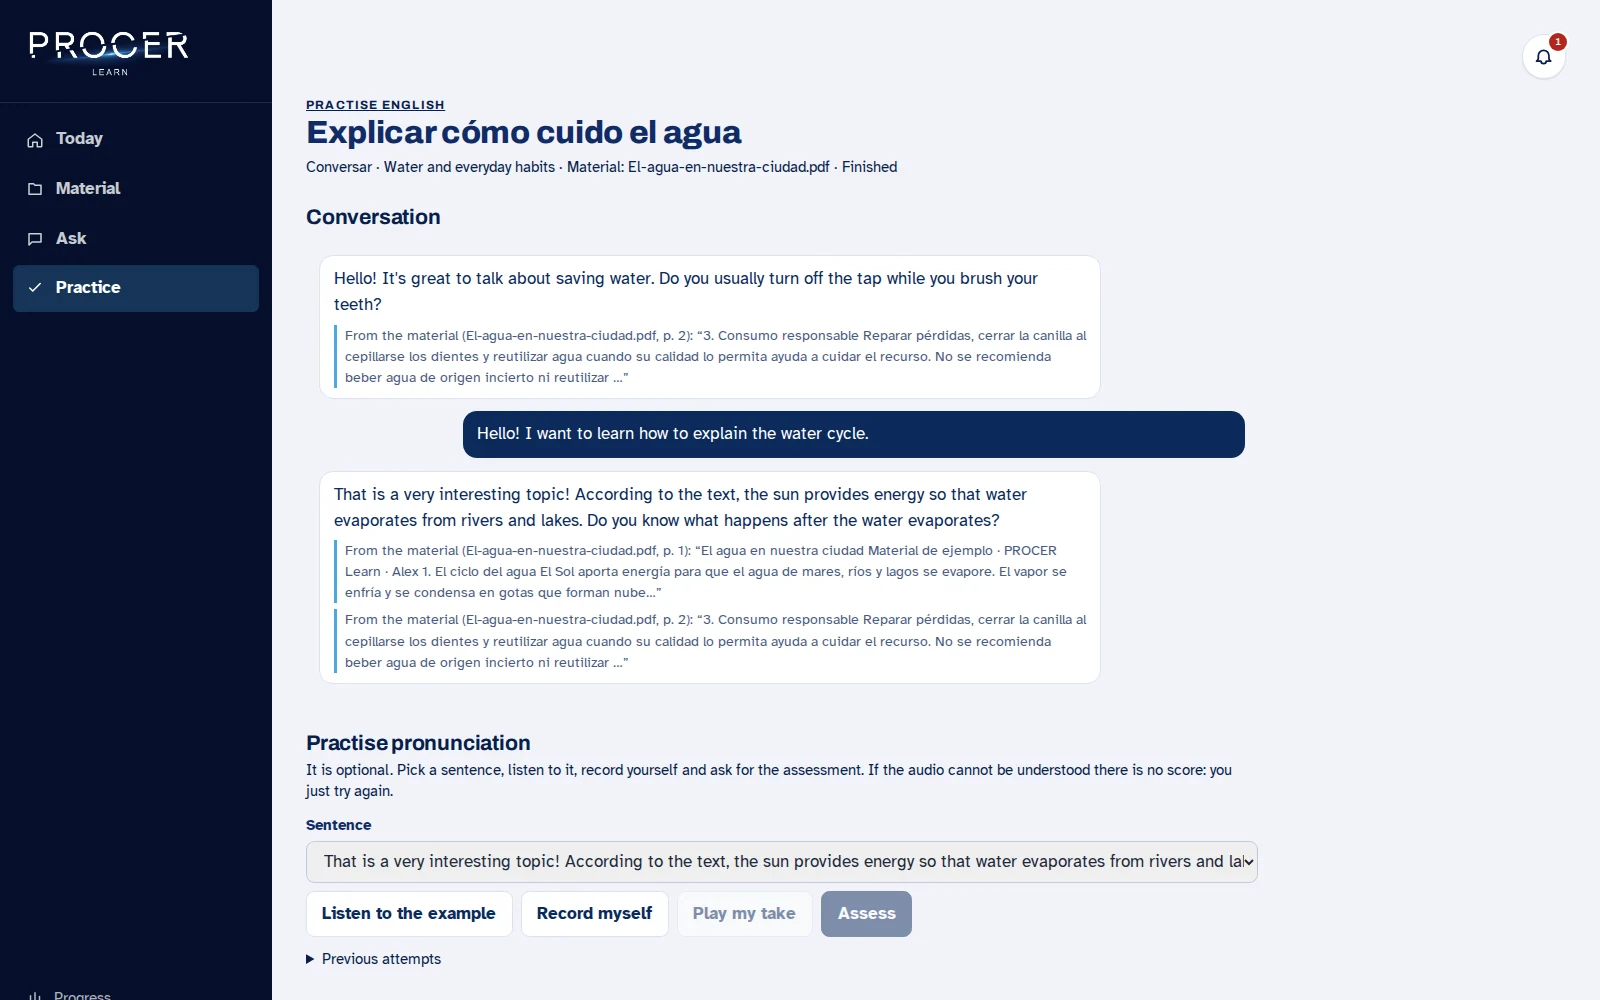
Use your own material
Optionally choose a document. You can also enter from Practice English with this on the material card. Review the passages the tutor cites: they are the connection between the conversation and what you are studying.
View the screen for this step
-
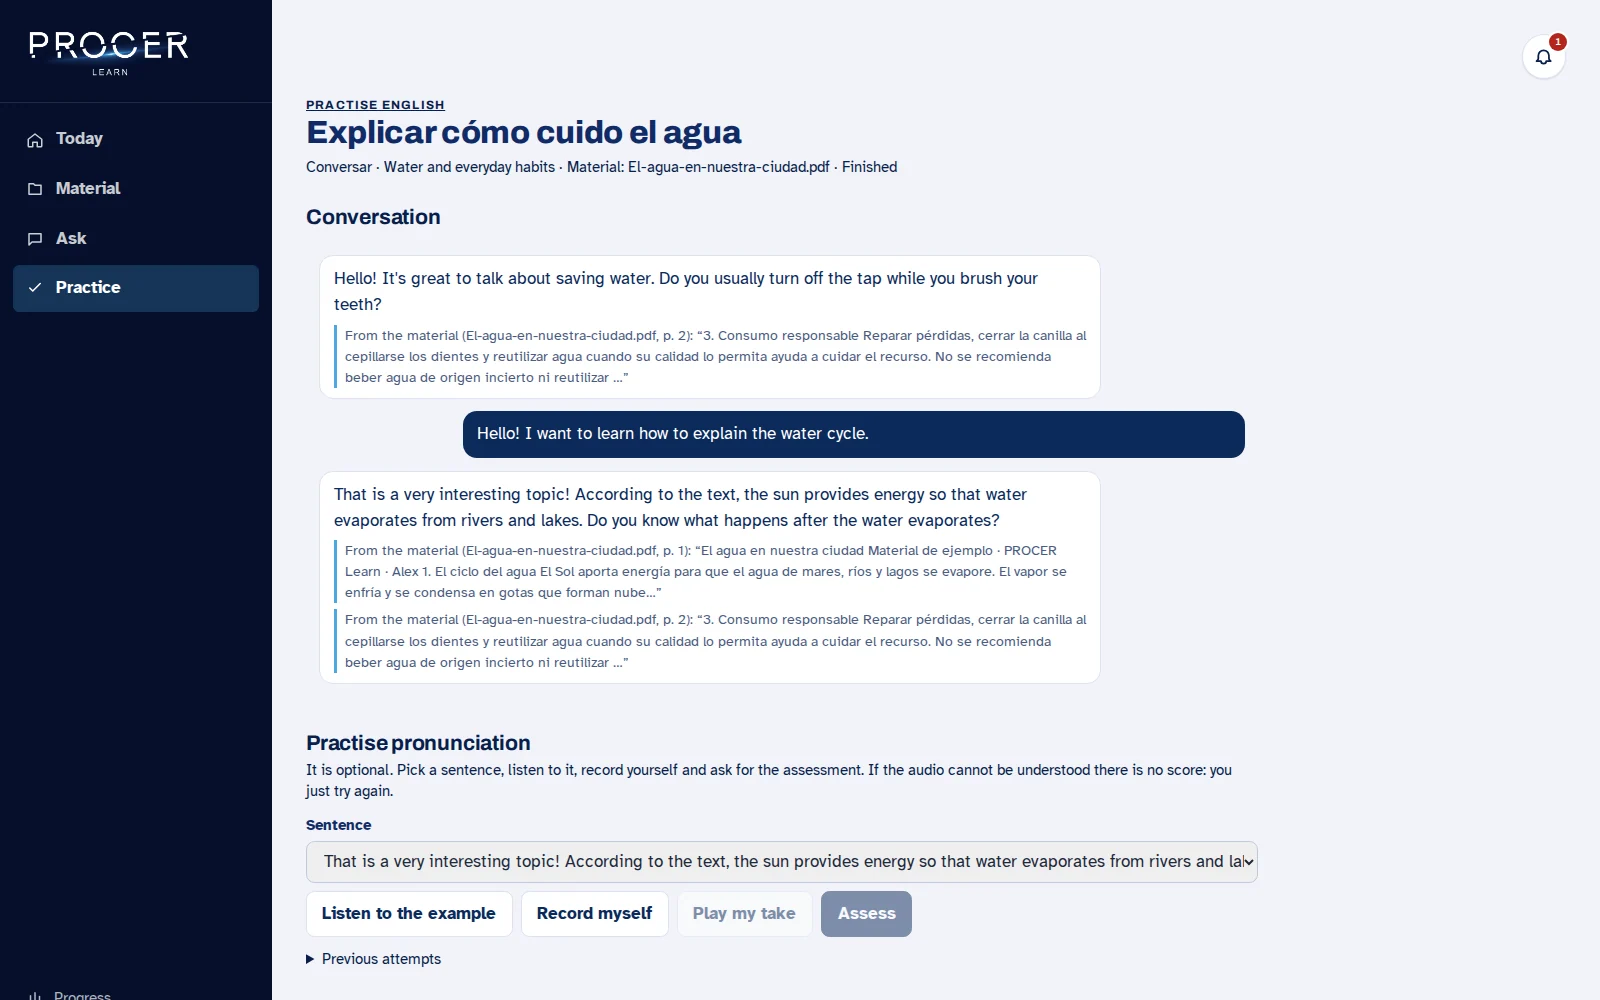
Start or resume
Choose Start. An open practice session can be resumed from the tutor and, if it is recent, from Today. The screen and controls change if your account has the pilot continuous conversation enabled.
View the screen for this step
Chapter 25 · English
Tutor conversation: text, help and ending a session
Regular practice allows you to write or record a response and ask for help without leaving the conversation.
-
Answer at your own pace
Read or listen to the question. Type in Your turn and press Send, or use Record and review the recognized text. If you get stuck, you can write in Spanish to ask for help. Wait for one operation to finish before starting another capture.
View the screen for this step
-
Request support
Listen to the response and Slower allow you to repeat the audio. Give me a hint helps you build a response; Explain to me in Spanish clarifies what you did not understand. Change the subject allows you to redirect the practice without starting from scratch.
View the screen for this step
-
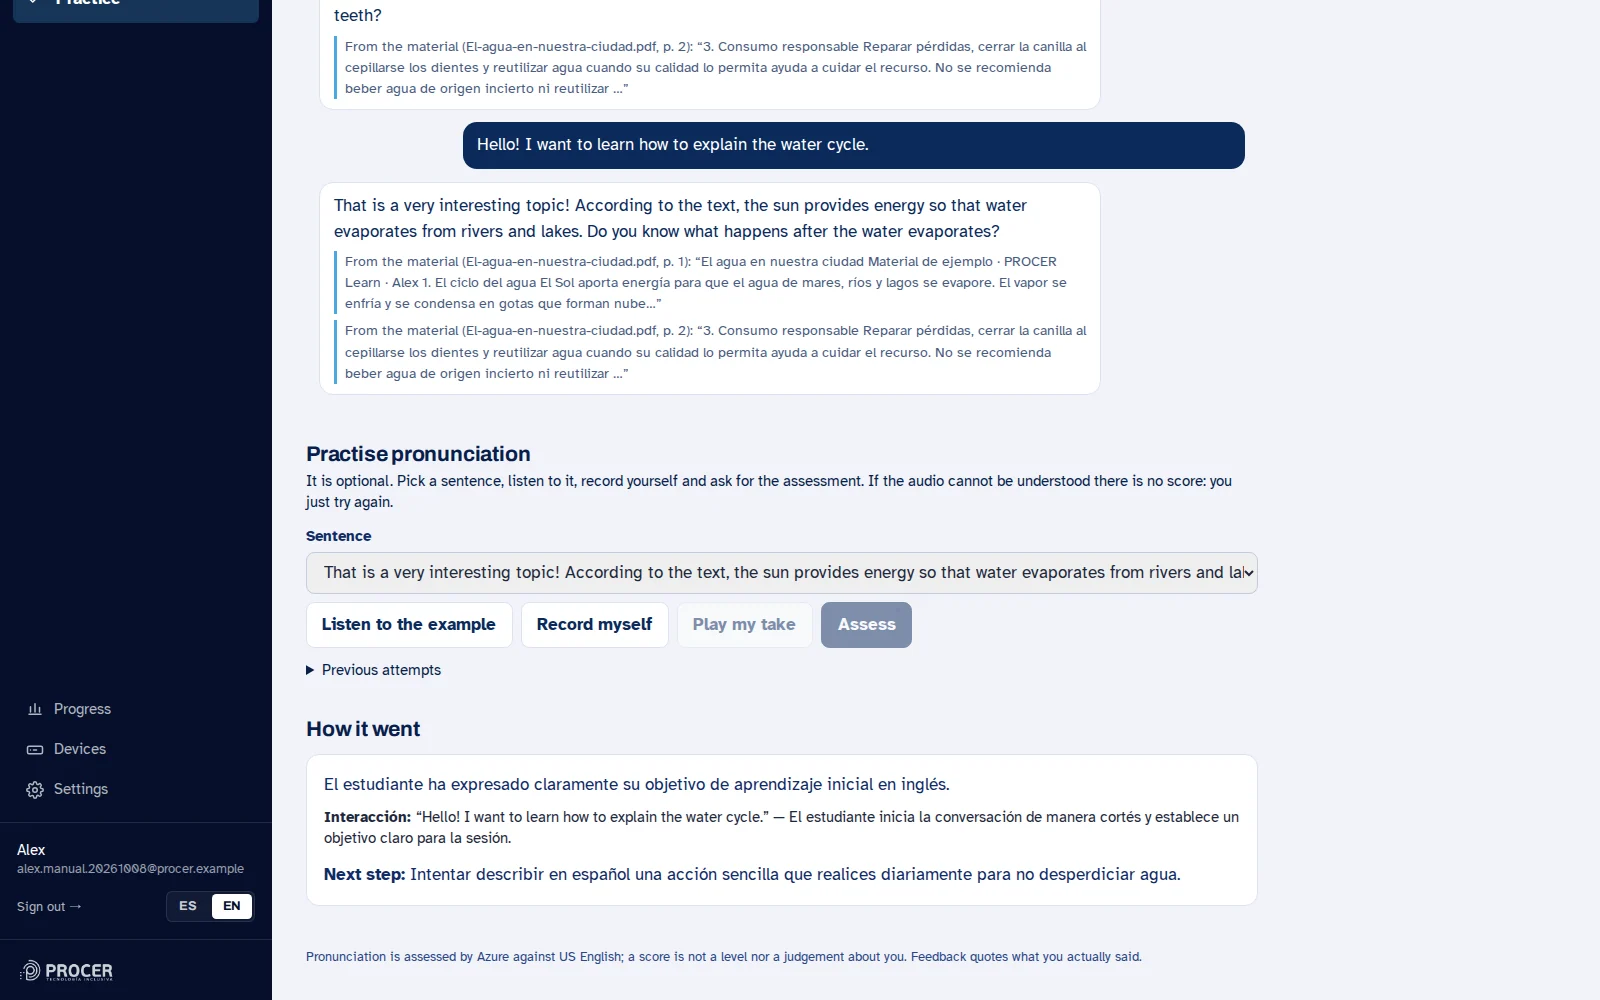
End the round
Choose End the round when you want feedback. Read the notice and press the same button again within eight seconds to confirm. Review observations, corrections, and examples taken from what you actually said. If a useful expression is offered, save it to review later.
View the screen for this step
-
Review what you learned
In previous practices, you can review the conversation and saved expressions. Practice a correction in a new phrase. Do not use a single score or a single chat to decide your overall English level.
View the screen for this step
Chapter 26 · English
Tutor with continuous conversation: pilot
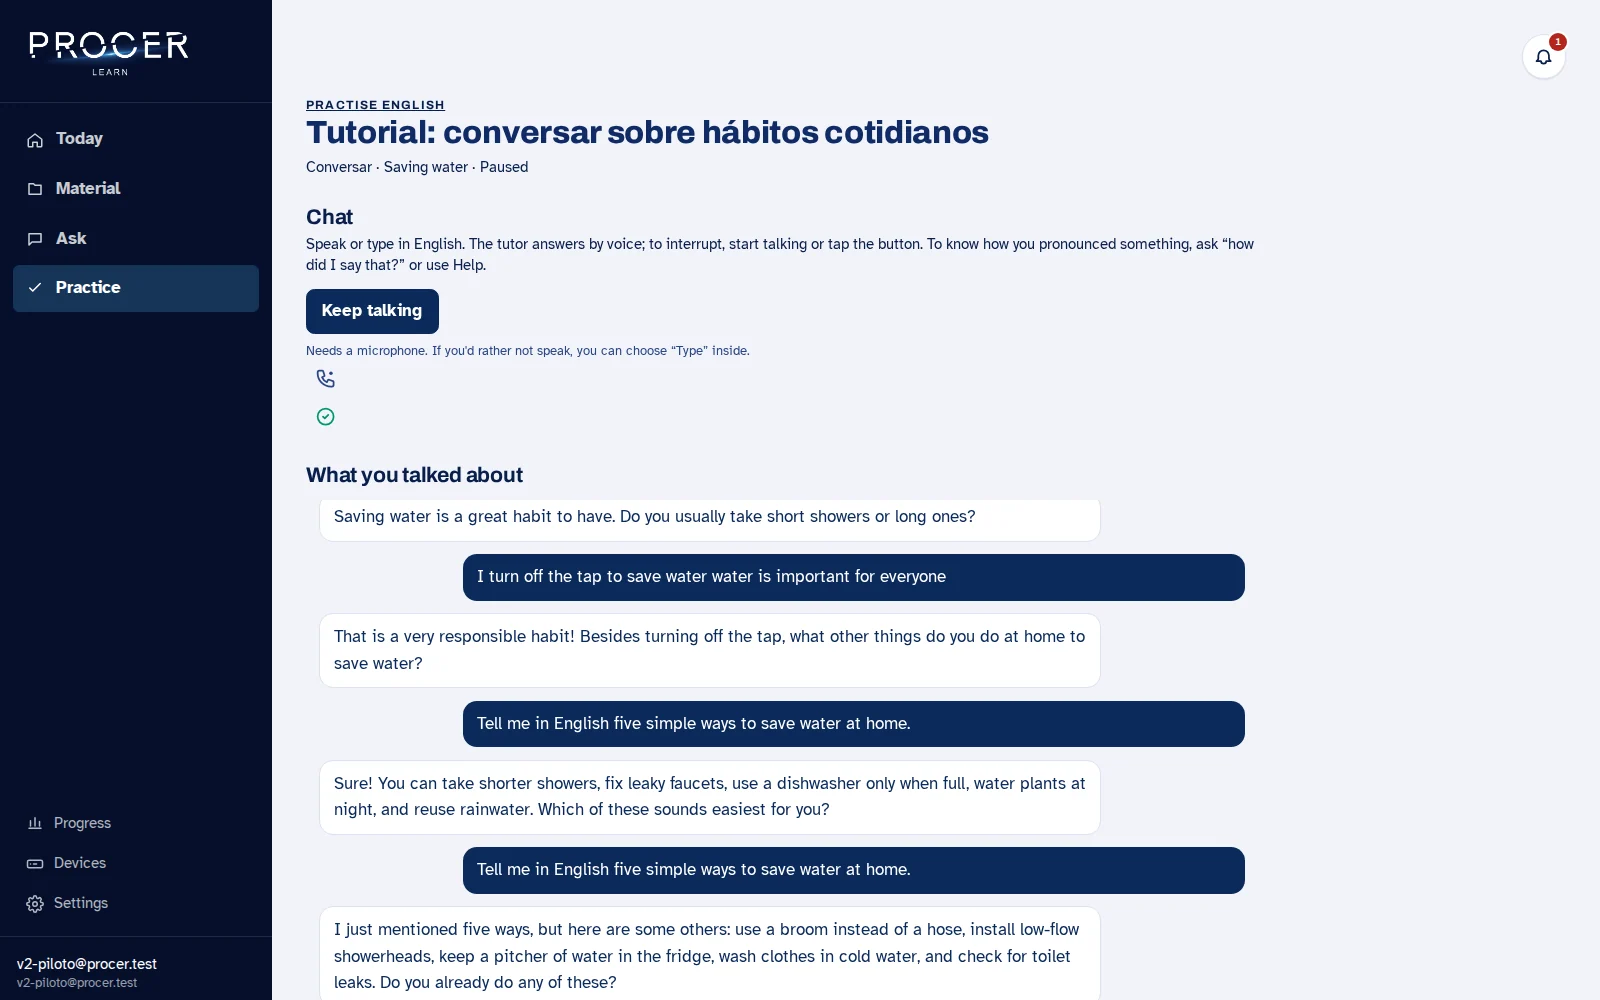
This mode is enabled only for pilot accounts. It was tested with a dummy account already authorized; it has not been activated for all users.
-
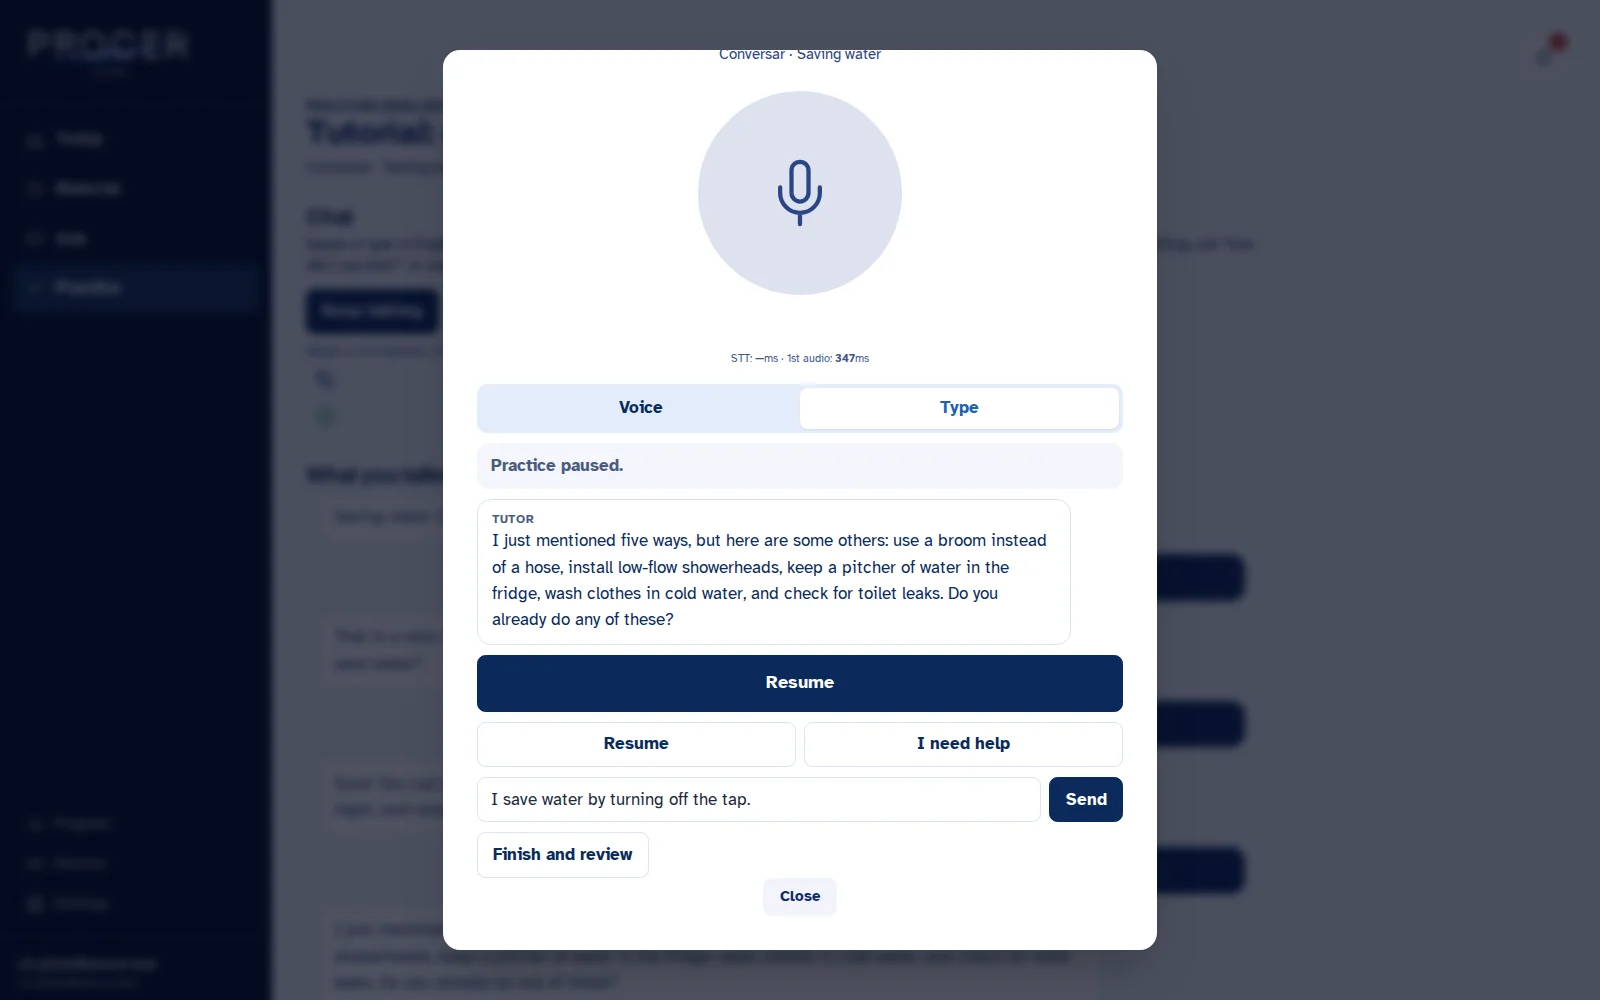
Open Start conversation
If that button appears, open it and authorize the microphone. Wait for 'Listening' before speaking. When you pause, the system closes the turn and the tutor responds. The visible text allows you to review what was recognized.
View the screen for this step
-
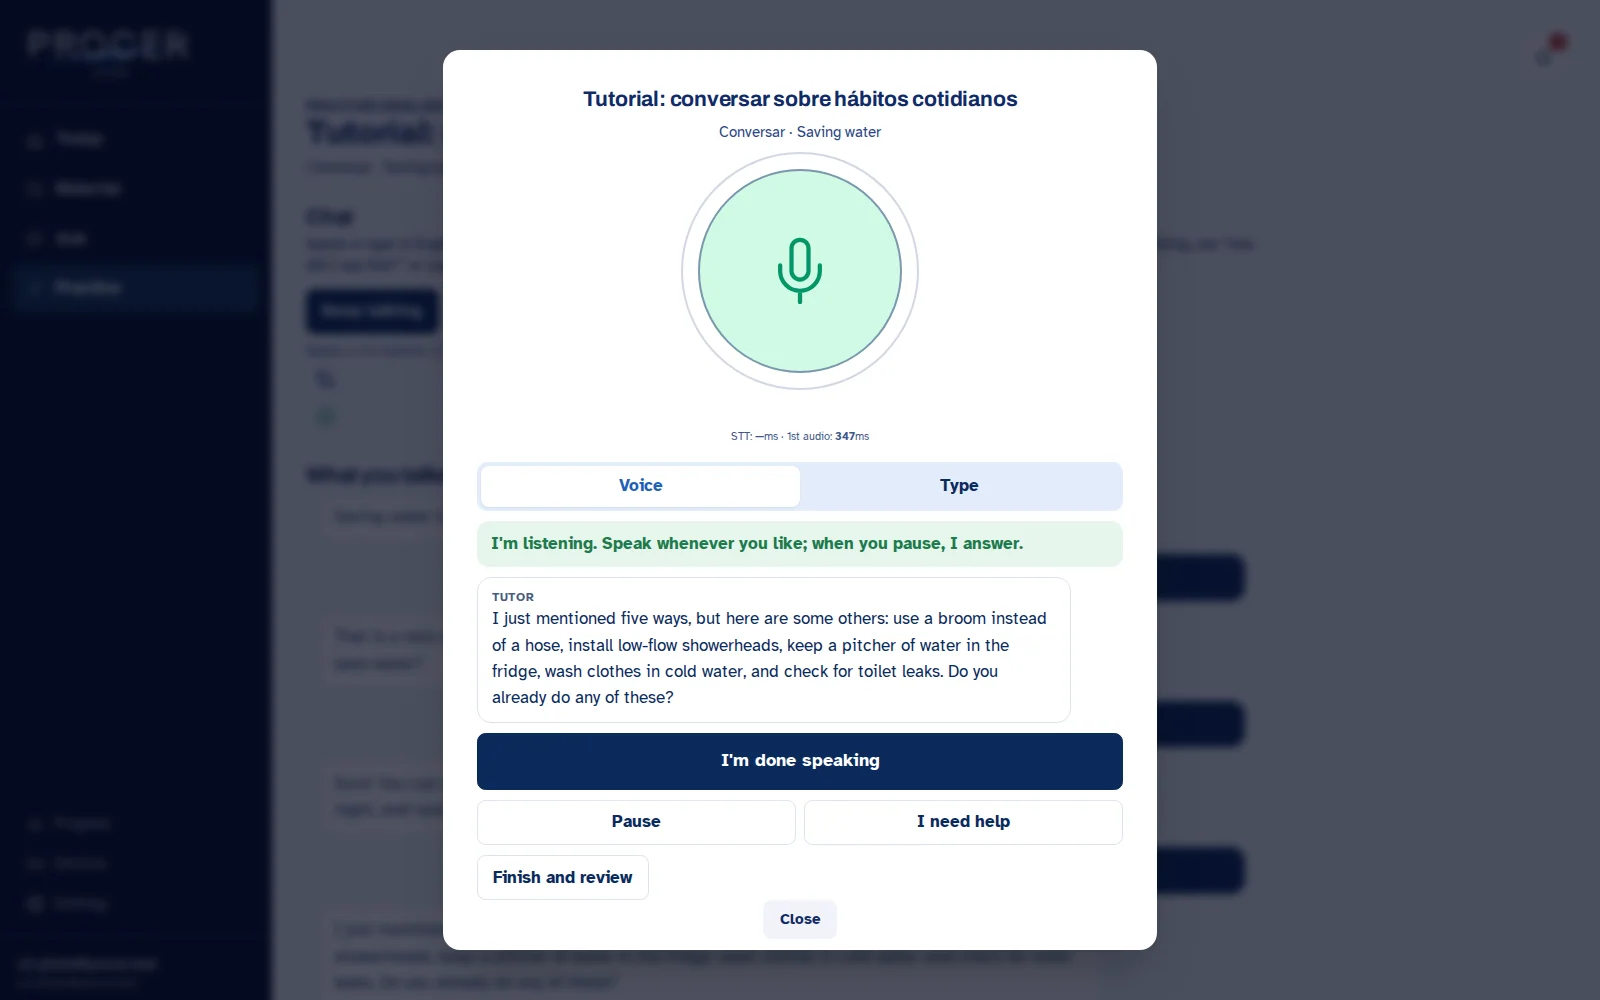
Interrupt and manage the turn
While the tutor is speaking, you can try to interrupt by voice or use 'Interrupt and speak'. 'Finished speaking' explicitly sends the turn. 'Pause' stops the practice and 'Resume' allows you to continue. If the automatic cutoff fails, the button gives you direct control.
View the screen for this step
-
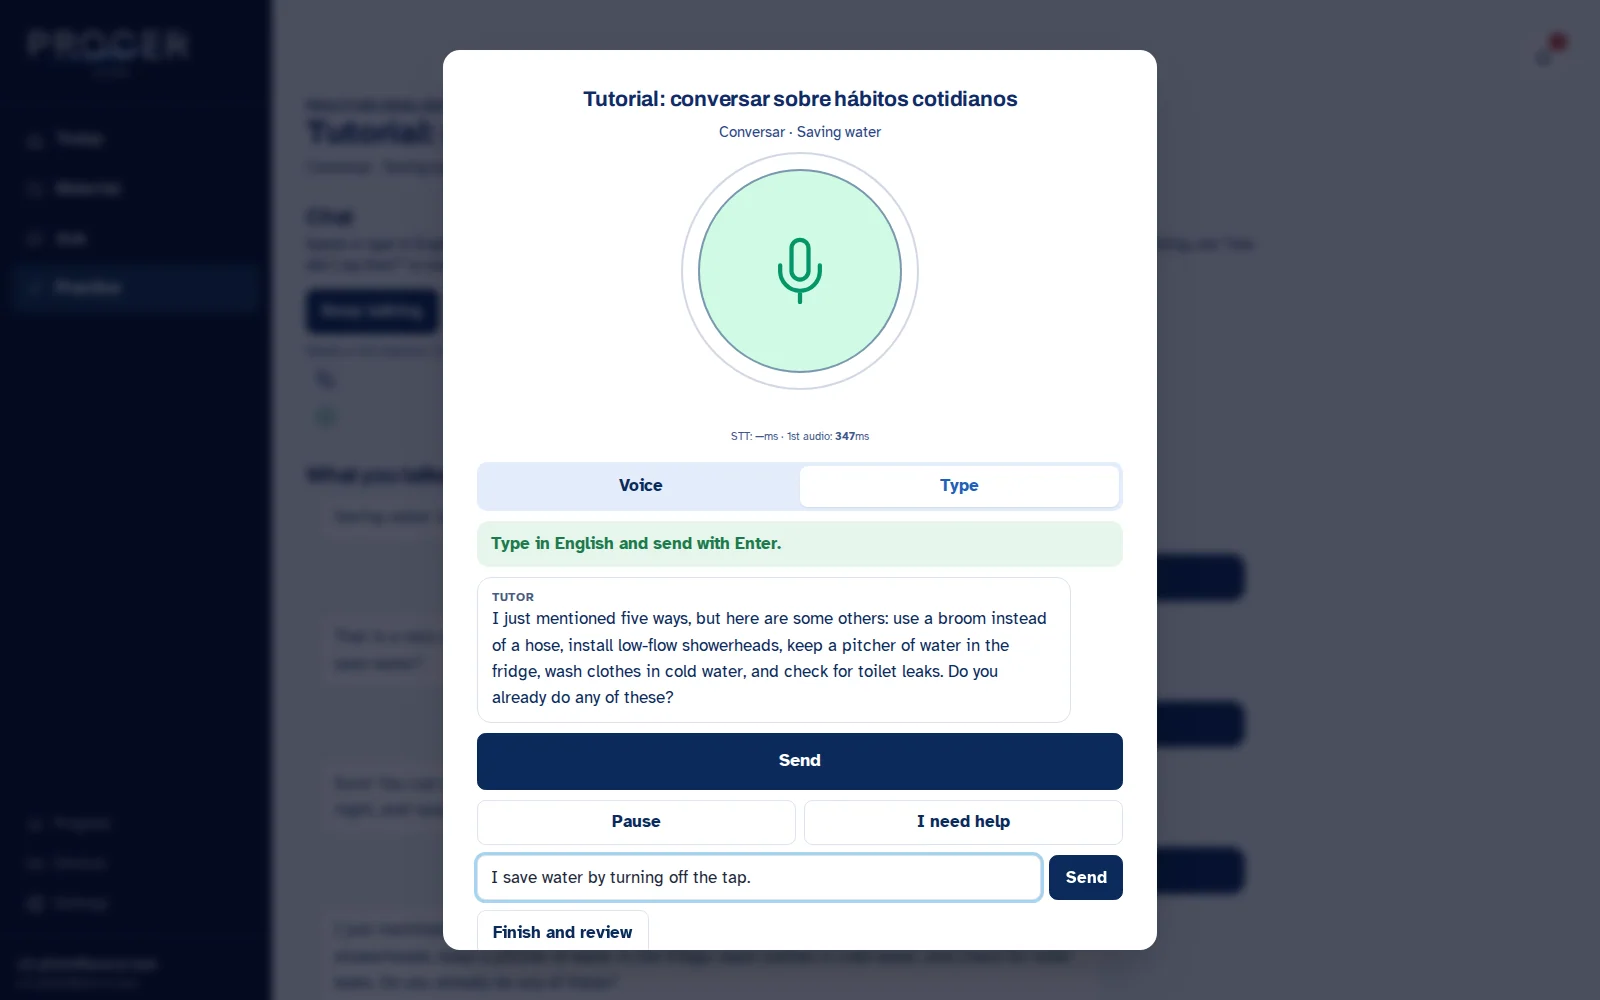
Switch to text when needed
Choose 'Write' to answer without a microphone. Complete the field and send with Enter. Return to 'Voice' whenever you want to speak. Avoid sending while the interface indicates that a turn is in progress.
View the screen for this step
-
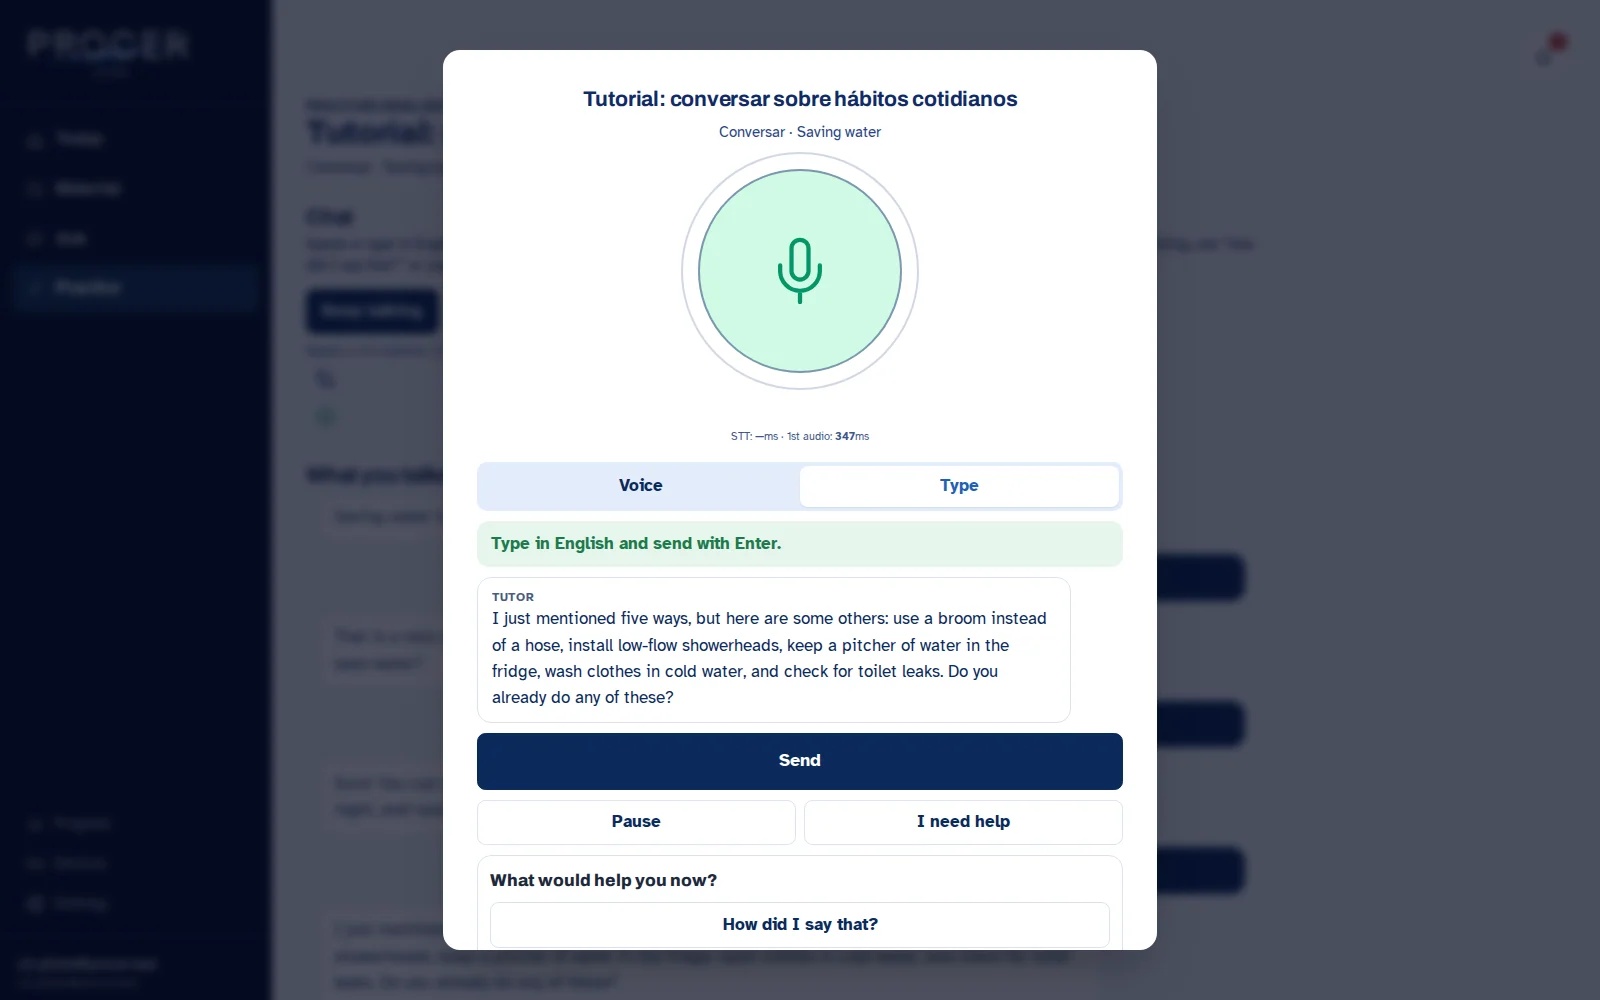
Use I need help
Open 'I need help' to repeat slower, ask for a hint, explain in Spanish, or change the topic. 'How did I say it' requests an evaluation of the available take. 'Back to conversation' closes the help options and resumes the main flow.
View the screen for this step
-
Close the practice
'Finish and review' requests feedback for the session. Also close the voice dialog when you finish. If the connection is lost, check the status before repeating; a reconnection should not be interpreted as meaning all previous words were received.
View the screen for this step
Chapter 27 · English
Practice and review pronunciation
The pronunciation assessment uses Azure Speech for United States English. It is feedback on a recording, not a level exam.
-
Choose a phrase
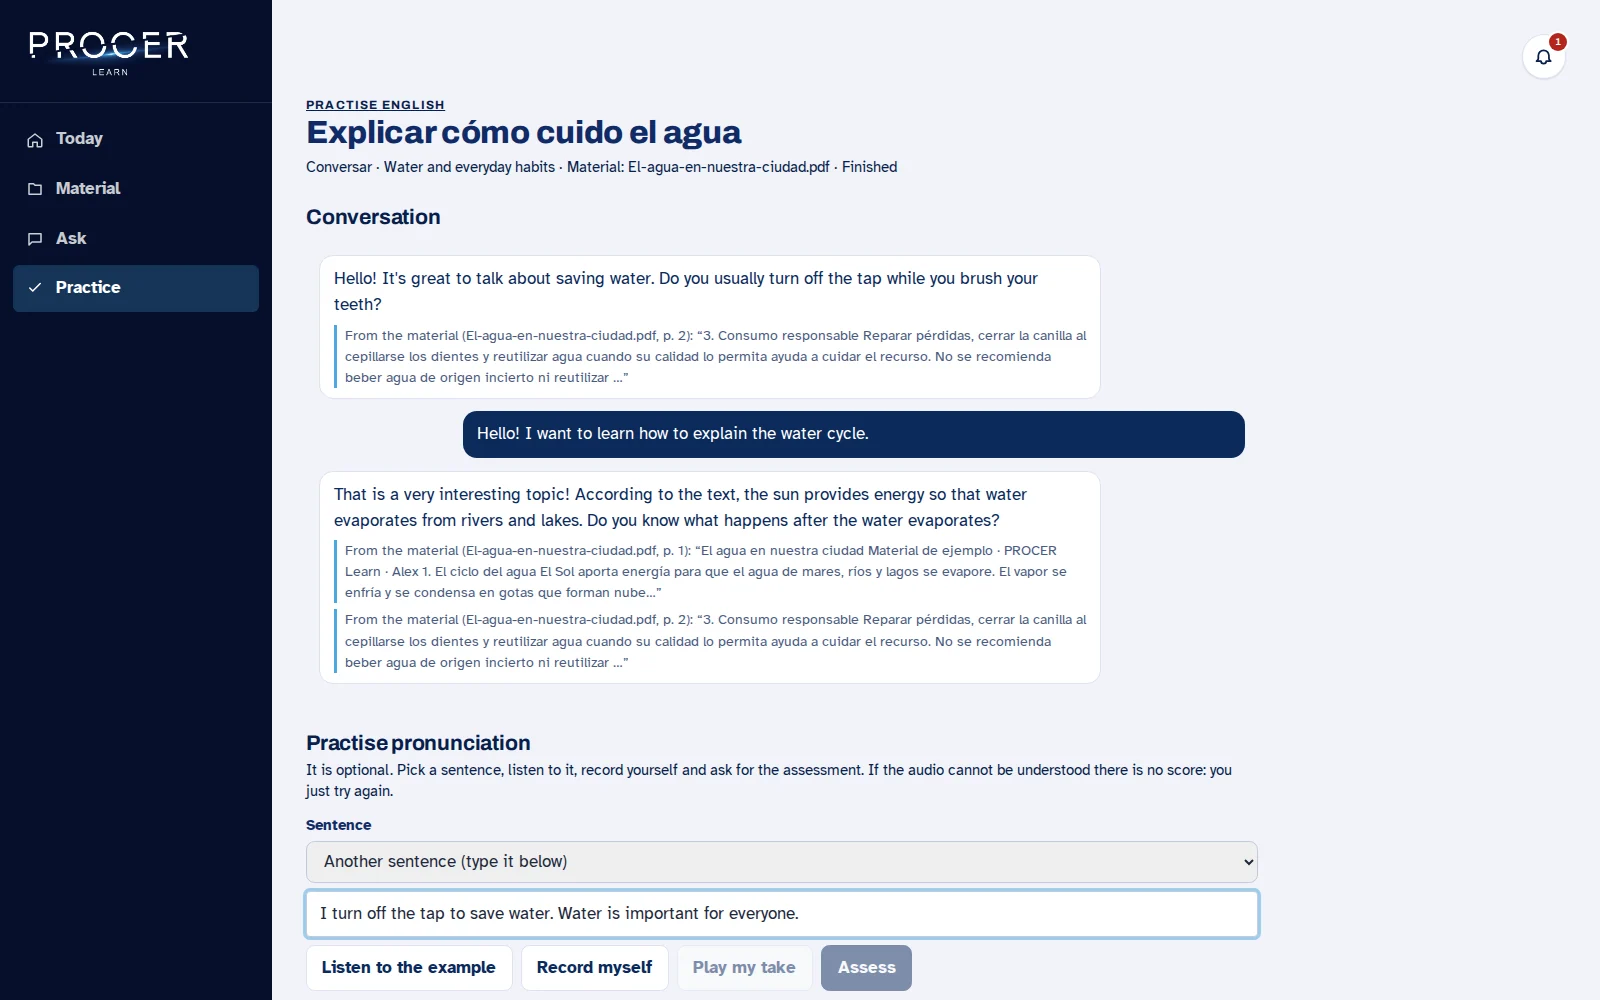
In Practice pronunciation, choose the suggested phrase or Another phrase and type exactly what you want to say. Listen to the example if you need to. Practice a short phrase before moving on to a longer one.
View the screen for this step
-
Record a take
Press Record me, say the phrase, and stop the capture. Hear my take allows you to check that your voice was heard. If there is noise, silence, or cut-off words, repeat the recording before evaluating it.
View the screen for this step
-
Request the evaluation
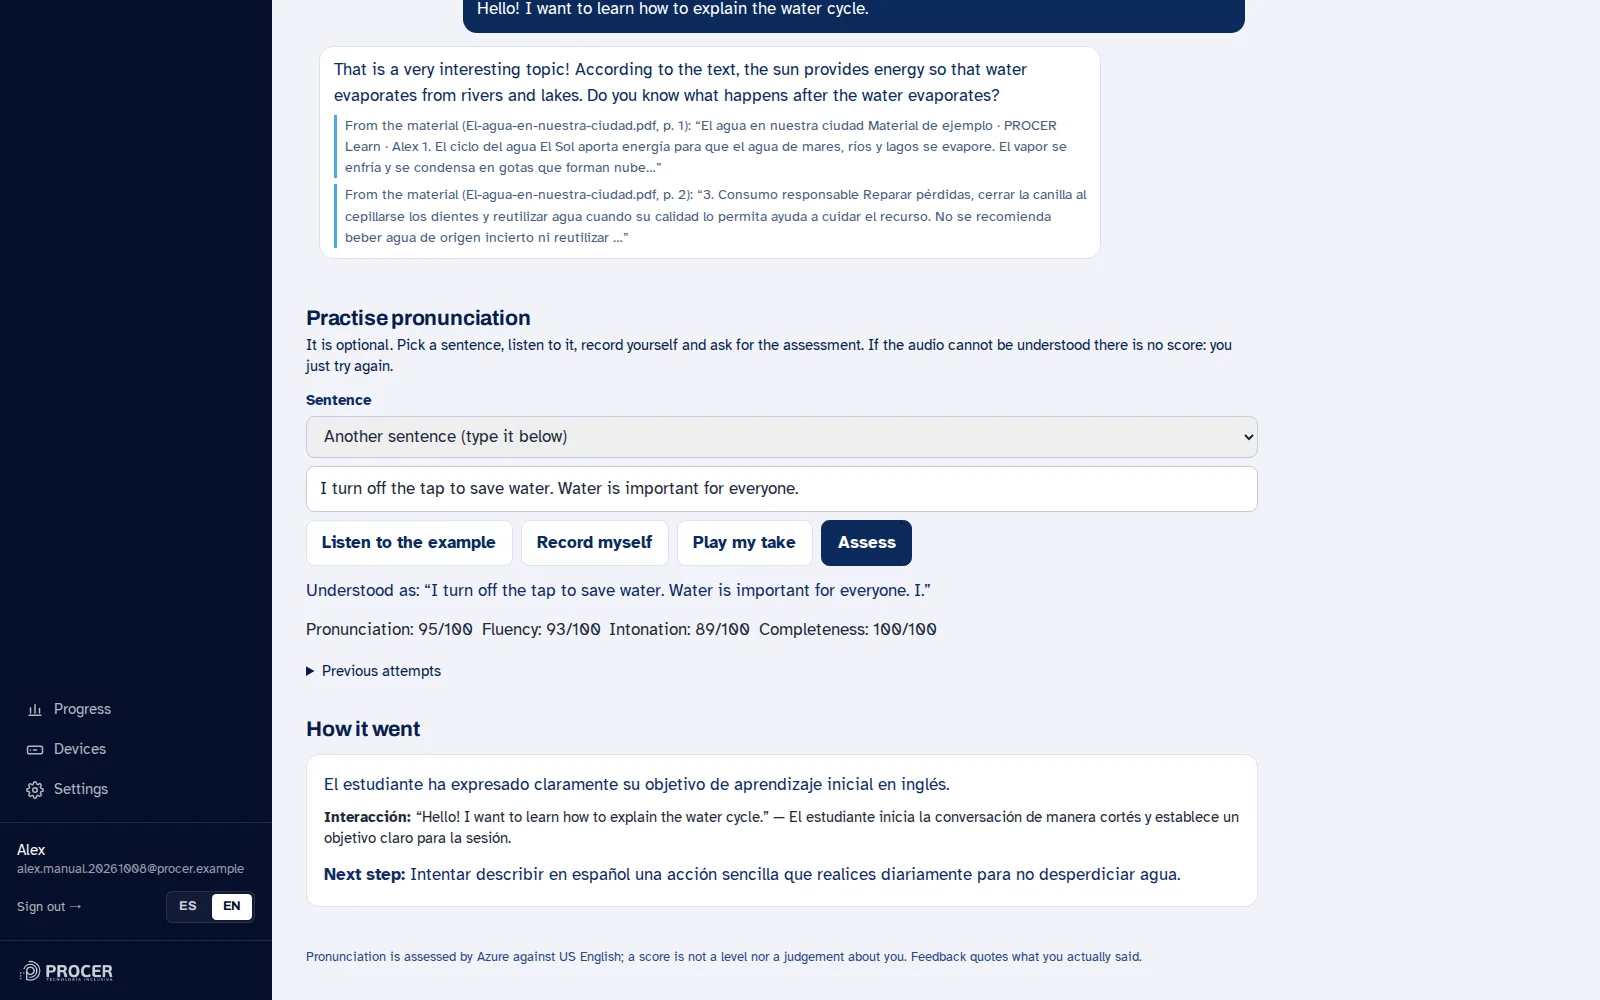
Choose Evaluate and compare the recognized text with what you intended to say. Depending on the mode and available data, pronunciation, fluency, intonation, and completeness will appear. If it could not be evaluated, do not interpret the problem as a zero grade.
View the screen for this step
-
Use the feedback to improve
Repeat the words or fragments that need practice and compare attempts. Completeness makes sense when there is a reference phrase. The filmed example uses a synthetic voice to test the process; its score does not measure a person nor represent an expected result for everyone.
View the screen for this step
Chapter 28 · Tools and progress
Progress, maps and goal review
Progress gathers activity signals and practice results. These should be read as limited evidence, not as a diagnosis.
-
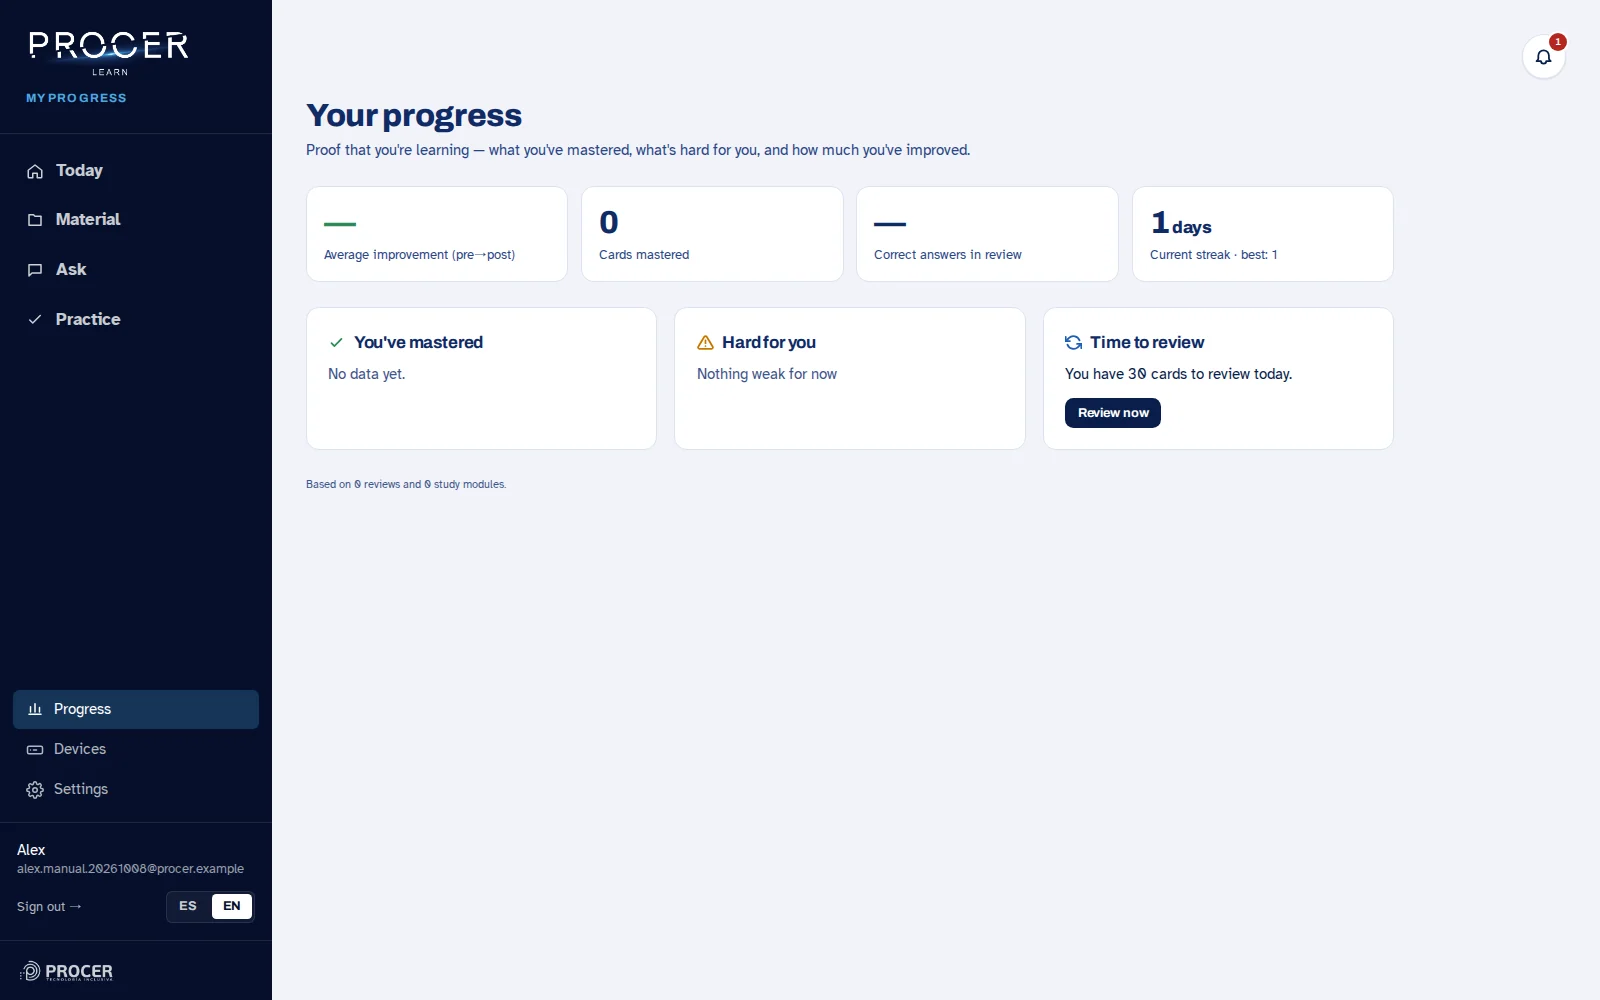
Review activity
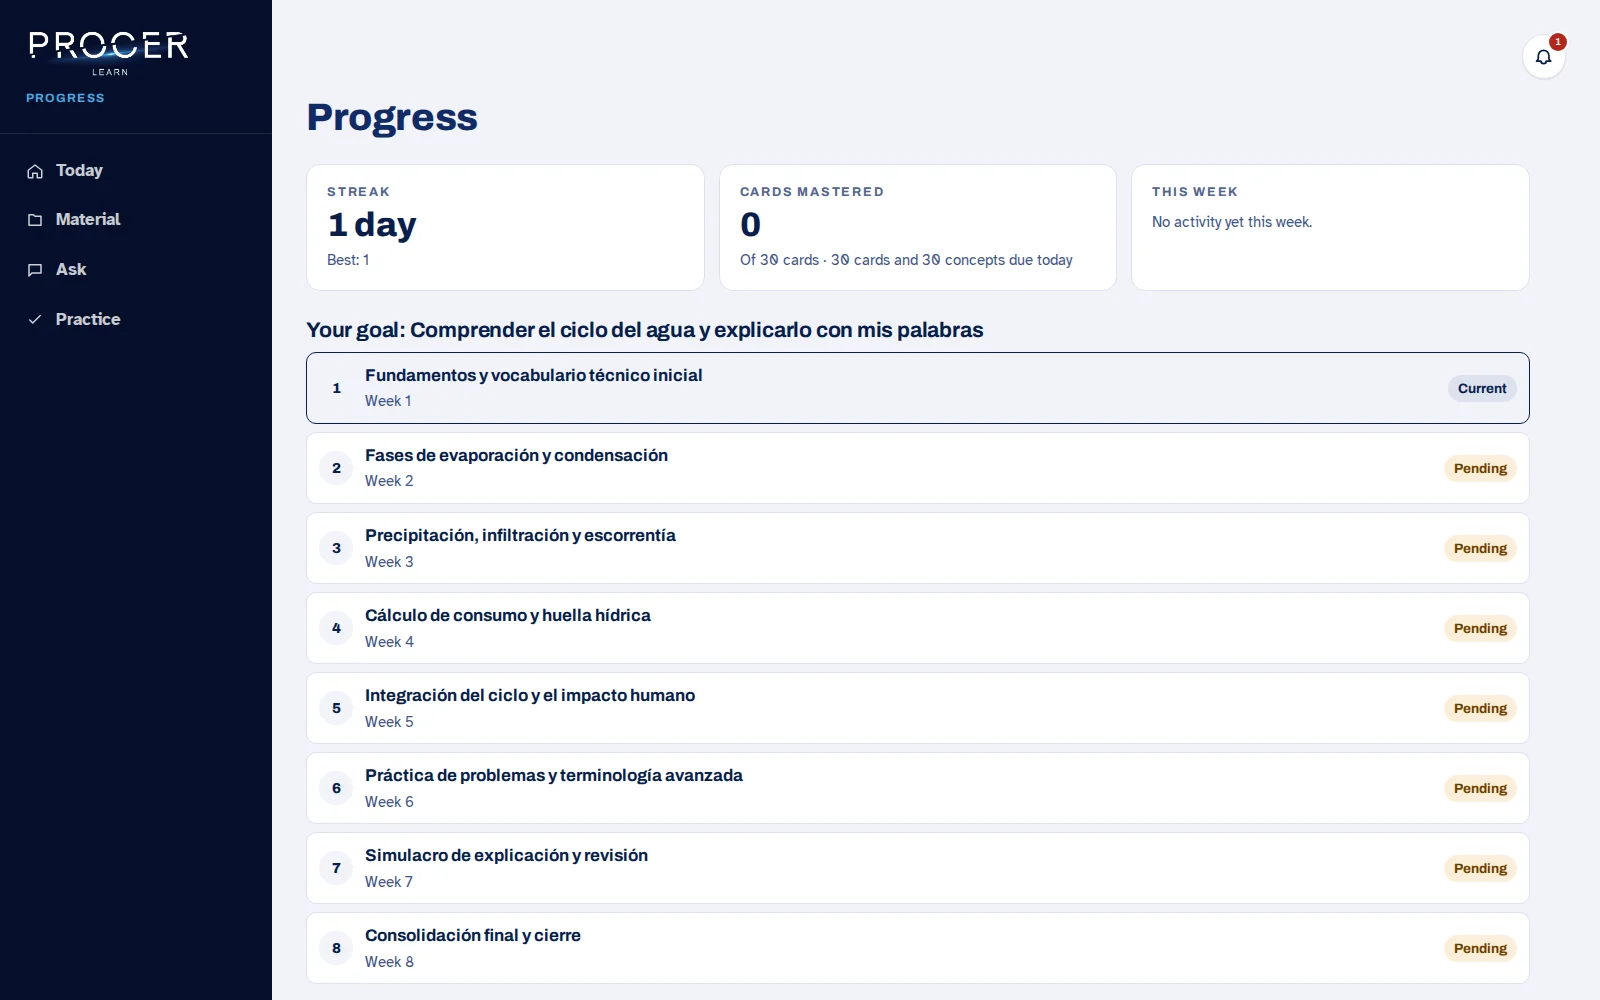
Check your streak, mastered flashcards, and weekly activity. A New account may show zeros. Figures change after recorded activities; reading a file does not necessarily equate to completing an assessment.
View the screen for this step
-
Return to your goal
Open the active goal to review its stages and what comes next. If no stages have been generated, complete that step before treating it as a plan. Goals are an adjustable orientation, not an obligation.
View the screen for this step
-
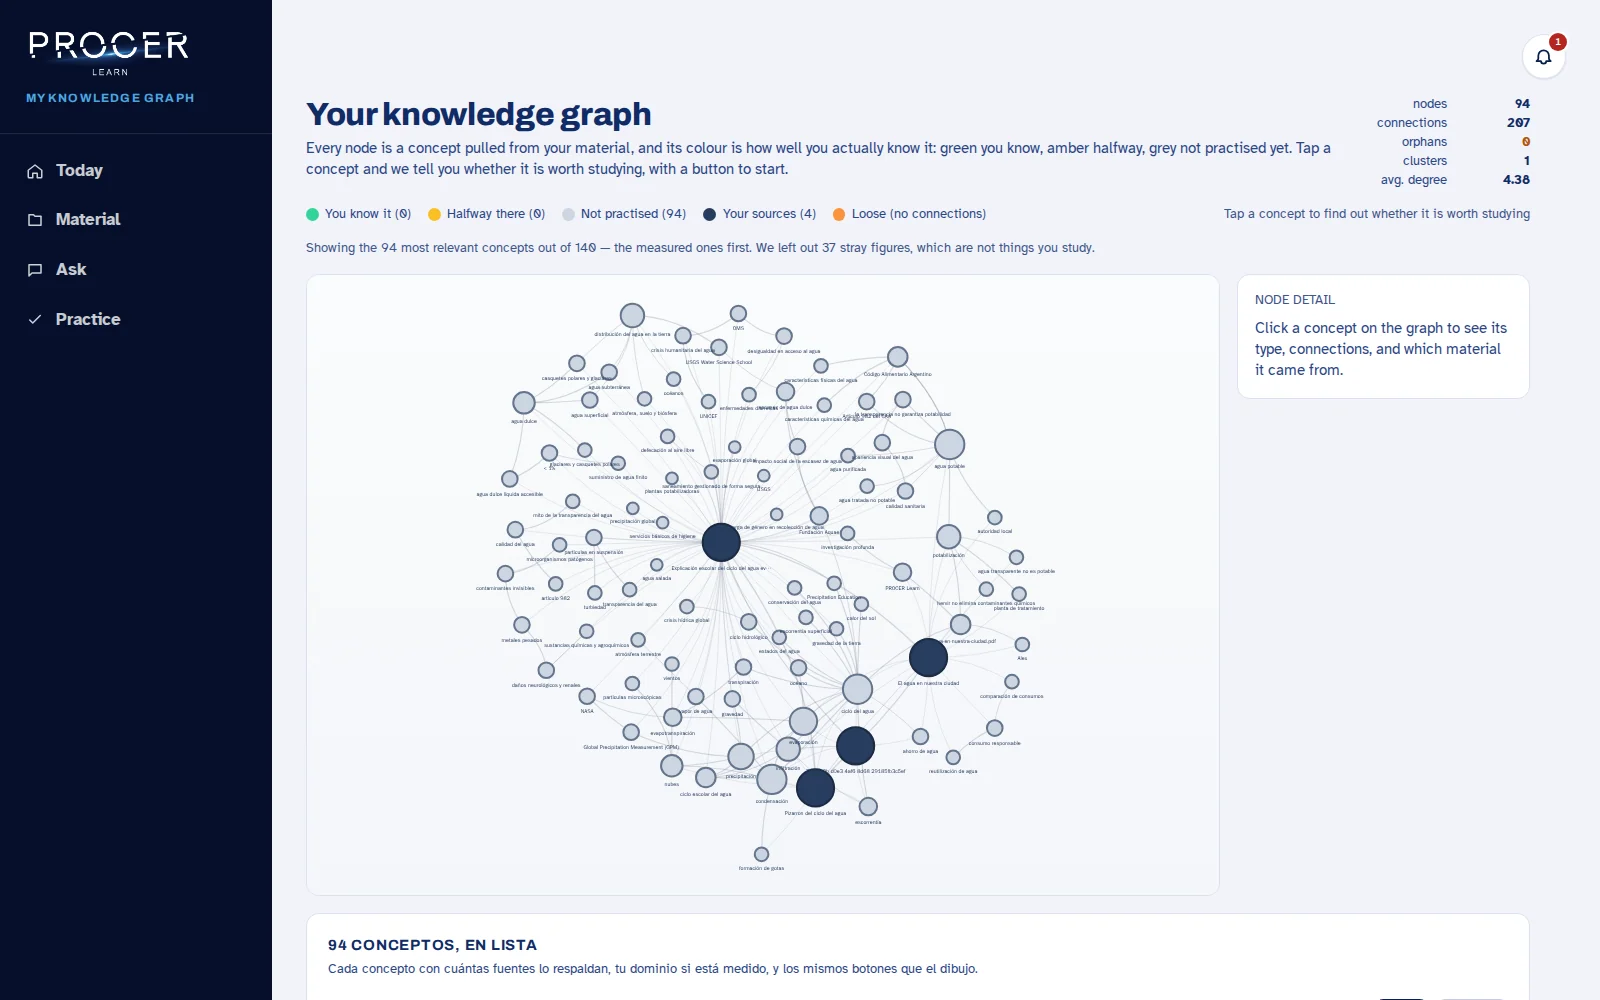
Explore the topic map
Open the full map to see relationships between content. Use View as list if the graphic representation is not useful to you. Viewing by subject and level opens another organization of topics and their mastery.
View the screen for this step
-
Consult the details
The detailed progress report allows you to review more information. Relate any mastery indicator to the activities that produced it. If a topic is empty, add material or practice before expecting conclusions about your learning.
View the screen for this step
Chapter 29 · Tools and progress
Writing and listening to mathematics
The formula editor allows you to enter an expression and check how it is interpreted, even without depending on seeing it.
-
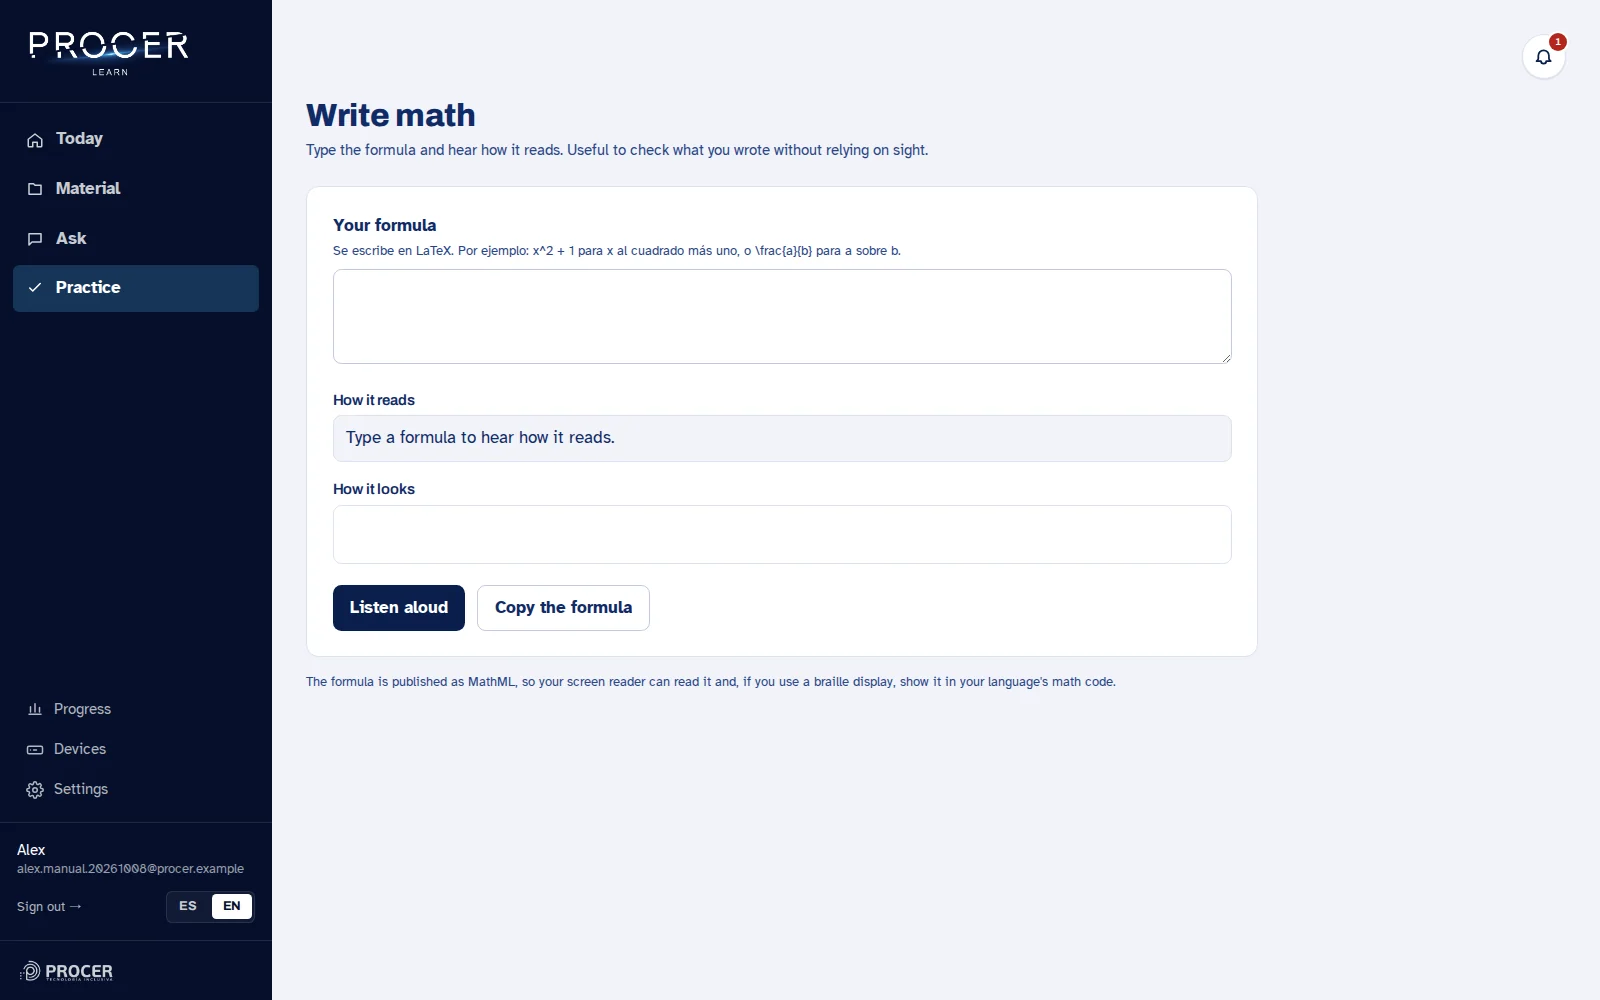
Open Write formula
Enter from the chat action to write mathematics. Use the input field with an expression in LaTeX. For example, a fraction is written with a backslash, frac, and two groups between curly braces. The video example divides forty-eight by twenty-four.
View the screen for this step
-
Review the interpretation
Wait for the mathematical representation and its textual reading. Listening aloud reproduces the expression and Copy formula allows you to reuse it. The screen reader can also announce the result. Check numerators, denominators, and groupings before using it.
View the screen for this step
-
Choose how much detail to hear
In Settings, Personalization, look for How technical content is read and choose a brief or detailed mathematical reading. Save the preference and test the formula again.
View the screen for this step
-
Correct before using
If the expression is not interpreted, check signs, braces, and structure. A valid representation does not prove that the mathematical procedure is correct: check the operation or ask for an explanation afterwards.
View the screen for this step
Chapter 30 · Tools and progress
Sheet music: MusicXML, audio and braille
The workflow currently available in Learn starts from a MusicXML file. An image or PDF of sheet music does not enter through this same form.
-
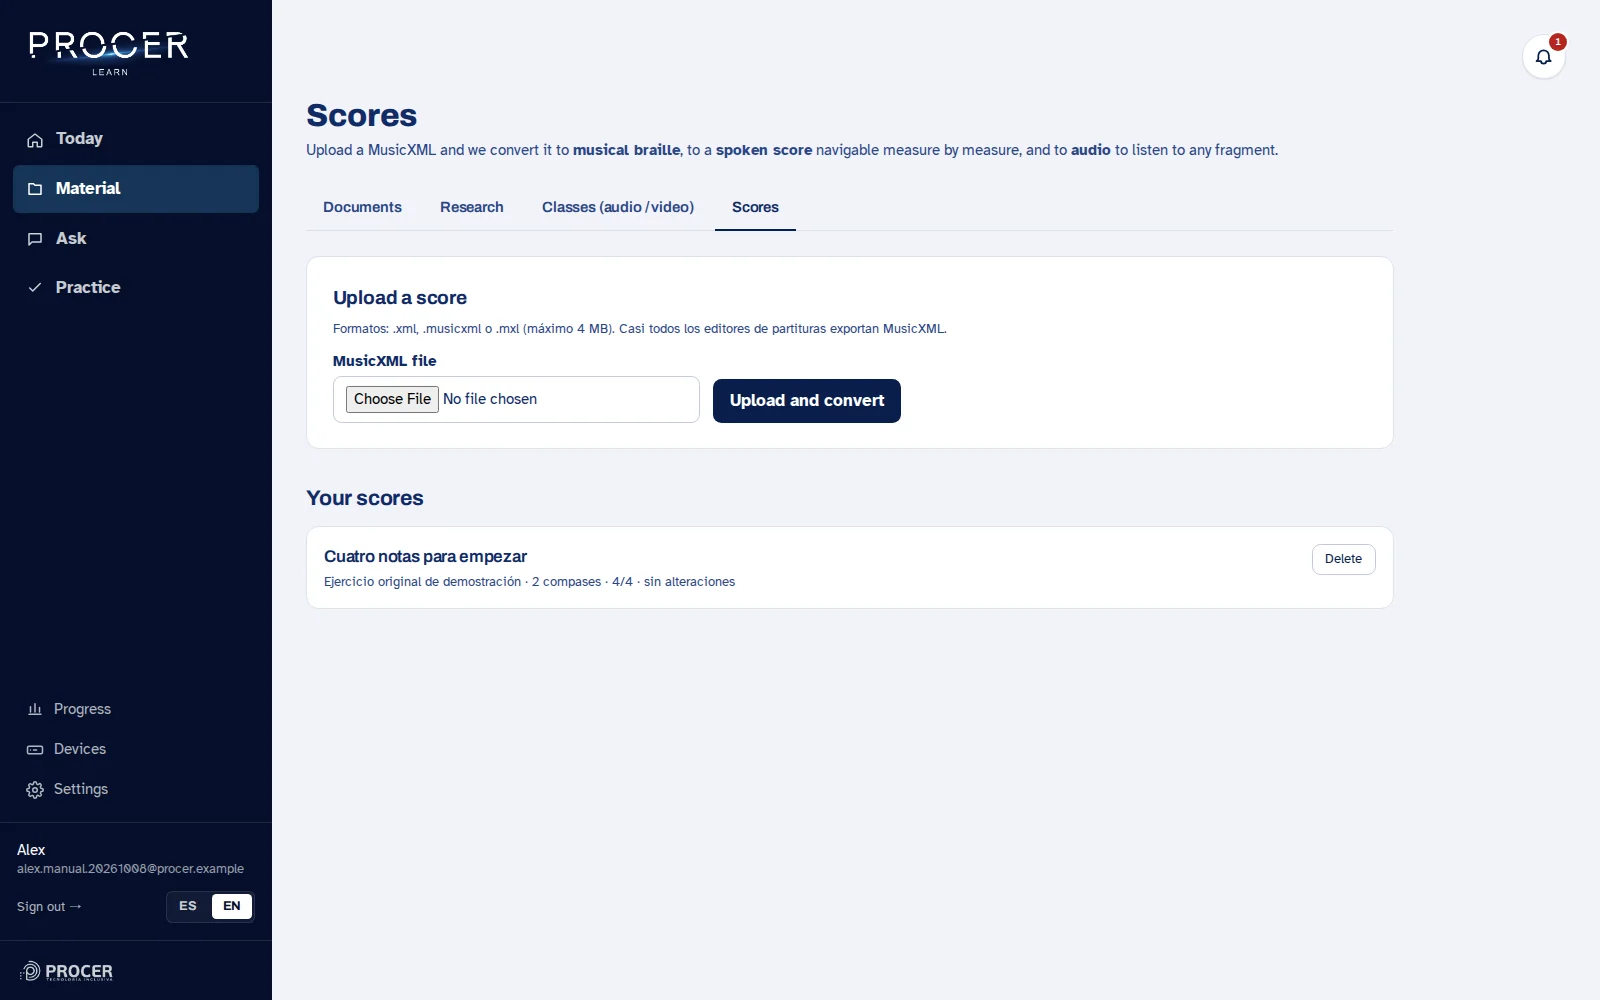
Export and upload MusicXML
From a score editor, export an xml, musicxml, or mxl file. In Material, full Library, open Sheet Music, choose the file, and select Upload and convert. The form supports up to four megabytes.
View the screen for this step
-
Navigate measure by measure
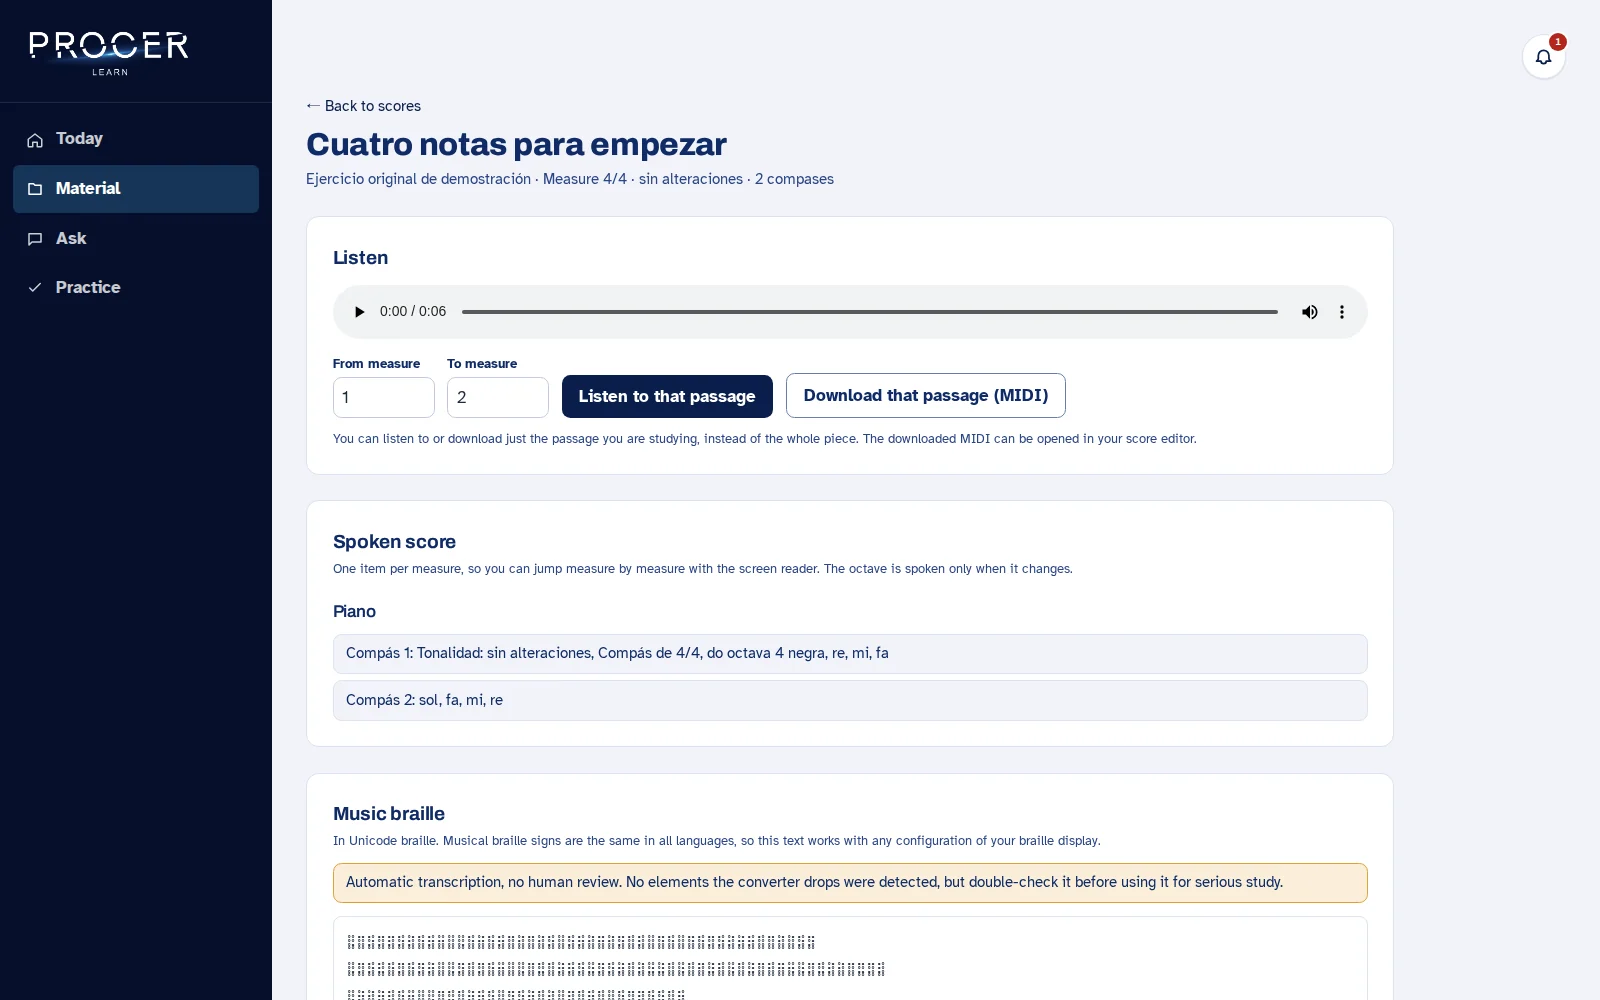
Open the processed score. Spoken Score organizes the content by instrument and measure for navigation with the screen reader. Note names can be displayed in Latin or English notation according to your preferences.
View the screen for this step
-
Listen to a fragment
Choose the starting and ending measure and press Listen to that fragment. You can also download the fragment in MIDI to open it in another program. Playback helps compare what you hear with the written description.
View the screen for this step
-
Use the braille and visual view
The screen displays Unicode musical braille, offers to copy it, and allows viewing the enlarged score. This is an automatic conversion: review the warnings about unrepresented elements before using it as definitive material.
View the screen for this step
-
Keep the original
Download the MusicXML when you need to take it to another editor or specialized translator. Previous research on recognizing sheet music from photos is not equivalent to having that workflow enabled here.
View the screen for this step
Chapter 31 · Tools and progress
Academy and courses
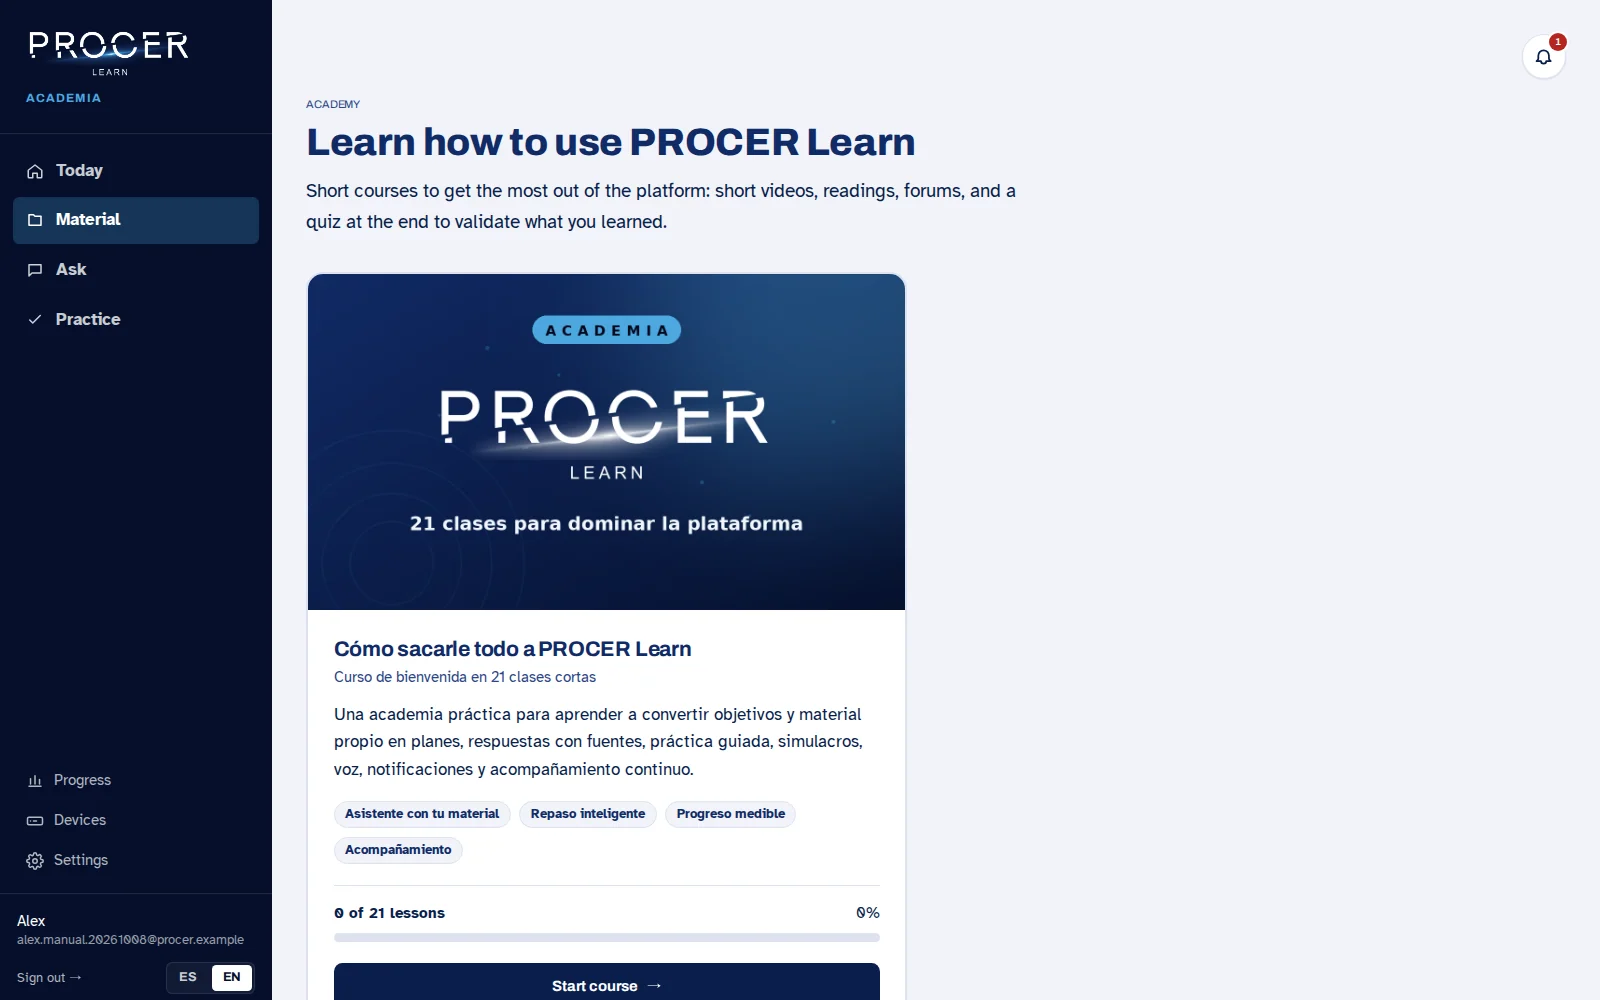
Academy brings together courses available for your account. Its lessons can combine explanations, video, and activities.
-
Enter from Material
Use the Material filter or Academy: all courses. Open the course you want to follow and review its content. If a card says In progress, it does not necessarily mean you have already completed a lesson: check the counter.
View the screen for this step
-
Follow a lesson
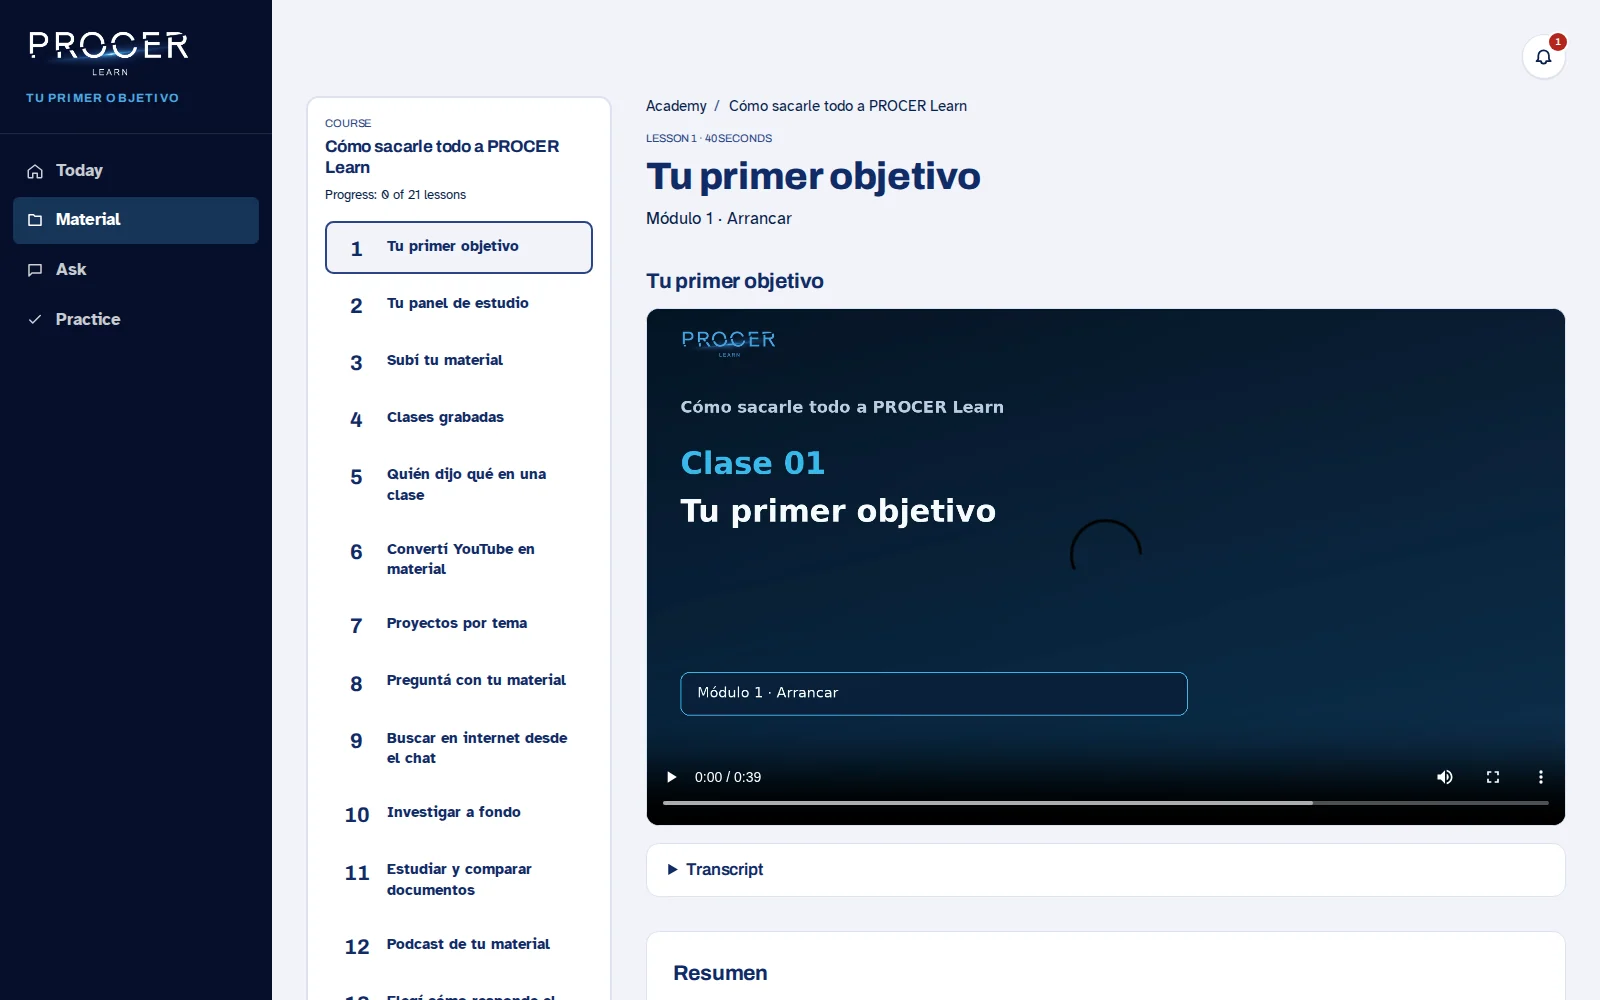
Open a lesson, go through its blocks, and play the video when available. You can pause and return to the text. Specific content depends on how the course is structured; not all lessons have the same types of blocks.
View the screen for this step
-
Record progress
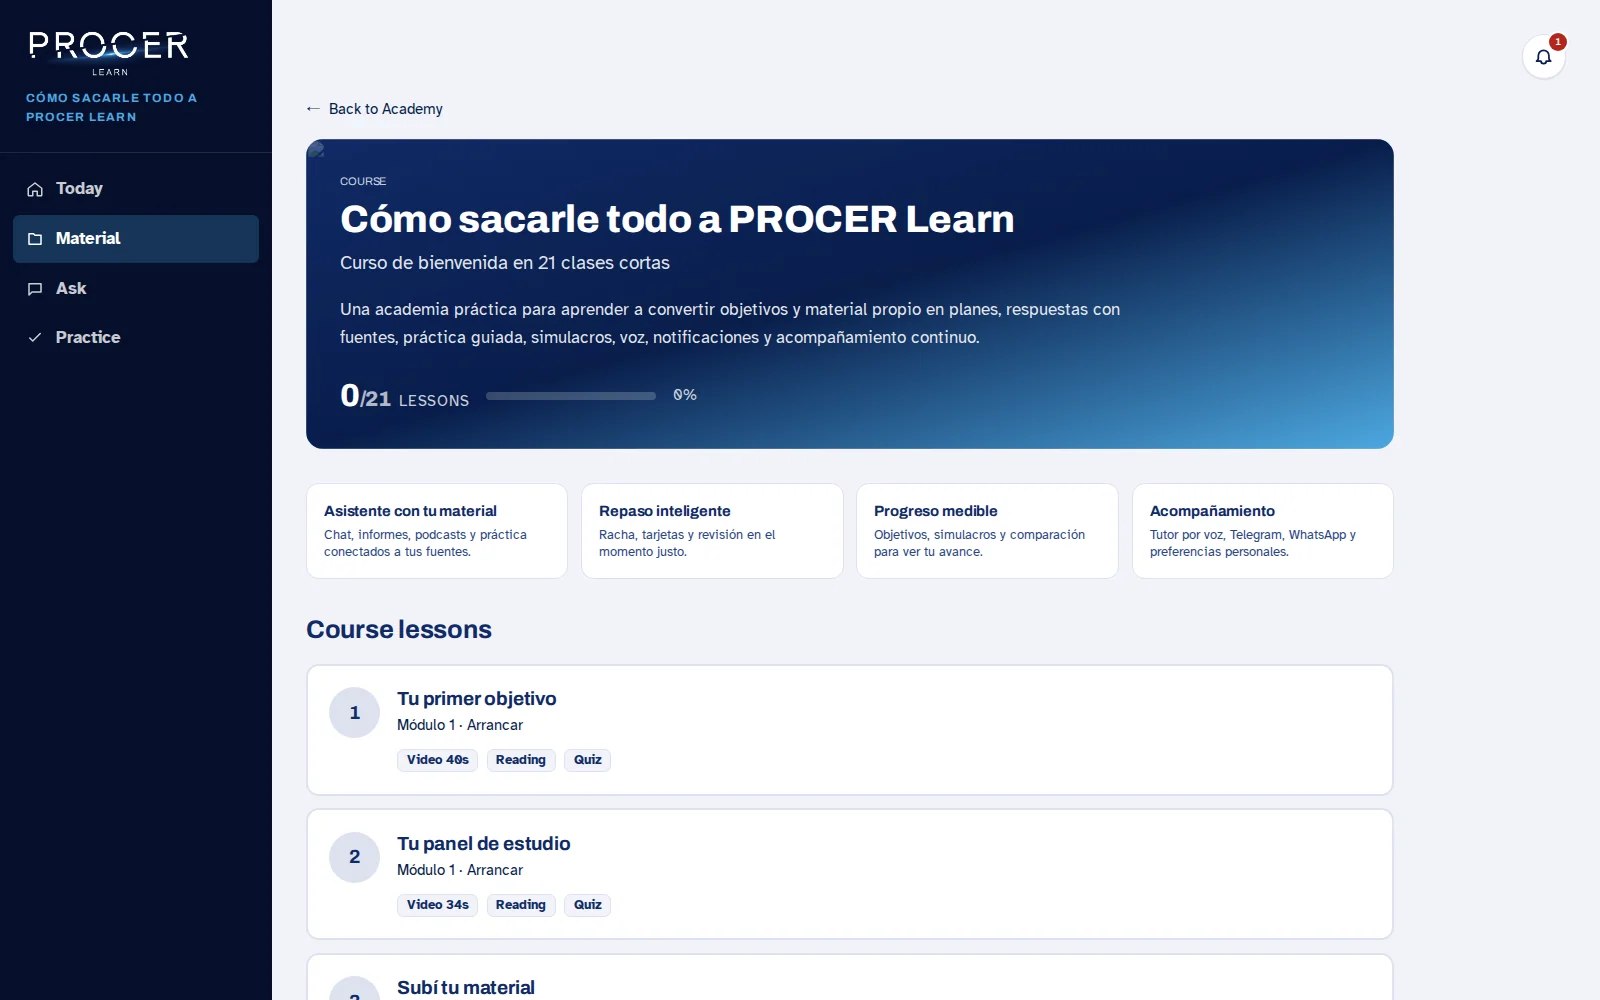
Use the action to complete the lesson if you have finished working on it. Then return to the course and check the progress. Avoid marking it finished just to advance the counter: that mark serves to guide you when you return.
View the screen for this step
-
Course assessments and conversations
When the course includes questionnaires or a discussion space, respond or participate from those blocks. Review the results and the course instructions. Creating or editing courses requires author permissions; it is not a general function for the B2C student.
View the screen for this step
Chapter 32 · Account and help
Supporting another person and sharing material
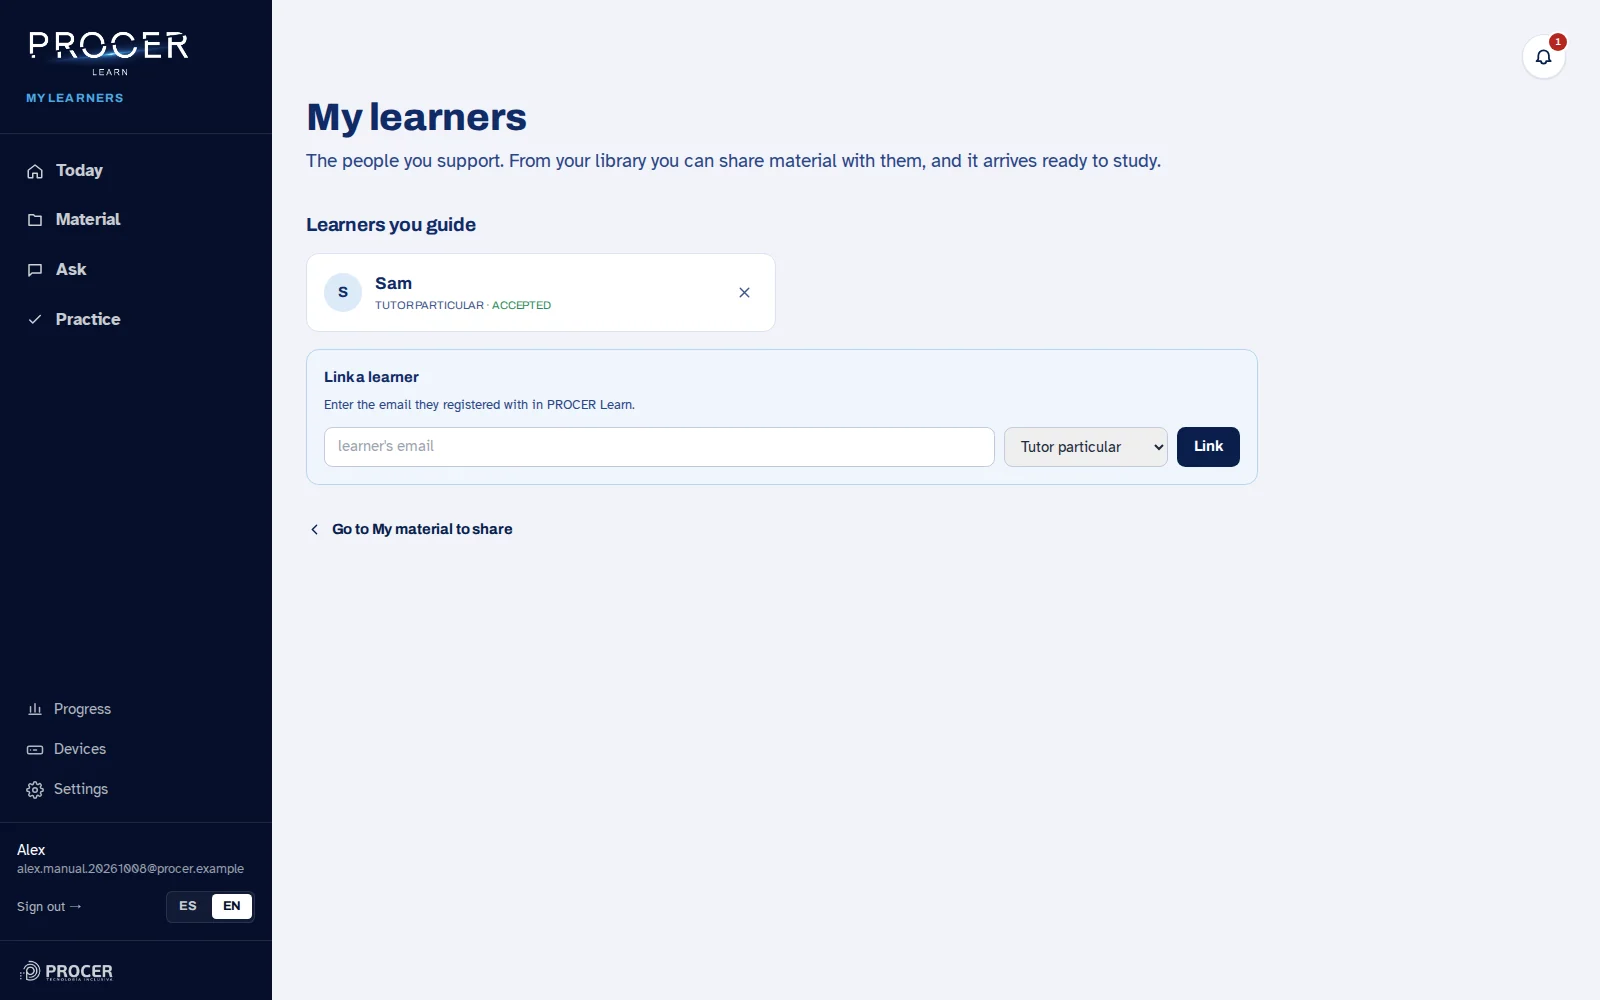
Learn allows you to request a link with another learner and share material with them. The other person must accept the link.
-
Request the link
Open Learners and enter the email address the other person uses in Learn. Choose the type of support and press Link. A pending request does not yet authorize sharing, nor should it be confused with access to their entire account.
View the screen for this step
-
The other person decides
The recipient must log in with their account and accept or reject the request. Do not use your own session to decide for them. If the expected person does not appear, verify the email before resending.
View the screen for this step
-
Choose what to share
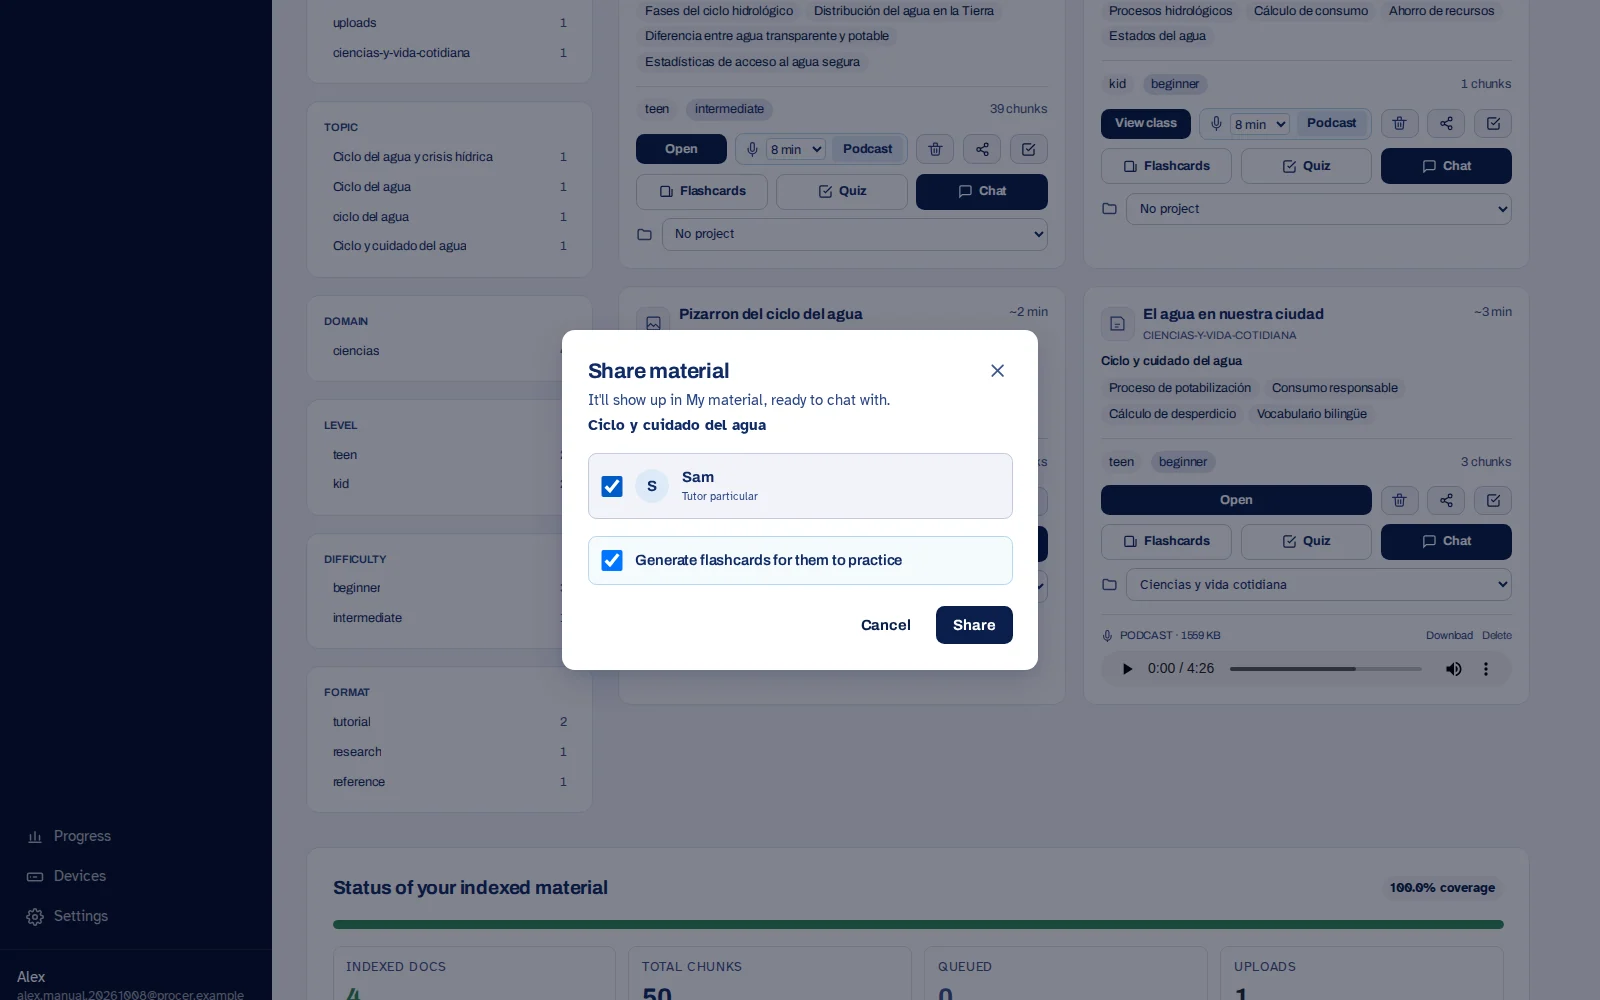
From your Library, open Share on the material and choose an authorized learner. If the option to include flashcards is offered, choose if you want to send them as well. Review the confirmation for each recipient: a partial send is not a complete delivery.
View the screen for this step
-
Assign a practice session
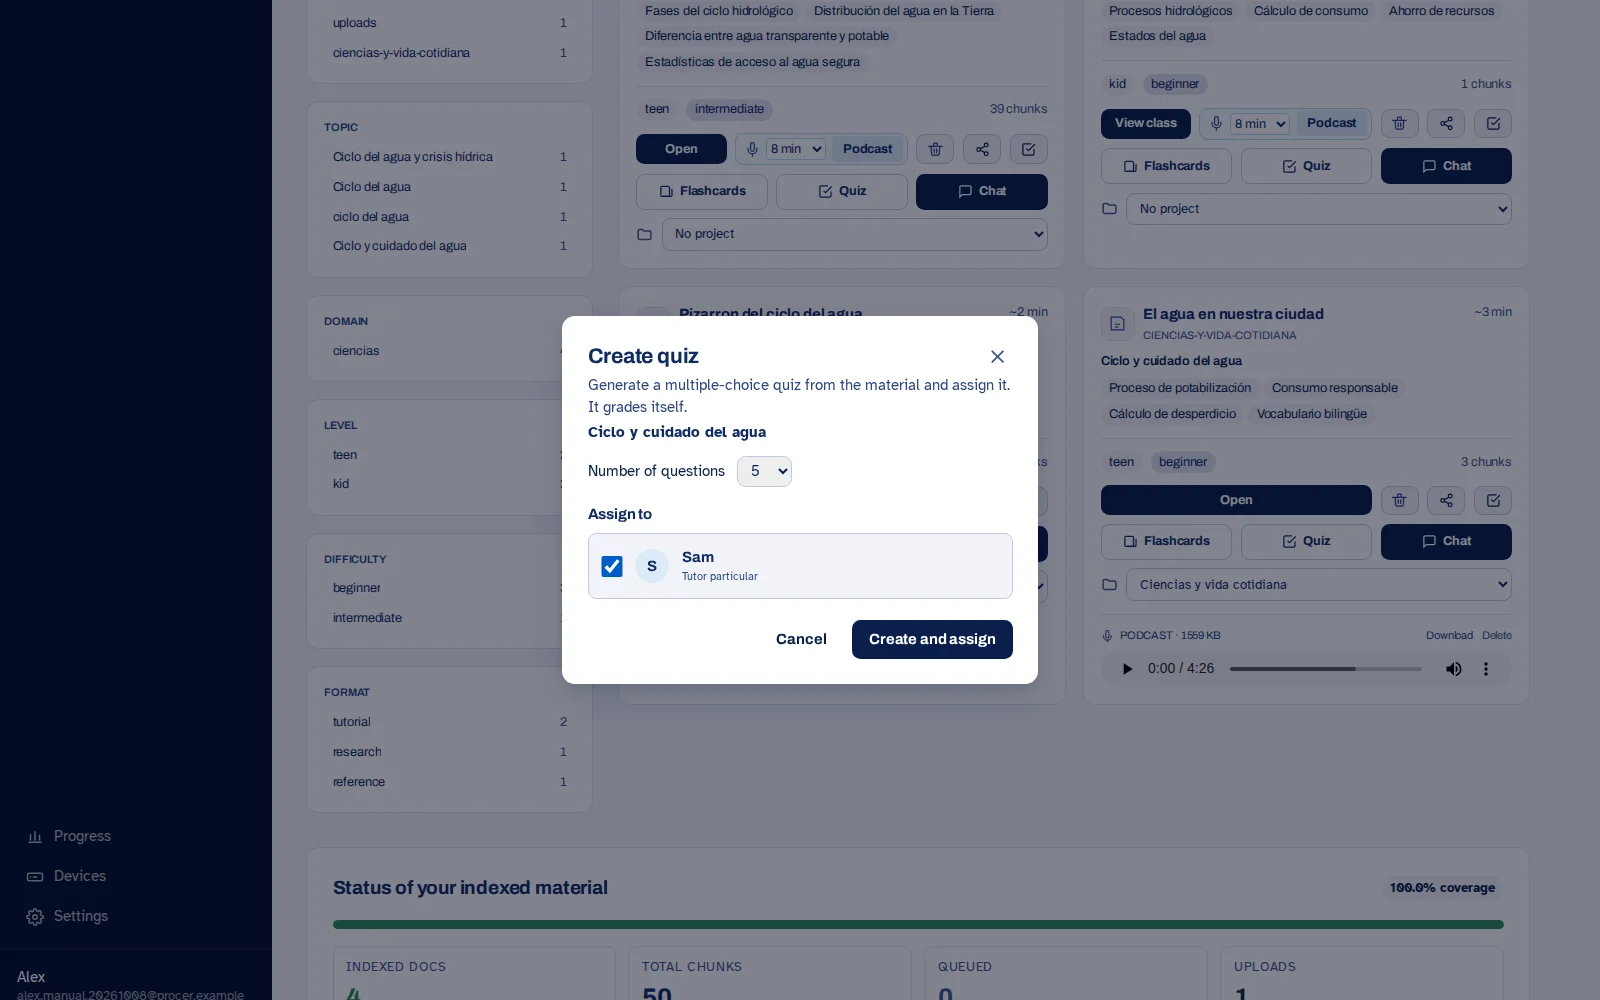
To prepare an assessment for that learner, open Create quiz from the document. Choose five, eight, ten, or twelve questions, mark who you are assigning it to, and press Create and assign. Wait for confirmation. The recipient logs in with their account and answers the assigned quiz; sharing a file and assigning an assessment are distinct actions.
View the screen for this step
-
Review privacy and the link
The received copy remains available for study in the other account. Information sharing preferences and the relationship with a tutor are different aspects; review them in Settings. If the support period ends, remove the link that is no longer appropriate.
View the screen for this step
Chapter 33 · Account and help
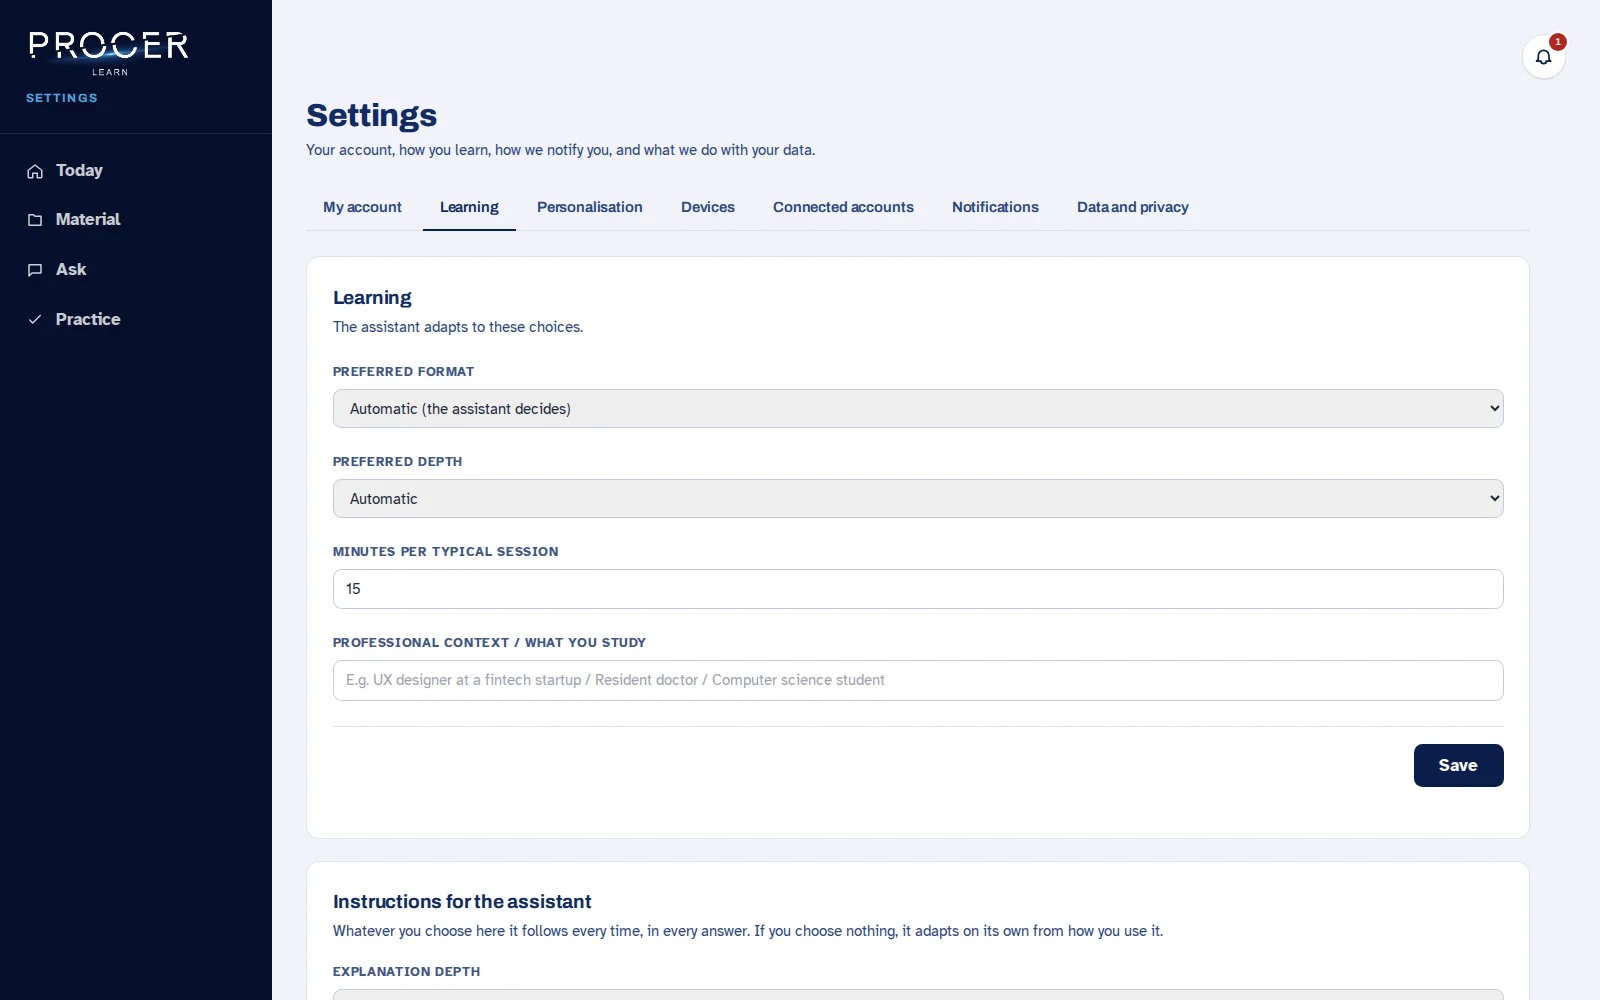
Account, learning, and accessibility settings
Preferences allow you to adapt responses and review which data Learn uses to personalize the experience.
-
Update your data
In My account you can change your first and last name and access Change password. The email is displayed as your login identity; this screen does not offer a free email change. For a change of ownership or email, resolve it with support.
View the screen for this step
-
Choose how you want to learn
In Learning, indicate format, depth, session time, and context. The instructions for the assistant allow you to request simple or technical explanations, examples first, short paragraphs, and a presentation appropriate for a screen reader. Save each modified block.
View the screen for this step
-
Review memories
In My profile, look at the facts that the system deduced from your conversations. Delete those you do not want to keep or those that are incorrect. This data is not a diagnosis; it serves to personalize responses and may require correction.
View the screen for this step
-
Personalize the experience
In Personalization you choose the New interface and the available flashcards. There are also preferences for mathematical reading and musical note names. Some options correspond to the classic interface and do not reorganize the four new destinations in the same way.
View the screen for this step
-
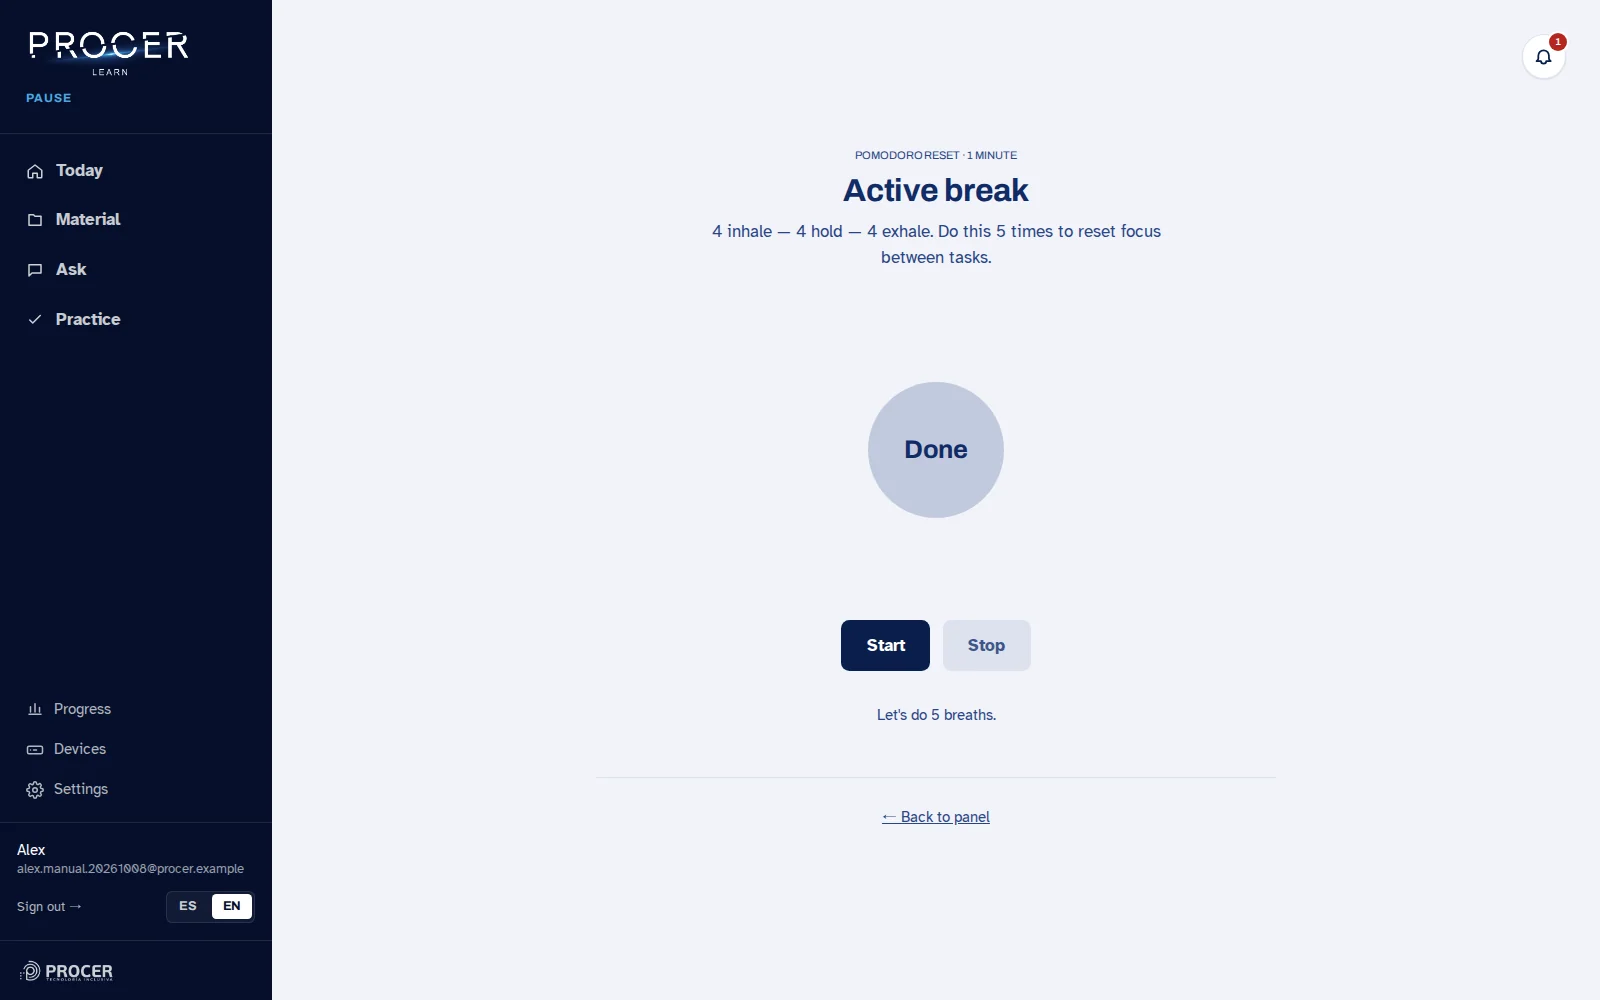
Language and pause
Use ES or EN to change the interface language. This does not automatically translate every file you uploaded. If you need a break, the Pause screen proposes a guided breathing exercise. Wellness features are optional and do not substitute professional care.
View the screen for this step
Chapter 34 · Account and help
Connect Drive and receive reminders
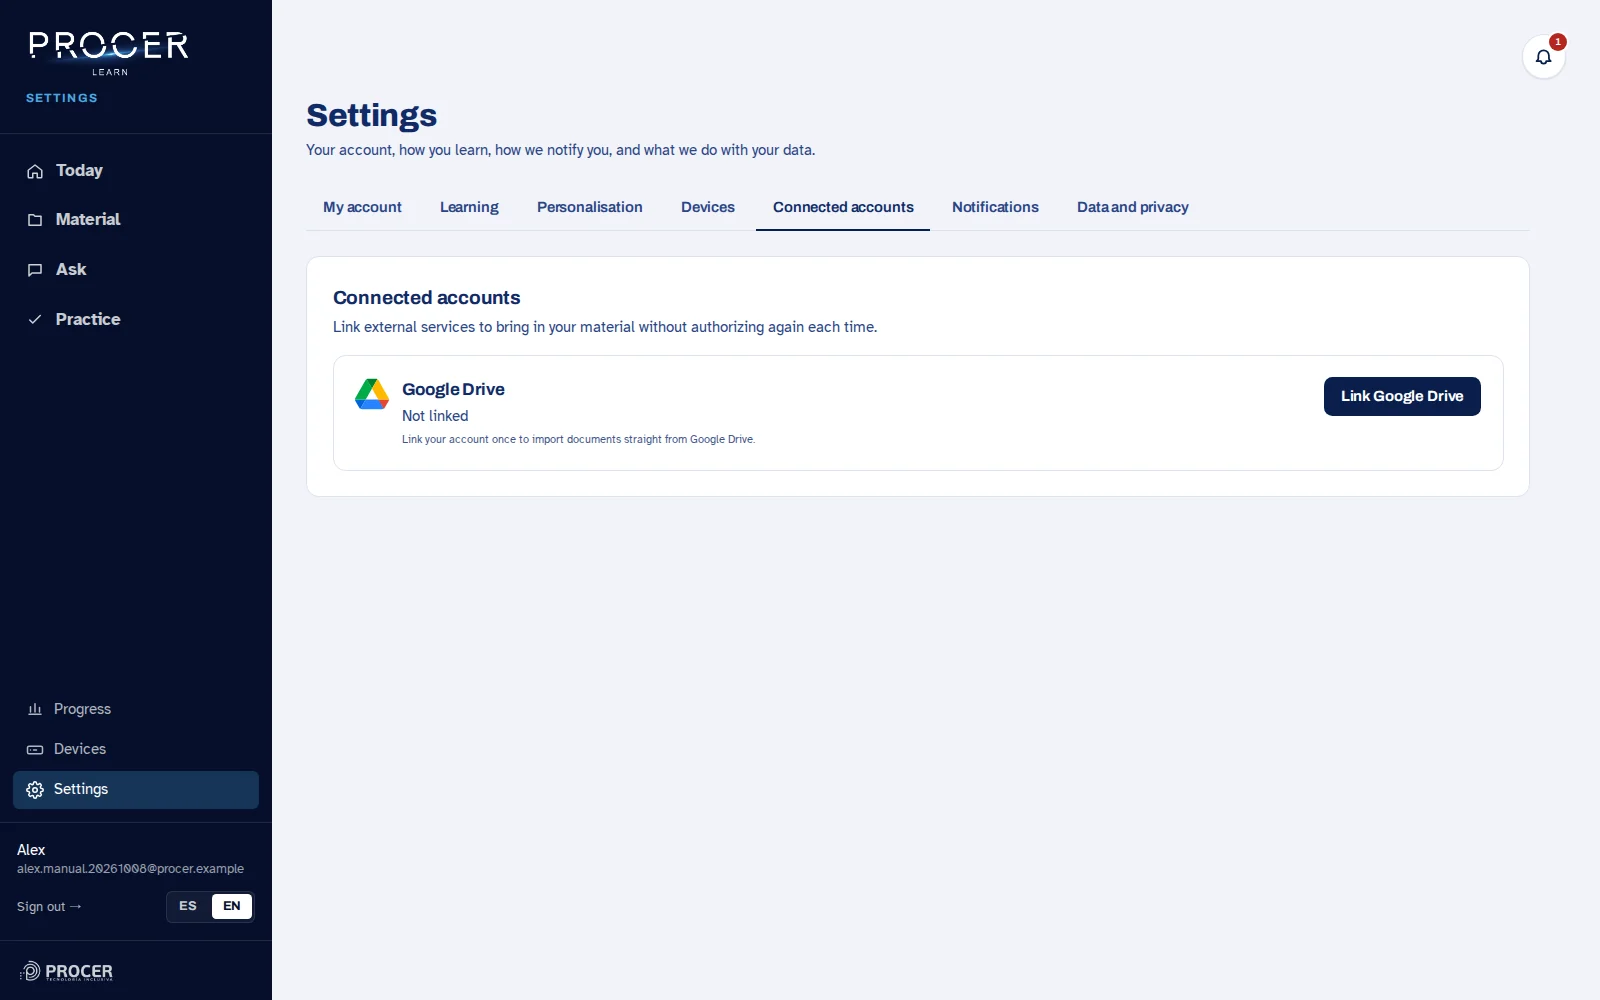
External connections are optional. Always check which account you are authorizing and which material you want to import.
-
Connect Google Drive
In Connected accounts, choose Link Google Drive and complete the access with the correct account. Then select the files you want to import from the library. Authorizing Drive does not mean that all your files have already been uploaded to Learn.
View the screen for this step
-
Change or remove the connection
If you linked a different account, unlink it and repeat the authorization with the desired account. Verify the imported files in Material. The copy you already imported and the Drive authorization are separate elements.
View the screen for this step
-
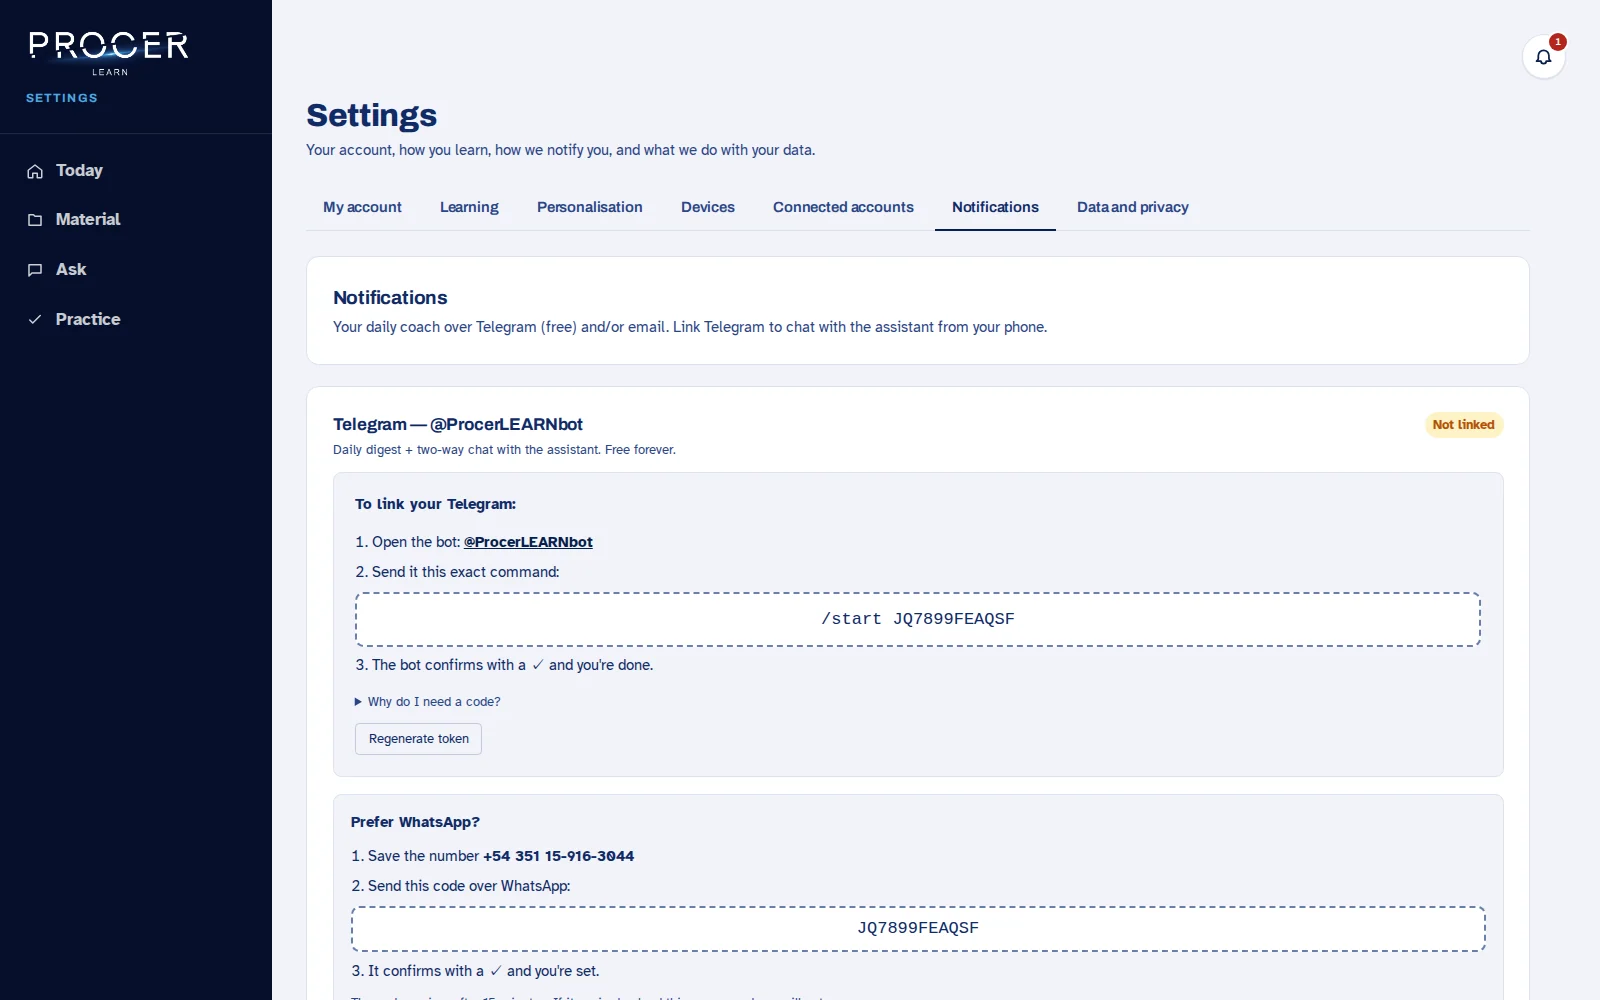
Link Telegram
In Notifications, open the bot indicated on your screen and send the complete command that starts with a forward slash start followed by your code. Wait for the linking confirmation. The code shown in the tutorial is hidden; each person must use the one from their own account.
View the screen for this step
-
Or link WhatsApp
Use the number and code shown by Learn. Send the code from the WhatsApp account you want to associate and wait for confirmation. If it has expired, refresh to get another one. The screen indicates that this bot responds when you write to it; do not promise proactive reminders through this channel.
View the screen for this step
-
Configure schedules
Activate summaries via Telegram or email if you wish to receive them. Choose the time and the Do Not Disturb interval; save. Regenerating the code or unlinking a channel changes its association. Do not share these codes with other people.
View the screen for this step
Chapter 35 · Account and help
Voice, models and privacy
Data and privacy brings together advanced options and the management of requests regarding your data. The basic workflow does not require changing providers.
-
Choose the available voice
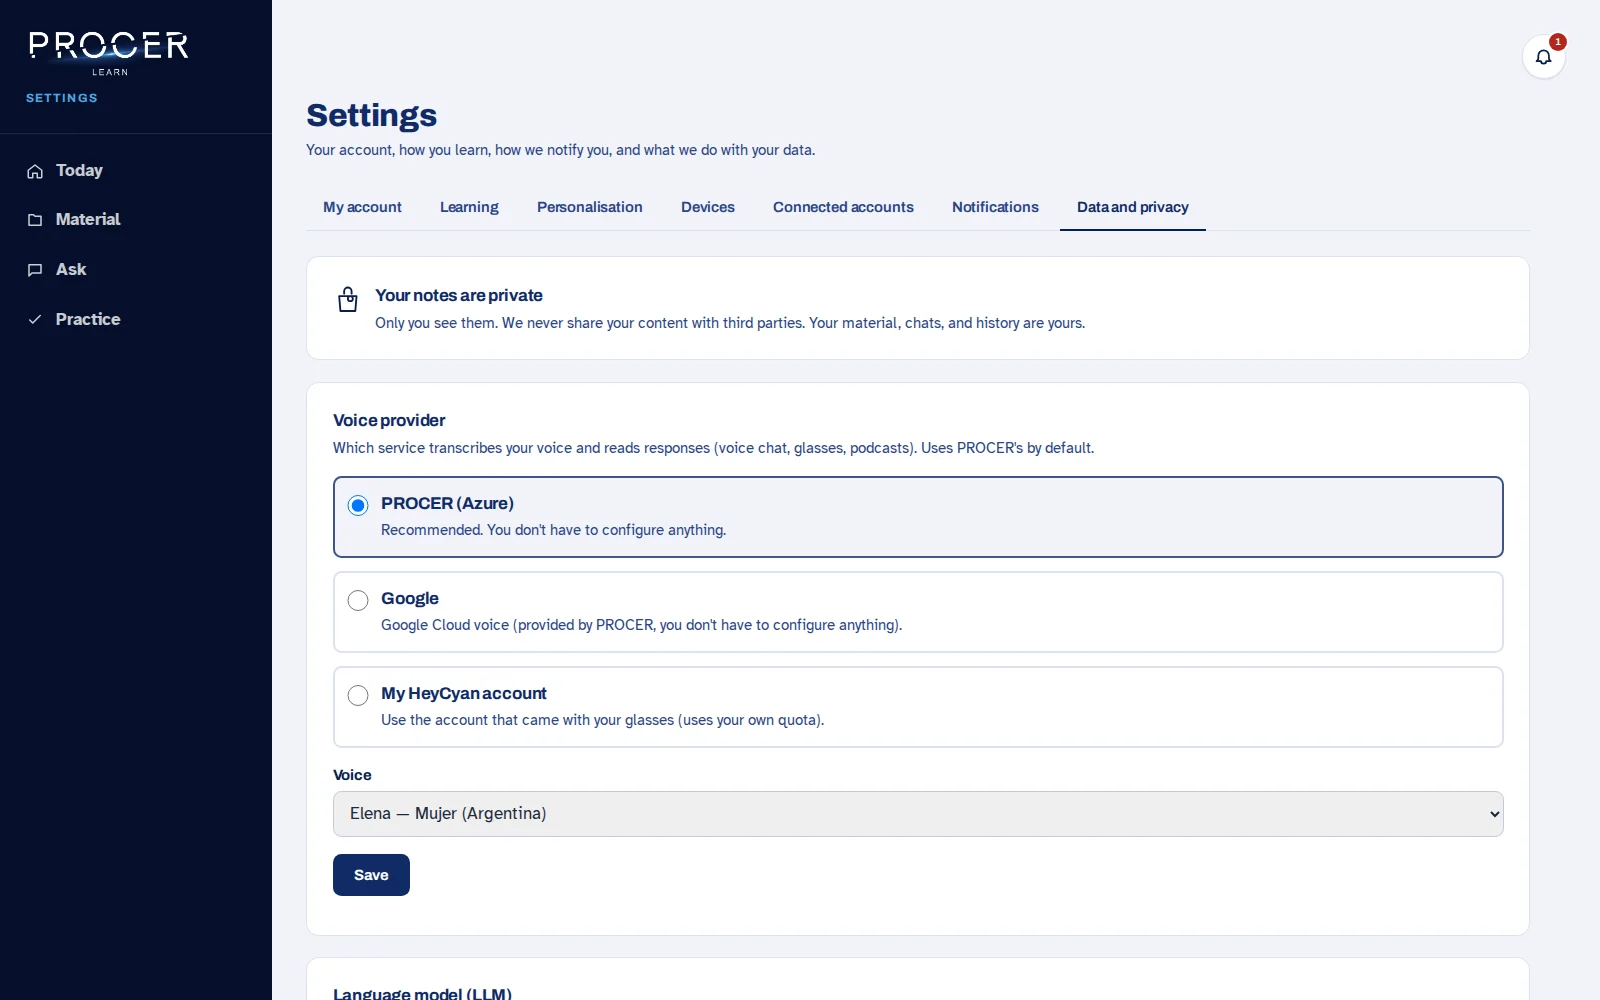
In Voice provider you can choose between the enabled options and select a voice from the displayed catalog. Save and use Test account if available. External service credentials are only filled in if you have that account and want to use it.
View the screen for this step
-
Understand your own keys
The language model block allows you to configure your own providers when applicable. Test checks access and Save keeps the configuration. Removing a credential is not equivalent to deleting your documents. Never copy a key into the chat or a public video.
View the screen for this step
-
Review what you share
Control your preferences for sharing learning data and optional participation in product improvements. Do not assume that private material means the processing does not use external providers: the assistant, voice, and other functions depend on AI services.
View the screen for this step
-
Export or delete the account
In Your data, the export and deletion links open an email request to support. They do not automatically perform the operation within Learn. Indicate your account email, keep the response, and wait for confirmation of the request.
View the screen for this step
Chapter 36 · Account and help
Manage devices and sign out
Devices allows you to review the associations between your account and your hardware. The physical handling of each product retains its own controls.
-
Identify your devices
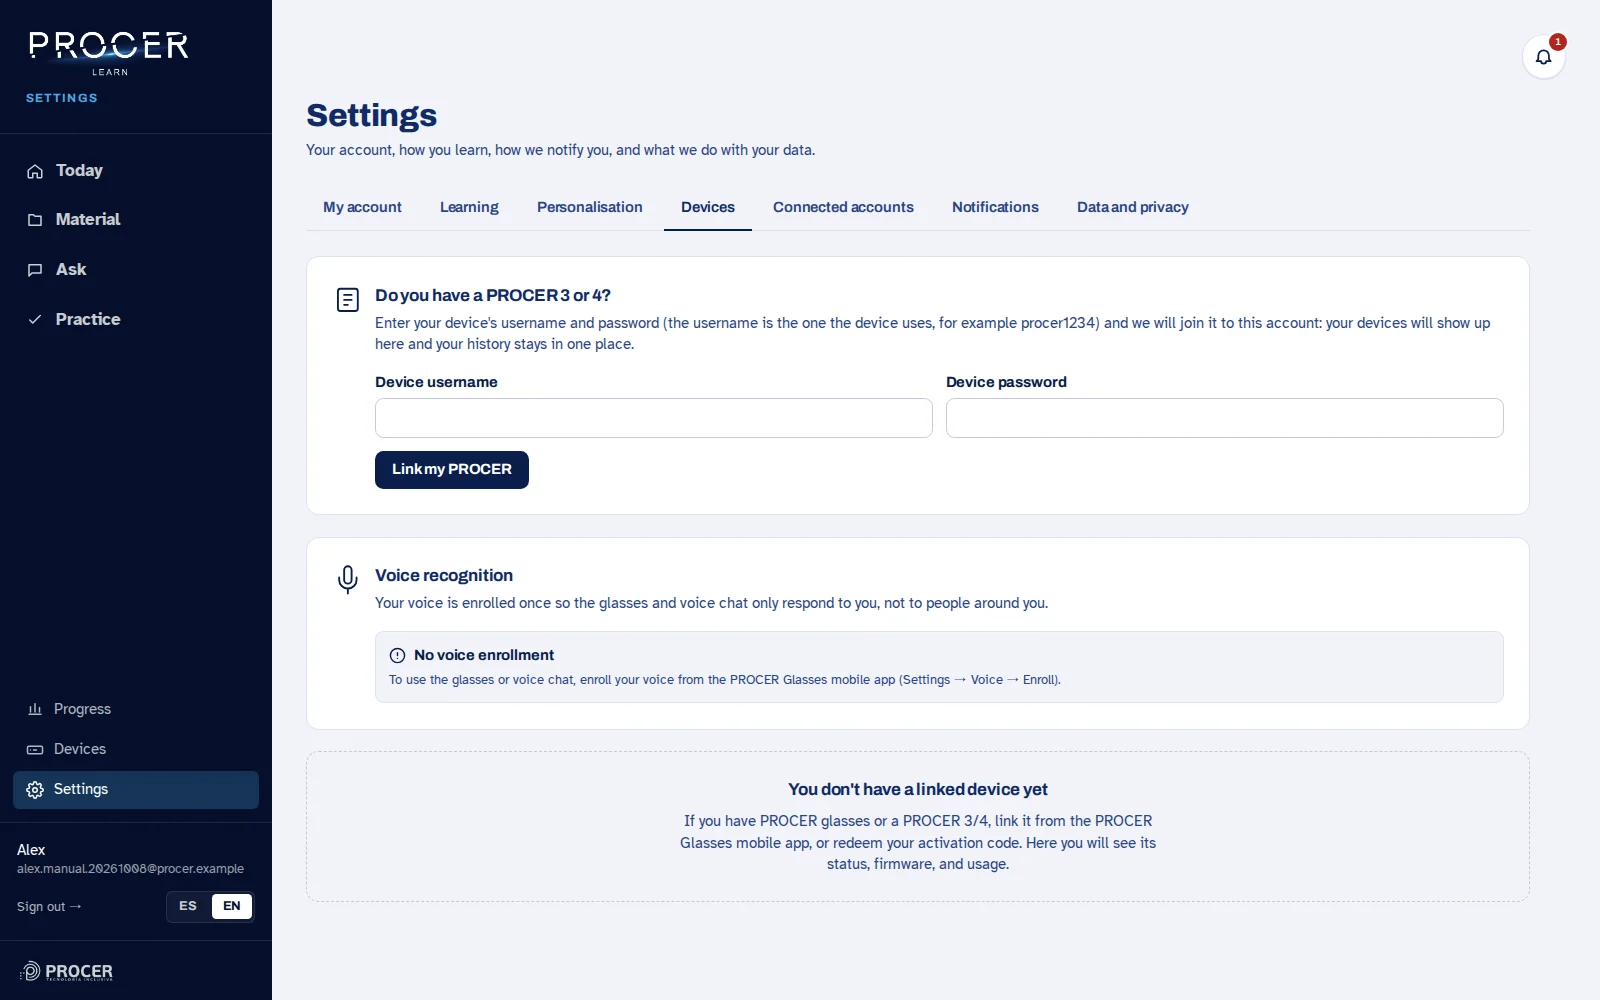
Open Devices and check which PROCER and which glasses are linked. An account can have more than one device depending on the available associations. A device should not remain active simultaneously on two different accounts.
View the screen for this step
-
Before unlinking
Unlinking releases the device association; it is not the same as signing out. If your access depended solely on that hardware and you are left with no associated devices, Activate may appear again. Review this consequence before transferring or returning a device.
View the screen for this step
-
Sign out on a shared device
Use Sign out when you finish on someone else's computer. Also close any camera or microphone dialogs. When you return, enter with your Learn email; do not repeat the registration or linking process if your account already exists.
View the screen for this step
-
If something does not appear
First check the session email and the Material filters. When the problem comes from a device, note which device it is and if the app showed the upload as completed. This information helps distinguish an incorrect login from a file that did not arrive.
View the screen for this step
Chapter 37 · Account and help
Troubleshooting common issues and continuing your learning
A good workflow makes it clear what to do when a step doesn't complete. Before repeating an operation, check which state was saved.
-
File received but not yet ready
Check the Progress and wait for indexing. If an error appears, use the retry option provided or try a shorter file. A document in processing is not yet an available source for all tools.
View the screen for this step
-
Incorrect response or missing source
Reformulate the prompt, select Only my material and name the document. Check the citation and open the original. If it continues to fail, save the question and the expected passage to report it. AI can make mistakes even with a well-written response.
View the screen for this step
-
Microphone, voice, or interruption failure
Verify permissions, input, volume, and ensure another tab is not capturing audio. Try using headphones, use the button to Stop/interrupt, and switch to typing if you need to continue. There is no need to insist on using voice to finish a practice session.
View the screen for this step
-
Materials or devices seemingly lost
Check the account you used to sign in, remove filters, and check Devices. Do not delete or re-import the entire library as a first attempt. Notify support with the screen and the step, without sharing passwords or private codes.
View the screen for this step
-
Your Learn routine
Return to Today, open a Material, ask a specific question, and practice with a flashcard, a game, or the tutor. When finished, review what you understood and what you will return to. The goal is for each tool to help you learn something that matters to you.
View the screen for this step